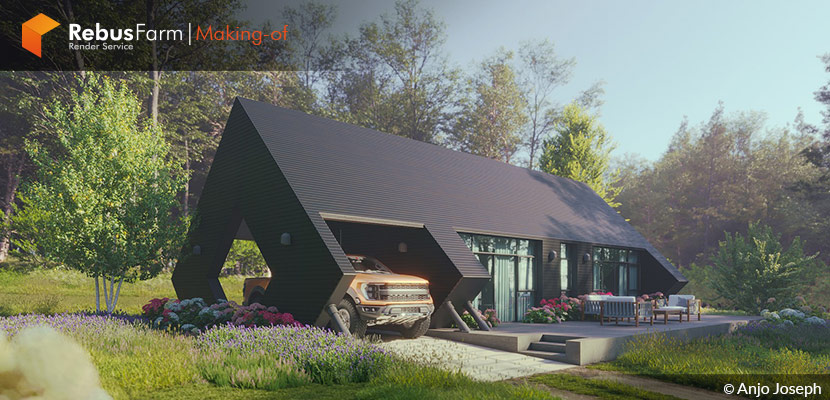
Trying to get a photorealistic shot, just like you see in real photography, is the target of Anjo's Joseph personal work called "Summer". An Indian 3D artist, well-known for his hyper-realistic efforts, gives us the opportunity to look deeper into his working tips. Enjoy the article!
About me.
Hello everyone,
My name is Anjo Joseph. I am from Kerala, the southeast state of India with the most vibrant nature. Basically, I am an electrical engineering diploma holder with 8 years of experience in a relevant field. As an artist, I like to learn and update myself, so I took a Grafix course mainly based on 3DS Max from CADD Centre Thrissur 20 years ago, and still try on that exercise with every bit of information from the internet. I would also like to thank all tutorial makers for sharing their experiences to update my skillset.
I like photography, but I am not a good photographer. I had recently seen a video of one of my friends shared in a group, about camera settings and photography. Usually, I use a simple exposure method with Corona for long shots, also I was not used to shoot with a depth of field. So I like to try these more advanced things with 3DS Max & Corona Render.
Concept & Modeling.
Concerning my personal works most of them are forest villas or lush green cottages. In this case, I chose a terrain that I experienced before. My previous workplace was in Cork Ireland. At the time of the covid, I had an opportunity to explore my neighboring areas with Dave, my house owner.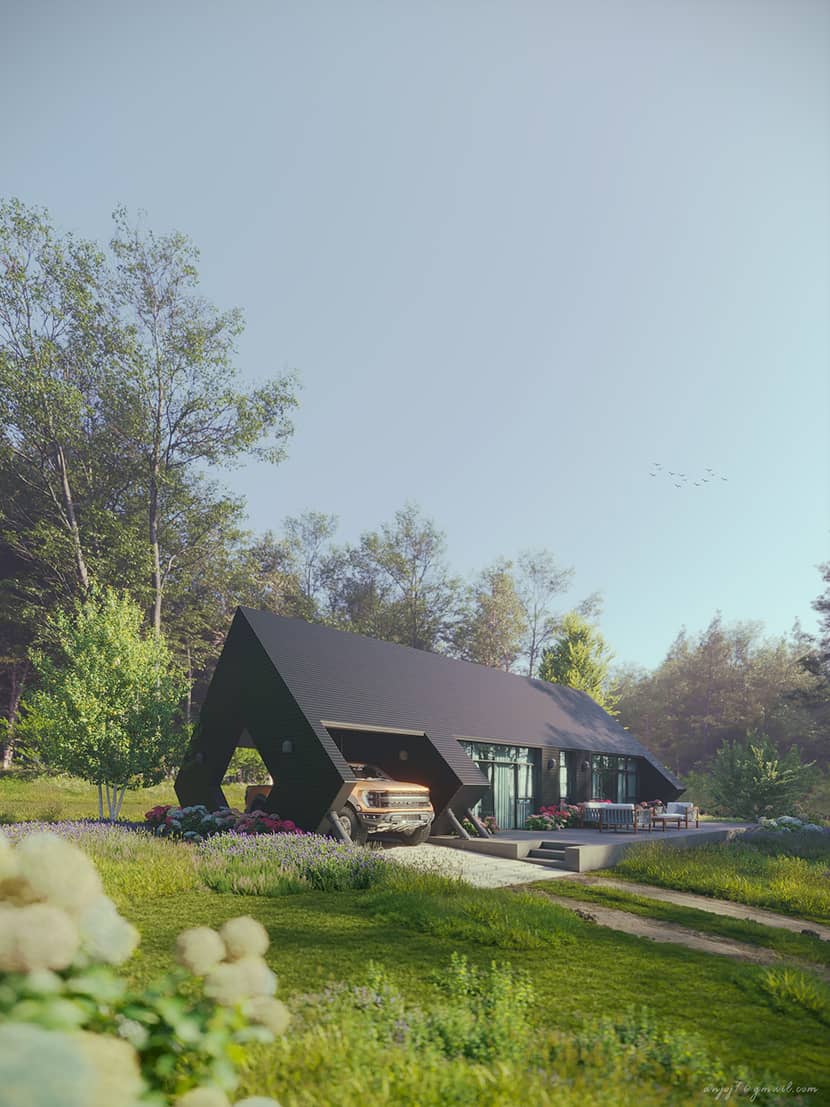
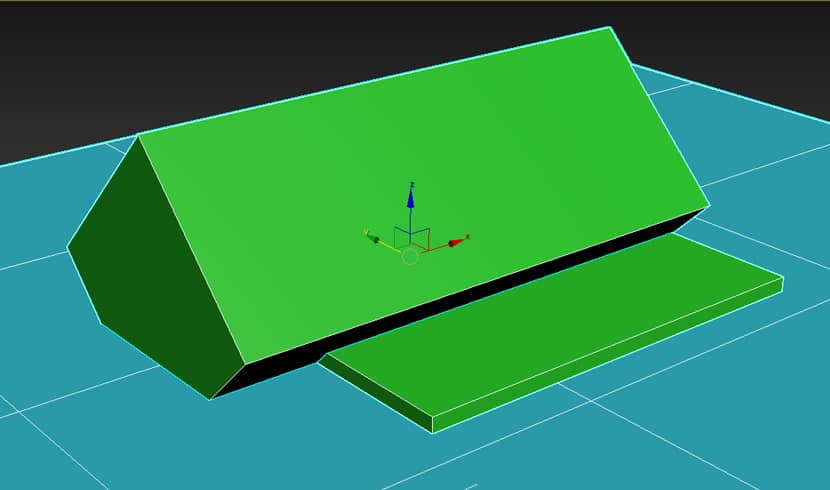
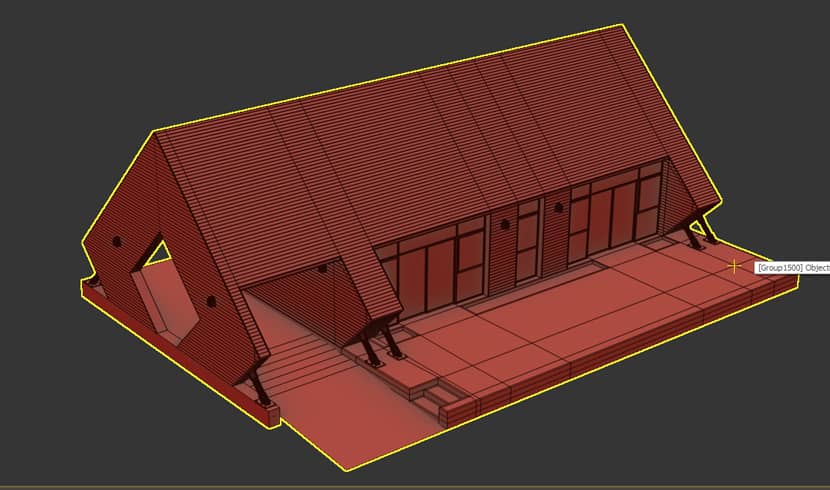
A simple house, made of concrete and metal structure covered with black wood, with a pretty huge balcony and car porch. The model idea was so simple, like two boxes, one rotated 45 degrees and the other with a 60 cm balcony. As per the design, I made some openings and metal support for elevation purposes. For modeling, I mostly use the edit poly method as I believe I am capable to add details and textures later. In my experience, errors will be zero if you approach things in a very basic and simple way.
The Terrain.
I needed a terrain with different layers and levels. So I started with the house level on a simple plane. By extending the edge I made the desired levels and added edges and smoothness.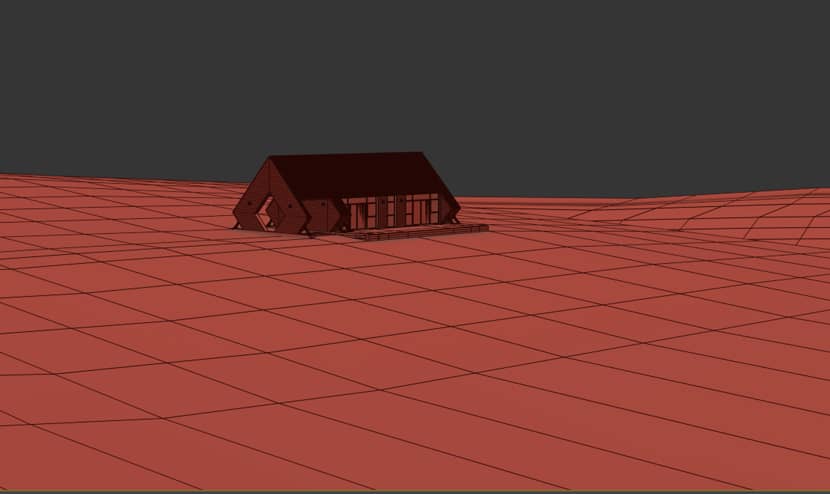
Materials & Textures.
There are not much-complicated materials in this scene. Most of the materials & textures are from Quixel Bridge and Megascan. The green tint glass is from the Corona Library and the wood material is also from the same one. For making the texture black, I added a color correction in the diffuse map channel.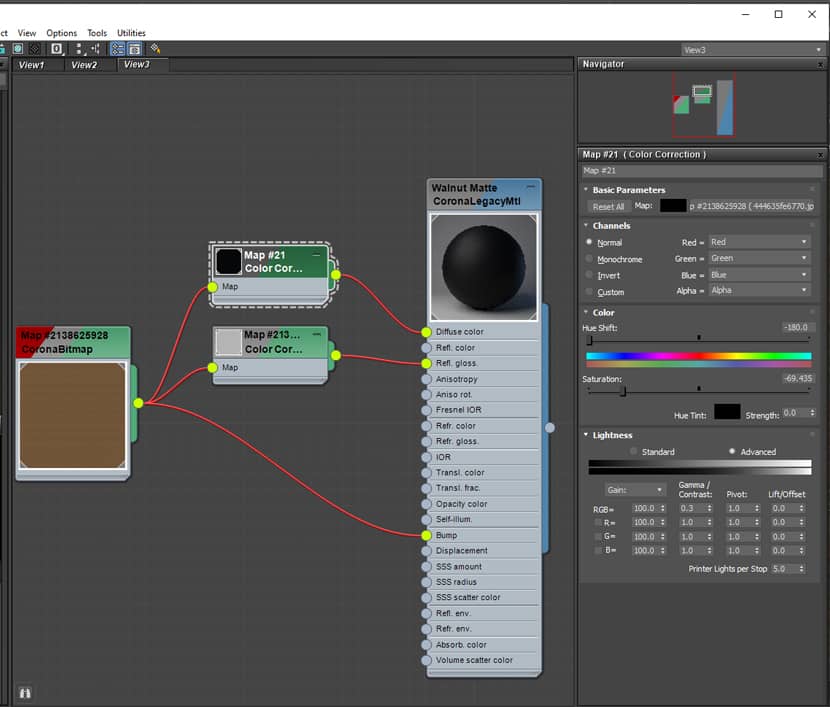
To get a difference in the wooden grains on each panel, I added an unwrap UVW modifier to the mesh.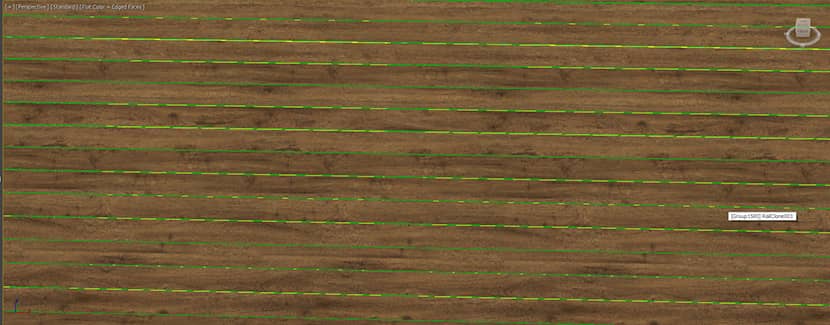
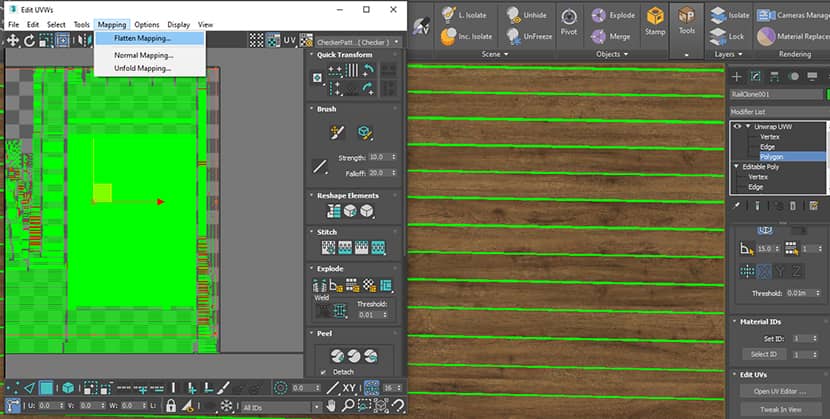
It is a great and simple technique that I think almost everyone knows. For beginners, you have to apply UVW unwrap to the mesh, select all poly in modifier, open UV editor, go to mapping, and then flatten mapping. Some times, you have to rotate and adjust some polys in the editor. Here I am pasting one of my video tutorial links. The language I used in the video is Malayalam, but I think you can follow the process by just watching it carefully.
Then, I added some tire marks by using Corona Decals and Megascans. The displacement made a pretty good effect in the final render.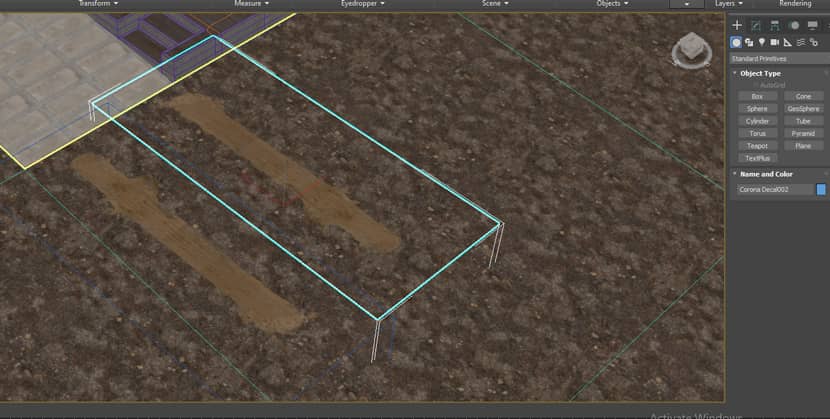
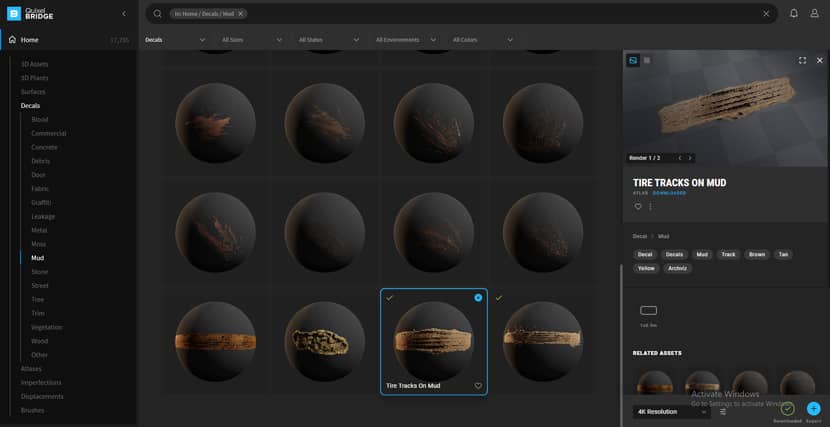
Corona decal is an efficient tool for adding details in the surface in 3ds max with a much faster workflow
Assets & Distribution.
Most of the vegetation assets are from the Maxtree collections and on their website you can almost find plants from all over the world. Whenever I take work from another country, I definitely make a small study on vegetation on google maps or images. So it will easily convince the clients: <<Yeah, this is our plot>>.
In this project, it was pretty easy for me to choose the vegetation as I worked there and they were very basic plants that we can easily spot in that region.
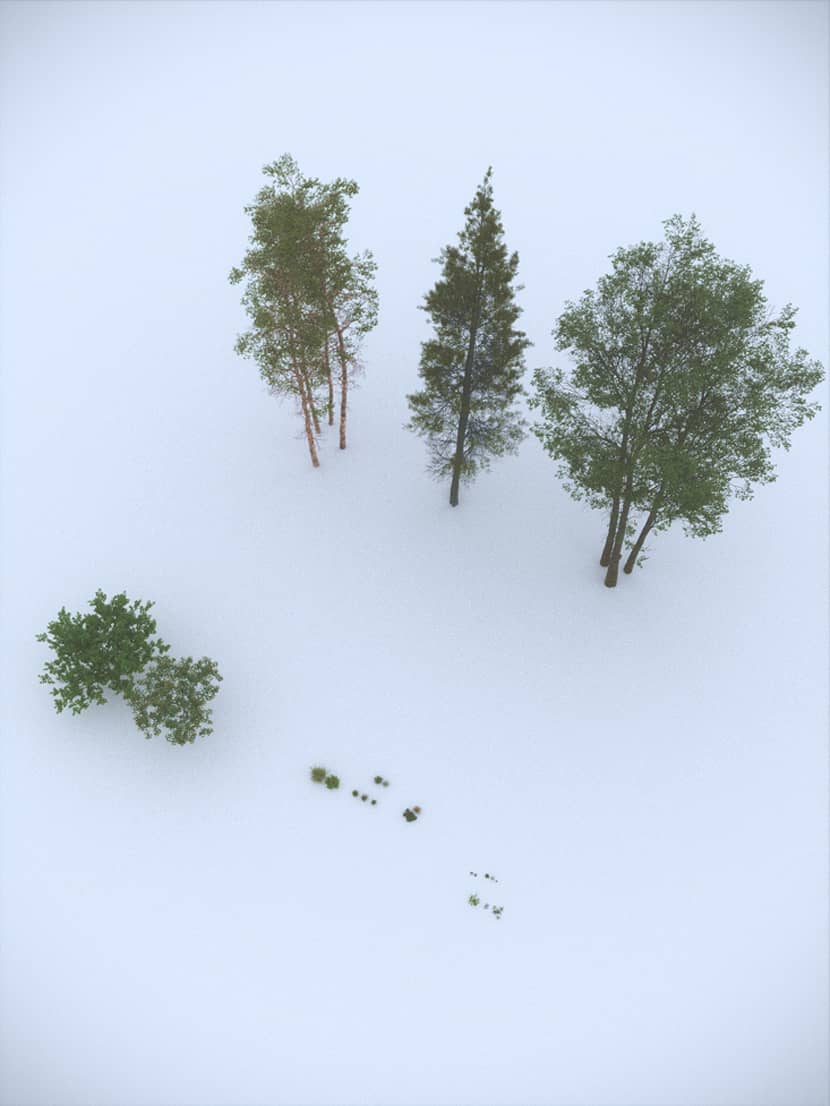
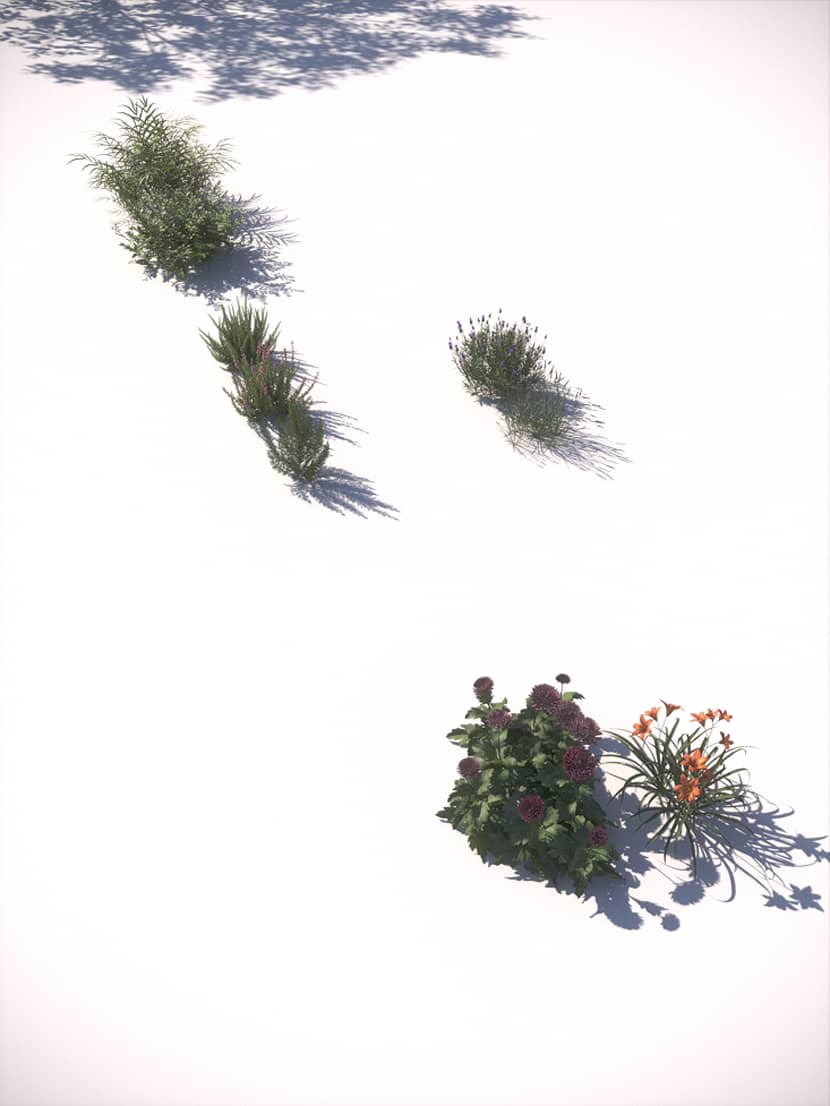
For vegetation distribution, I used Forest Pack. There are actually so many scattering tools available in the market but I use Forest Pack because there are some features that are more advanced than other tools.
Clusters: This feature allows you to scatter multiple plants as clusters in real life.
Brush and Eraser in the area: Allows you to paint a collection where you want falloff in density and scale. This will add more realism.
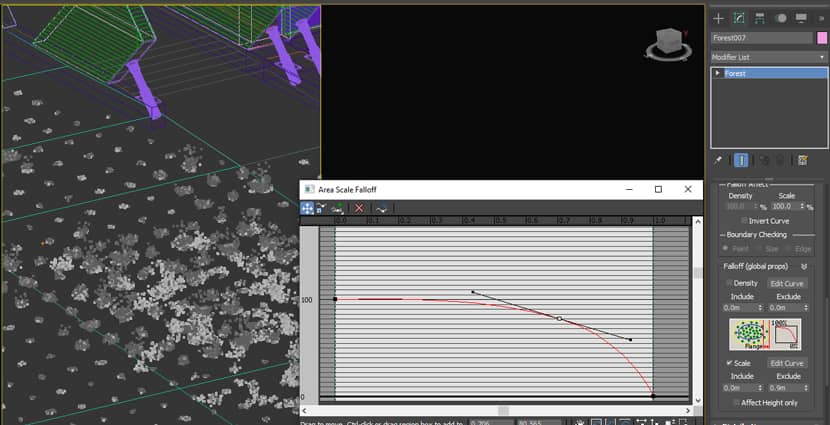
For this work, I started with the grass and I used 2 or 3 layers. Layer 1 is a simple lawn grass, Layer 2 is a small weed plant, and Layer 3 is a bigger grass with small ferns or shrubs.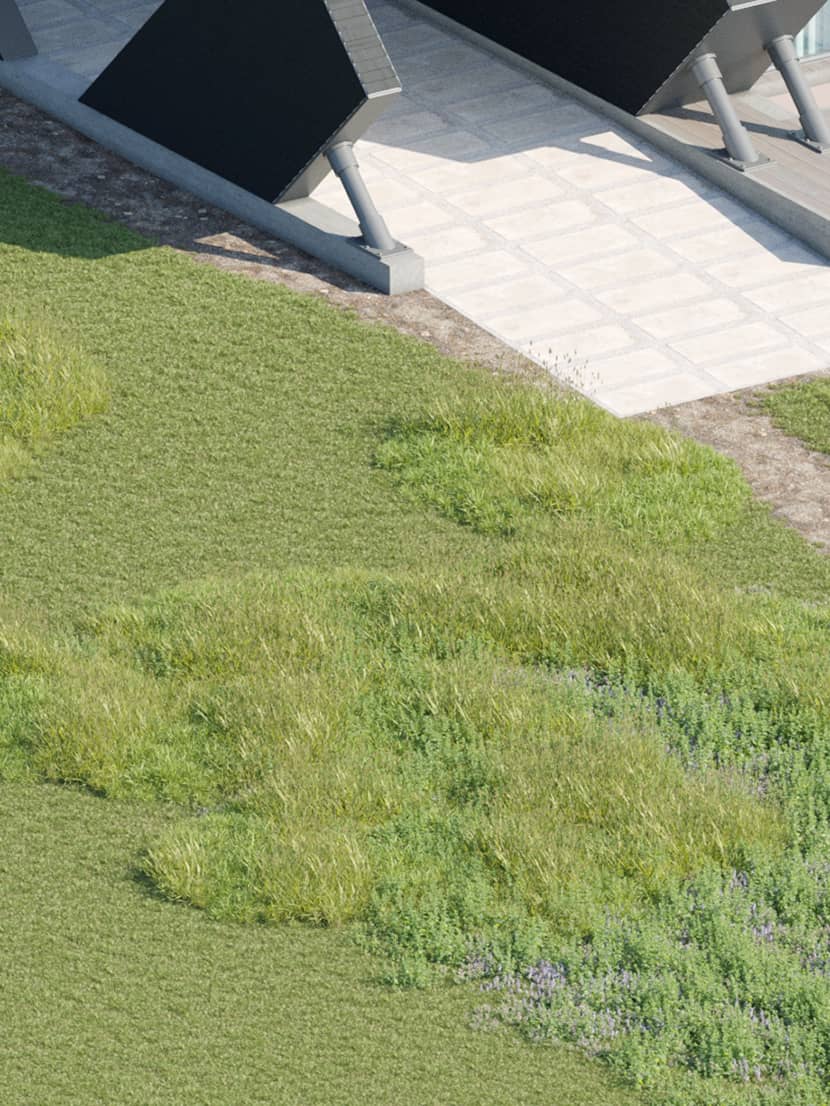
Some flower plants were arranged near the house also using the same method. Hydrangea plants are arranged separately because of DOF I used in the close-up shot.
Lighting.
Most of my projects are exteriors, so I approach lighting in more simple ways. In my set up I use mostly 3 things.
1. Primary Light. For daytime, I use the Corona sun as a primary light, and the other conditions it will vary as Hdri or artificial light. It depends on the lighting scenario I choose.
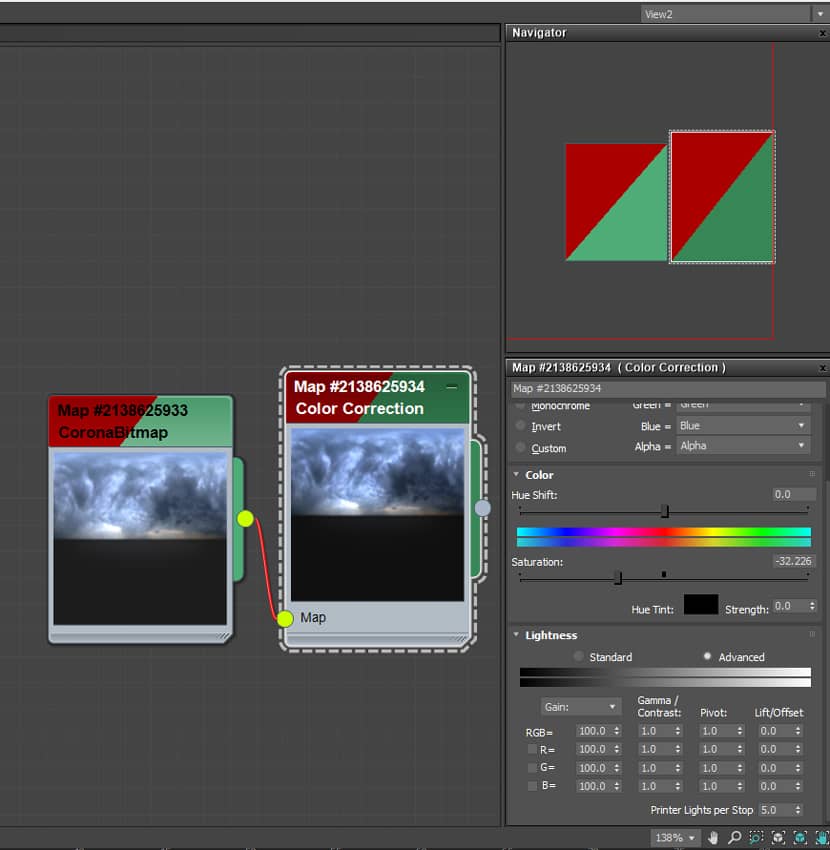
2. Environment. I use Corona Sky, Hdri, or just Color for some scenes, here I am sharing my Hdri setting for the evening shot. Hdri is used in this scene from Chaos Cosmos.
3. Volume Fog. With volume Fog, we can add depth to our image. It derives the distance from the things in the scene, but it will be used as per our scene demands, like the place and time of the frame. Here I used it on a box just after the camera.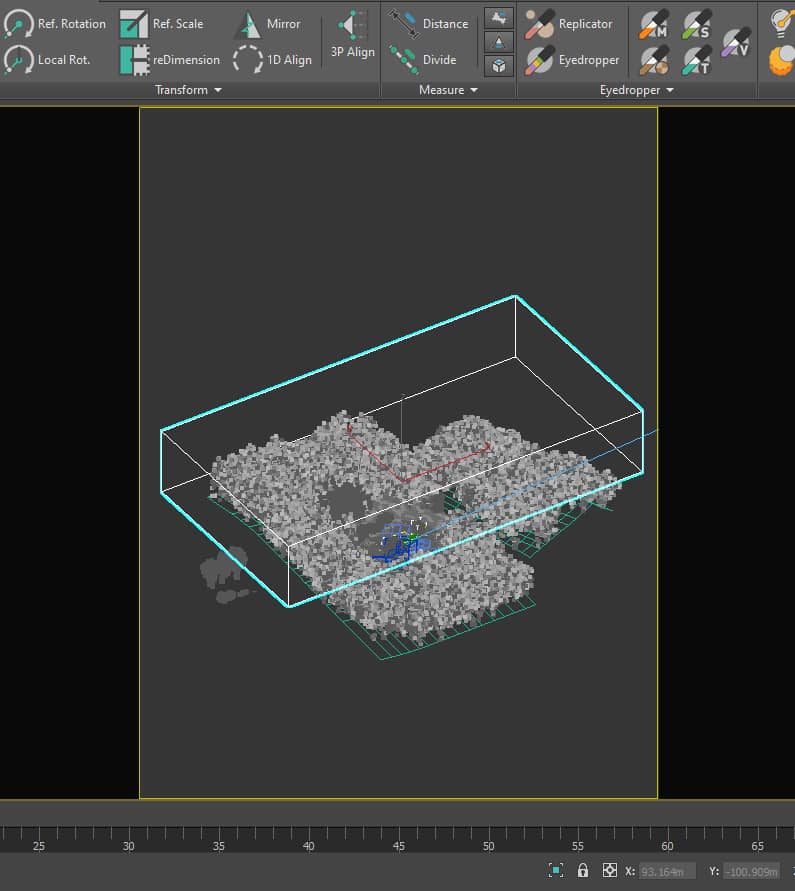
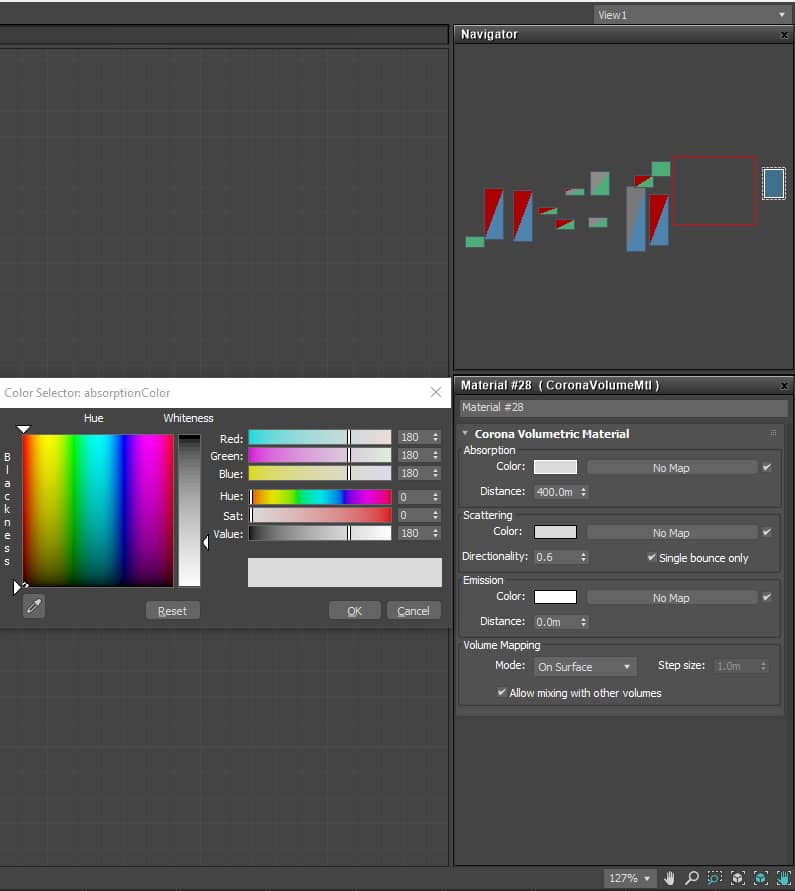
In this scene, I needed to give some importance to what I focused on, and for that reason, I added some fog at the far side achieving the desired amount of depth.
Cameras.
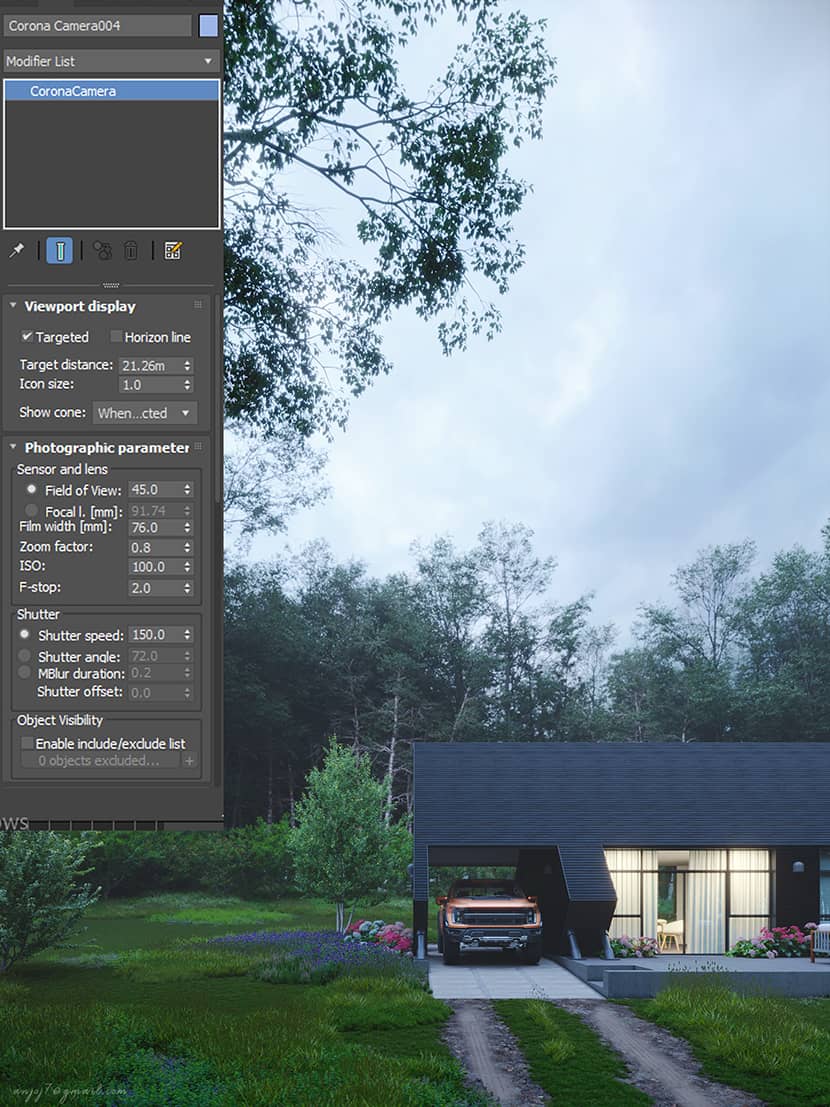
There are 3 cameras in this project. As I mentioned previously, I wanted to be as much closer as possible to a real DSLR shot. I attach my camera settings below: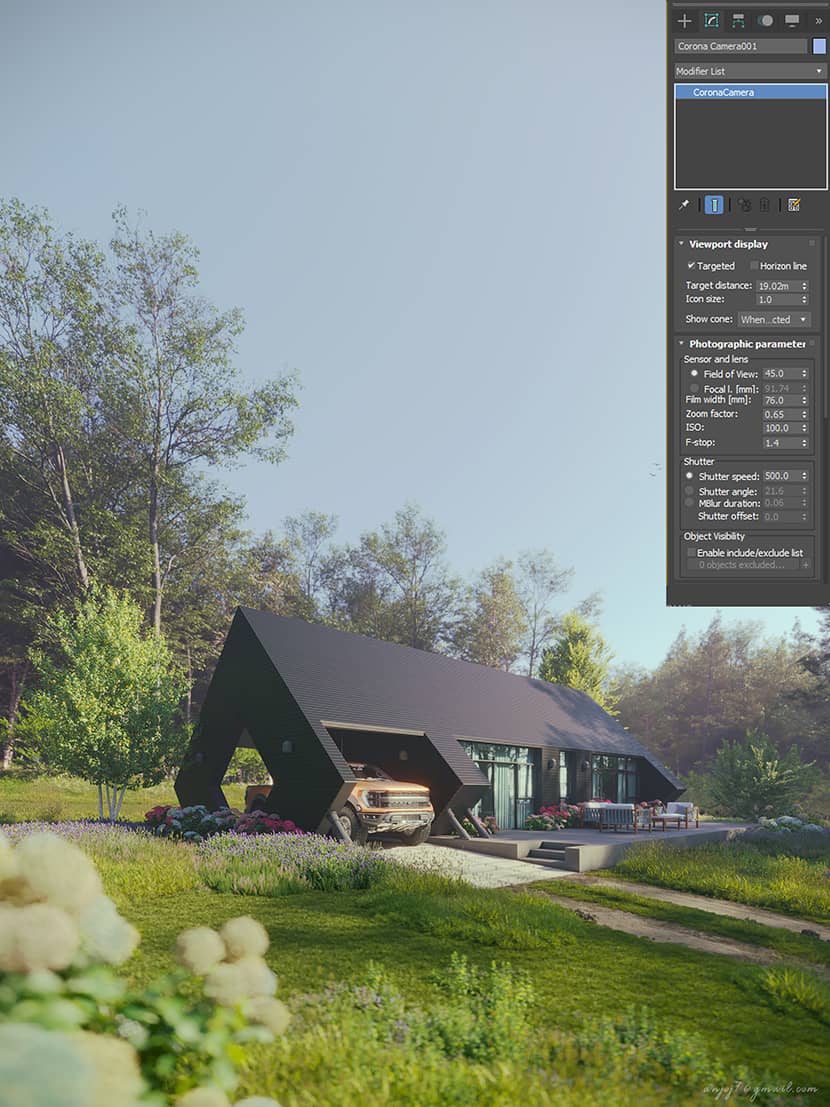
Rendering Set Up.
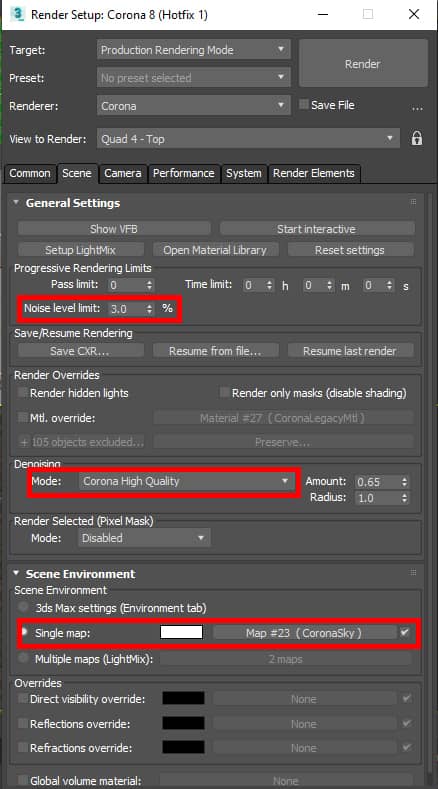
The rendering setup is pretty simple as I didn't change many things.
I also needed some passes for compositing. When I have to enhance something in my images, the render passes help me a lot in Photoshop.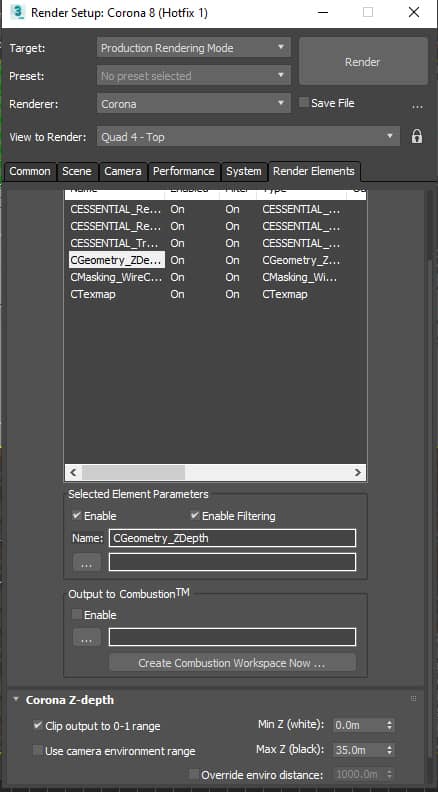
Below, I share the VFB settings. This usually varies according to the project.
Rendering Set Up.
I use a simple old method for compositing in Photoshop. As I mention before, I take Reflection, Refraction, Transulancy, Z depth, C tex map etc.
In this scene, I used color dodge mode and opacity 10 for reflection, screen mode opacity 80 for translucency & multiply mode opacity 50 for Ctex map, to add AO.
For making more depth, I used some adjustment layers with Zdepth masks. Before that, my aim is to enhance the greenery on the front side of the villa, so I duplicated my depth pass and adjusted the levels like the image below: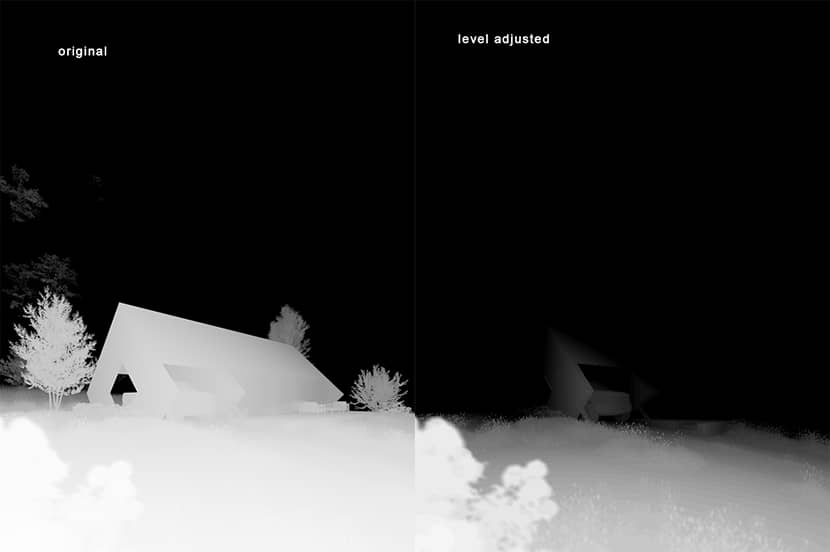
Within the mask, I used an Exposure adjustment layer. I made some adjustments on offset and gamma correction and I repeated the same process with color correction.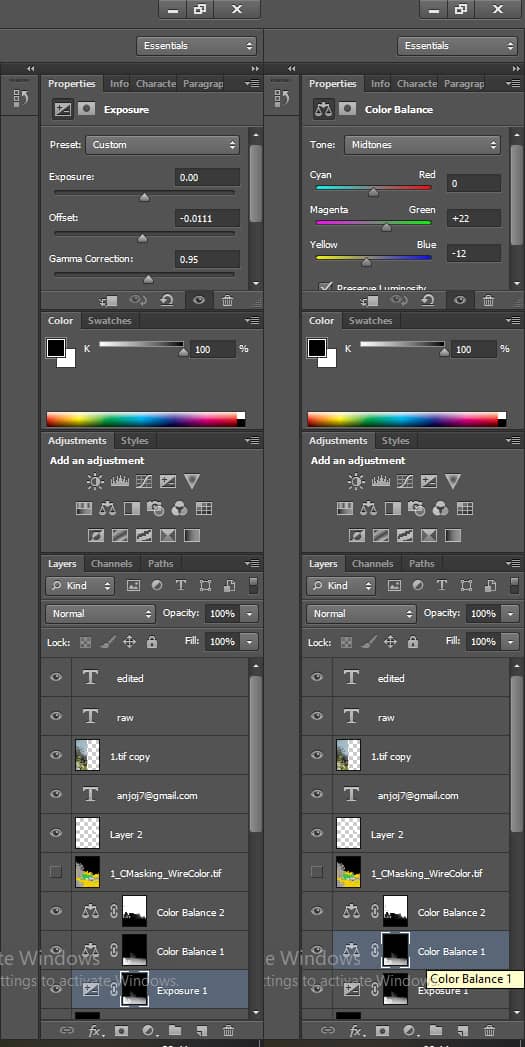
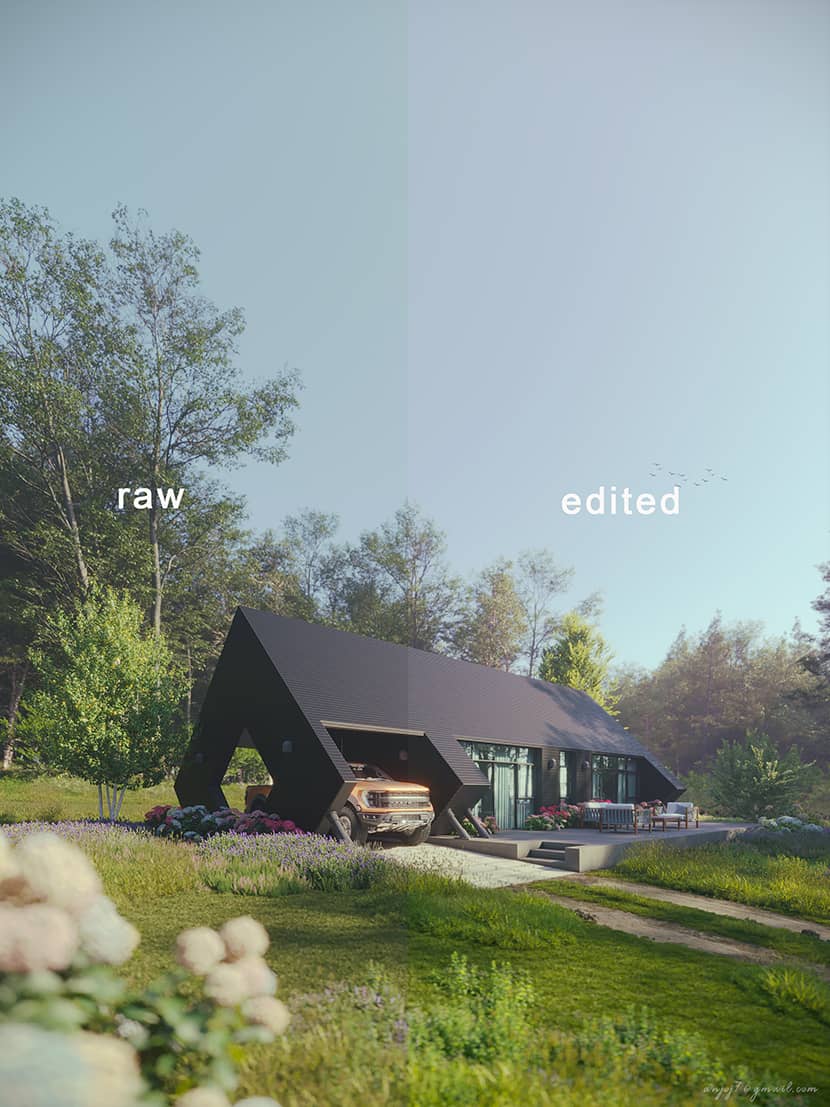
For the background trees, I made a color correction adjustment layer with inverted z depth as a mask, This gave me a "golden" Fog in the background.
That's it! I hope you found my article useful and I'm at your disposal for any further queries. You just need to get in touch with me through my social media below.
Finally I would like to thank RebusFarm and VWartclub for giving me the opportunity to present and promote my work through their beautiful platforms.
Kind regards,
Anjo Joseph.
Check more of Anjo's work on these channels:
Want to share your work with our community too?
Contact us at This email address is being protected from spambots. You need JavaScript enabled to view it. and tell us about your favorite project.
