Monday, November 2nd, 2020 by Julian Karsunky
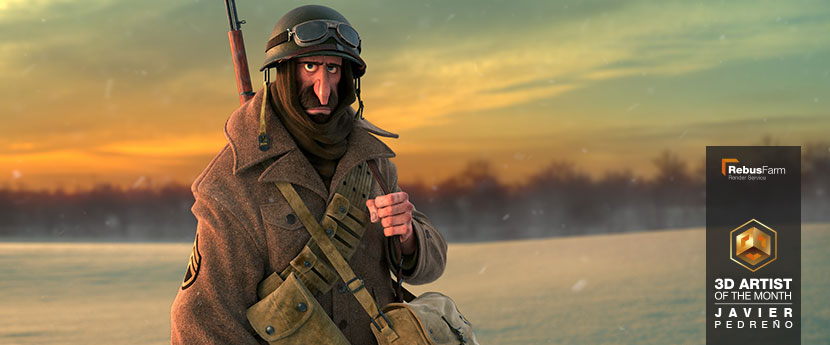
Company, halt! Today, we salute Javier Pedreño, our November 2020 3D Artist of the Month. A passionate character artist and movie lover, Javier recently underwent an extensive online drill at Think Tank Training Center and is currently deployed at animation company Leo Sanchez Studio. For his demo reel, he went above and beyond in recreating a seemingly innocuous sketch of a WW2 soldier by famous Spanish director Sergio Pablos. Having completed boot camp, he is expected to climb the ranks quickly.
In our interview, Javier talks inspirations, the development process of his favorite character and overcoming perfectionism. At ease!
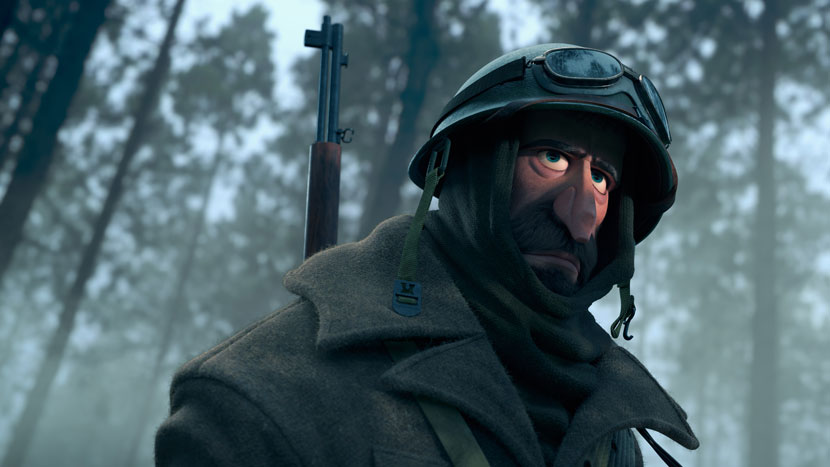 Staff sergeant Joe "Pitty" Pacetti of the 101 Airborne Division, patrolling the snowy forest of the Ardennes Mountains.
Hi Javier, thanks for joining us! To start things off, please introduce yourself to our readers!
Hello everyone and thank you for having me! My name is Javier Pedreño, I’m a 27-year-old CG character artist from Murcia, a small Spanish town close to the Mediterranean Sea and with an excellent climate.
Do you recall when and how you first consciously encountered CGI?
My first experience with CGI came as an exchange student at the Accademia di Brera di Milano during my Graphic Design studies. There, I had a fairly basic 3D modeling course in Maya. I later learned how to model in Cinema 4D from YouTube tutorials. So initially, I learned a lot about polygonal modeling, textures and lighting.
When and why did you then decide to pursue a professional career as a 3D artist?
After several years of learning on my own, I realized that I felt really passionate about 3D and that there was still so much more to learn. I spent almost a whole year considering different schools and options both in person and online, until I found Think Tank Training Centre, which instantly captivated me by the work of its students and teachers.
Tell us about your experience with Think Tank Training Centre!
Think Tank is one of the best schools to study GC in Vancouver, Canada. It is comparatively small, but there’s a strong sense of camaraderie between teachers and students. School managers are willing to help you at all times and make your life easier. I took part in the Specialized CG Training Program, which is an online course that lasted for 16 months.
After completing the first three terms, you have access to a mentorship with a tutor of your choice. In my case, I chose Abraão Segundo, an excellent 3D Character artist with a lot of experience in both VFX and video games. The mentorship lasts another six months and during this time you are to complete a project under the supervision of your mentor. I specialized in character modeling for Film.
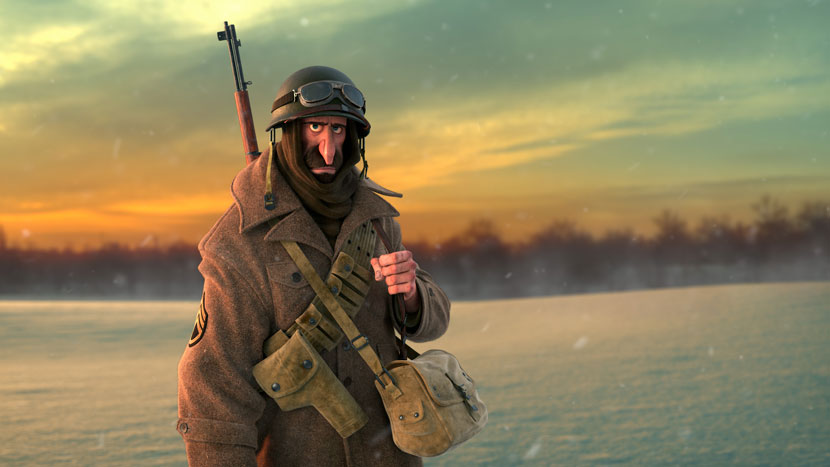 Javier created three distinct backgrounds for the project, each with its unique mood and color identiy.
What is your current job situation? Are you employed at the moment or exclusively working freelance?
LinkedIn as the main platform to both showcase my work and search for offers. I currently work as character artist at Leo Sanchez Studio. I am very happy working within the animated movie industry and consider myself lucky to be with this company and learn from great professionals.
What are your main responsibilities and daily tasks as a character artist?
I take care of all kinds of aspects related to 3D characters and their assets, including modeling, sculpting, clothing simulation, texturing and lookdev. I’m also involved with other tasks such as grooming, lighting, rendering and composition.
What are some of your personal career highlights thus far or projects you particularly enjoyed working on in the past?
One of my favorite projects was my final work from my graphic design career, a tribute to the 30th anniversary of Back to the Future. It is an animation featuring the most iconic objects of the trilogy and it combines 2D elements with 3D objects. To integrate both worlds, I used cell shading for the 3D models, then computed them in After Effects with other graphic elements. I was overwhelmed with the feedback I received from my tutors and online.
Another project I really enjoyed was ‘Pub Guys’, my final first term project at Think Tank Training Centre. In that project, I applied everything I had learned during the previous four months and was pleasantly surprised with the results. I paid a lot of attention recreating the original concept in 3D while respecting its shapes and silhouettes.
 |
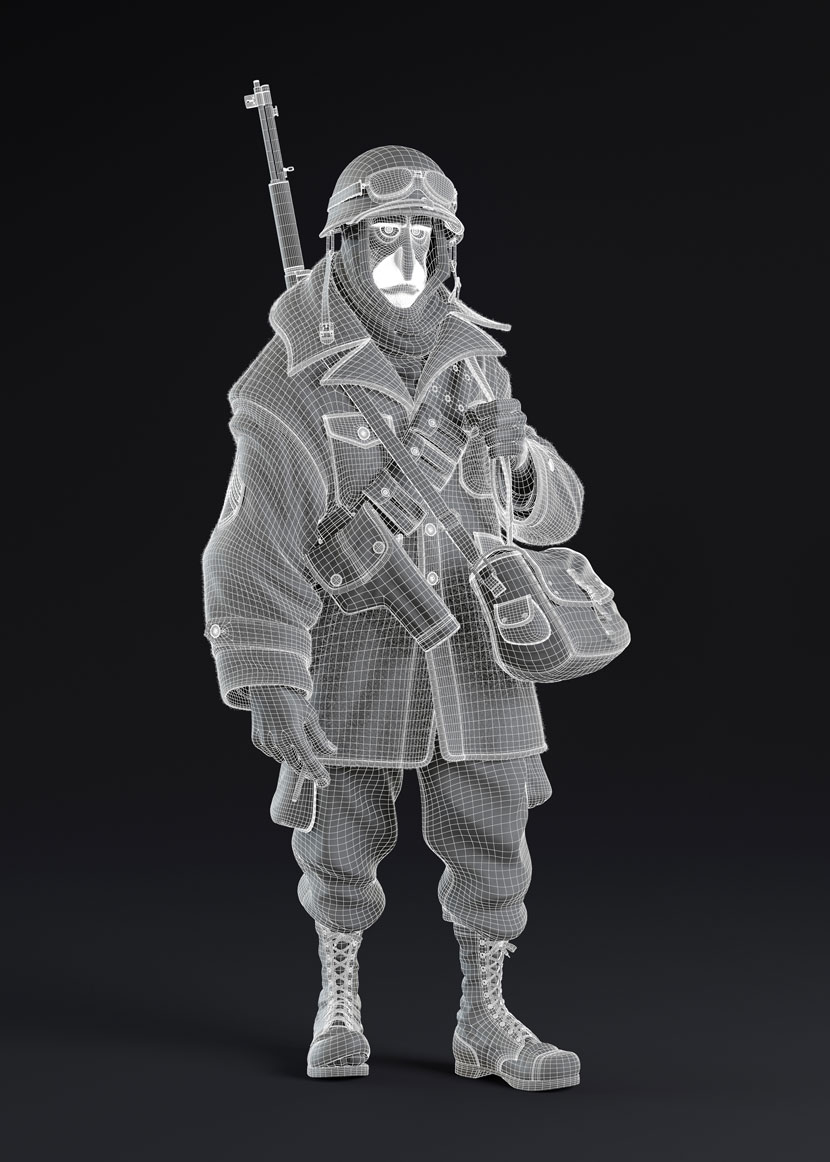 |
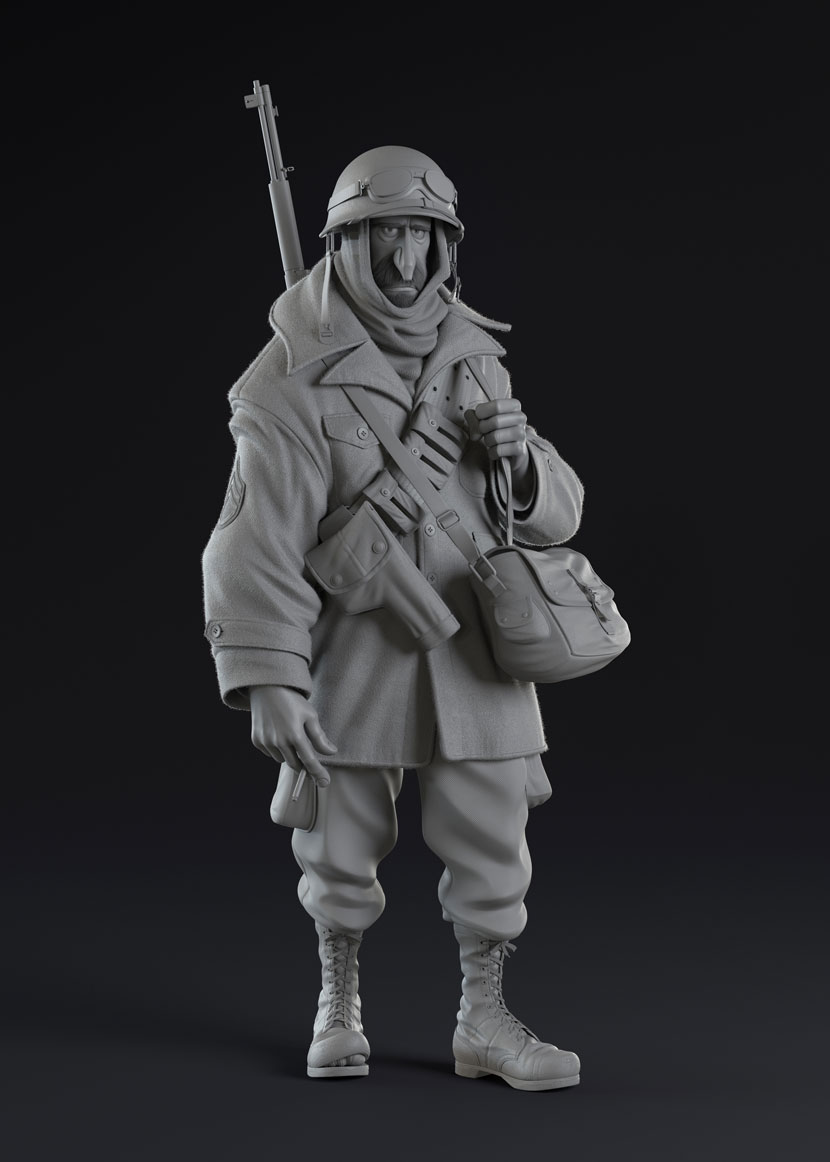
These clay and wireframe images offer a rare glimpse at the sergeant’s elusive lower body, which was not part of the original concept art.
Do you have any long-term goals?
One of my long-term goals is to learn character design so I can apply it to my own models and sculpts. As I model concepts of other artists, I also learn about the rules of character design!
Generally speaking, is there a specific design philosophy or school of thought you adhere to? What inspires you as a 3D artist?
From a very young age, I have always had a great admiration for movies and animated series, both traditional and CG. Over time, I have learned to see them differently, which has only increased my appreciation. Today, knowing what goes into it, I am unable to watch an animated film without noticing the technical and artistic qualities.
My greatest inspiration is the work of great artists such as Cory Loftis, Borja Montoro, Carter Goodrich, Nico Marlet and Genndy Tartakovsky among others.
What is your favorite subject in CGI? For what reasons?
My favorite discipline is 3D sculpting characters. I just love putting aside the technical aspects for a while and only focus on the basics such as anatomy, proportions, silhouette, etc. This gives you incredible freedom to develop your sculptures and develop your own style without limitations.
Let’s talk about your work in more detail, namely your submission to our campaign, your 3D recreation of sergeant Joe "Pitty" Pacetti, based on a sketch by Sergio Pablos.
Can you first of all describe the circumstances that lead to the creation of this piece. I understand this was part of a particular assignment during your mentorship program at Think Tank?
Yes, it was in fact my final project at Think Tank. After the three regular terms of the course, the mentorship is where you have the opportunity to demonstrate everything you have learned to develop a full-fledged demo reel.
I wanted to make a project as complete as possible. First, I focused on modeling and surfacing as my strong suites, then brought everything else up to the same level step by step.
What initially drew you to the original concept art and to that specific character in particular?
In choosing the concept, I carefully considered a lot of different options. My goal was to find a stylized character, which included both organic modeling and hard surface and which would also present me with a challenge I had not faced before.
Sergio Pablos has always been a point of reference for me, I love the charisma he brings to his characters! I eventually happened to find a sheet of his with various soldier designs that immediately caught my attention.
I chose the soldier in the winter uniform because I really liked his expression and offered a variety of elements to model and texturize. Besides, being cut off at the waist, this particular character granted me the creative freedom to invent the rest and give it my own touch.
What was your main goal in doing this project? What parts of the image were particular important to you?
I wanted to stay as faithful as possible to the original concept in terms of character proportions and silhouette. In that sense, every single line of the concept was equally important, and my job was to make them work in 3D.
A lot of research and care went into the assets as well, as I wanted to make sure they fit with the time; I learned a lot about uniforms, patches, weapons and military equipment.
Another aspect I paid a lot of attention to was cinematography. I learned a lot from reading Chris Brejon’s book on CG cinematography and I wanted to apply all this newfound knowledge to my renders.
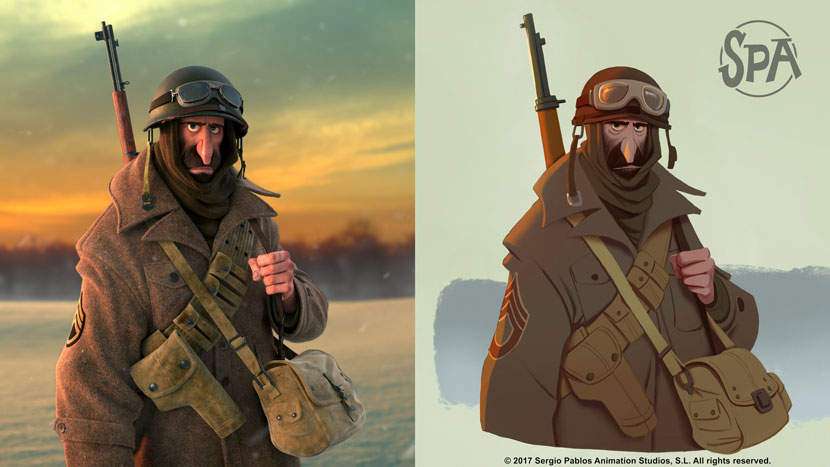 This side by side comparison between Sergio Pablo’s original sketch and its 3D recreation highlights Javier’s equally faithful and skillful approach.
What were some of the challenges you had to overcome?
The most complicated part of this character was interpreting the anatomy of the character in the sketch, since the only visible body parts were the face and one of his hands.
I started by making a blocking of the body from basic figures like a sphere and a cylinder. Once all the body parts were in place, I used DynaMesh to put them together. Although the body was not going to be seen under all the clothes, I meticulously worked on his anatomy to have a solid foundation. Getting the proportions just right required several tests.
How long did it take you to complete the project?
I was doing freelance work during my mentorship at Think Tank Training Centre, so I only worked on the project in my spare time. Overall, it took me approximately eight months.
Are you satisfied with the results? What has the feedback been like?
It was a long and involved project, during which I mostly learned by trial and error. When you make a mistake, you also learn how to avoid or fix it. With this character I learned hundreds of tricks and shortcuts for each part of the process. I learned which parts require extra attention and which are less important.
You’re always especially critical of your own work and you tend to focus on the parts that could be improved upon. However, that is not necessarily a bad thing, as it allows for personal growth! To this day, this is my favorite character and I am quite happy with the final result, which I would never have gotten without the feedback from my mentor, colleagues, friends and family.
Havin spent so much time and effort in creating a piece, it is very gratifying to see that people value your work. I can’t be happier with the positive feedback this project has received.
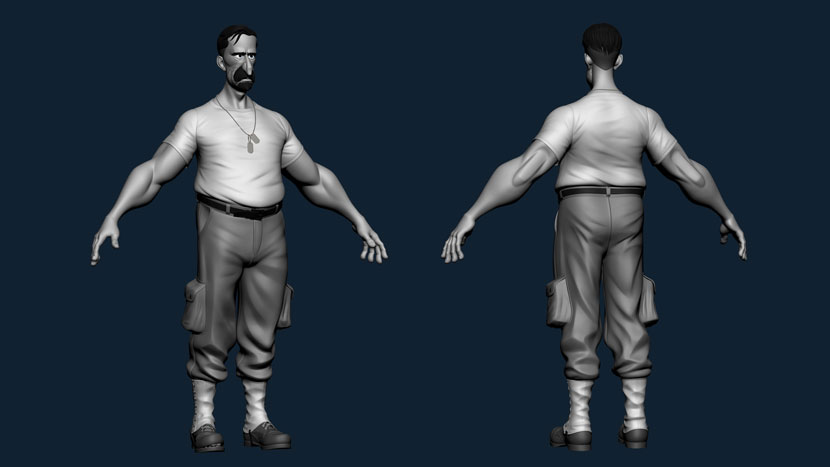 Although ultimately not visible underneath the thick coat, Javier still spent a significant amount of time in developing the character’s anatomy.
What software did you use to create this piece? Any plug-ins you found particularly helpful?
I used Maya and ZBrush to model and sculpt the character, textures were made in Mari and Substance Painter. Back in Maya, I groomed with XGen, for lookdev and render I used V-Ray. Last but not least, I used Photoshop to compose the still images and Nuke to compose the videos for my demo reel.
How did you approach transposing this 2D character into a 3D realm? Can you briefly walk us through the development process step by step?
For this project, I started from scratch in ZBrush, sculpting the entire body and clothing of the character. Then in Maya, I performed the retopology of the sculpture and polygonal modeled the rest of objects. For the UVs I worked with both programs: I cut the seams in Maya and did the unwrapping in ZBrush. Back in Maya I organized them into different UDIMs based on the type of material. I used decimation master to export a version of the last subdivision with a fairly small number of polygons but without losing detail or UVs.
I textured the skin in Mari and the rest of the assets with Substance Painter. I separated the hero assets to texturize them solo, the remaining assets were textured together. In Substance Painter, I created all the materials from scratch and shared them among the different assets as smart materials.
Once everything was textured, I created different materials in Maya and applied their corresponding textures. My renderer of choice is V-Ray, I worked with different V-Ray mtls and V-Ray Blend mtls to create around 60 textures that the character consists of. To perform the lookdev, I used a neutral HDRI as the only light source. In addition, I also used HDRIs with different interior and exterior lighting to check that the material was working correctly.
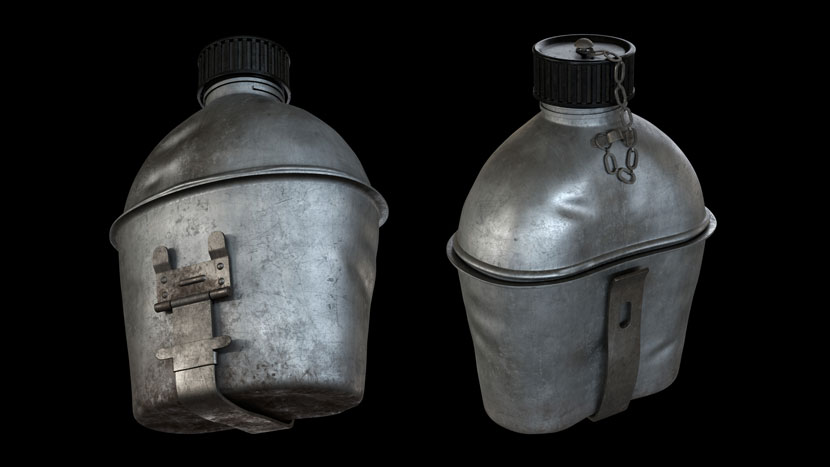 Despite being a recreation of an existing piece, a lot of original work went into Javier’s adaption. Assets such as this battle-worn canteen were carefully developed from scratch.
For grooming, I created a description for each part: eyebrows, eyelashes, beard, mustache, goatee, peach fuzz, coat and scarf. My trick was to use the minimum of guides for each description, just to create the desired shape. At this point, the results are rather unattractive, but the magic of the modifiers radically changes this.
For the illumination of this character, I was clear that I wanted to stage the character in the raw battlefield of the Ardennes. I did three exterior shots, each with a different lighting and frame, wanting to tell a different story in each shot.
For the render, I used very simple adjustments, this allowed for very good quality in little time: I rendered in 8k resolution, which took about two to three hours. Apart from the beauty pass, I created a render pass for each light source and also some more render elements such as reflection, specular, refraction and zdepth, which I used to later compose the image in Photoshop. The format I used to export my renders was EXR multichannel.
For post-production of the shots, I worked in Photoshop at 32 bits and a sRGB color space to maintain a linear workflow. The EXR format has a high dynamic range that allows for greater control of lighting through all levels. I usually compose the image with the light passes separated in add mode and adjust the levels to each pass separately.
Once I was happy with the lighting, I added the background and made the corresponding color adjustments and levels to integrate the character into. Finally, I made a grading color, taking into account a specific color palette to achieve the desired mood.
Considering the path you have already traveled up to this point, what is some advice you would give to aspiring artists?
Over time, I’ve come to realize that when you try and work on something that you’re passionate about, the amount of time you spend to accomplish your goal does not matter. I want every personal project I tackle to challenge me and make me learn something new. Because of this, I usually have many moments of frustration, but that only makes it that much more rewarding to get it done!
Another important tip is to know how – or when – to finish a project, even if it is not perfect. Perfection simply does not exist: no matter how much you work on a project, you will always find something else to get hung up about, some minor detail other people will not even notice. The key to prevent this is to look at a finished job and consider these perceived flaws as something to be improved upon for future projects.
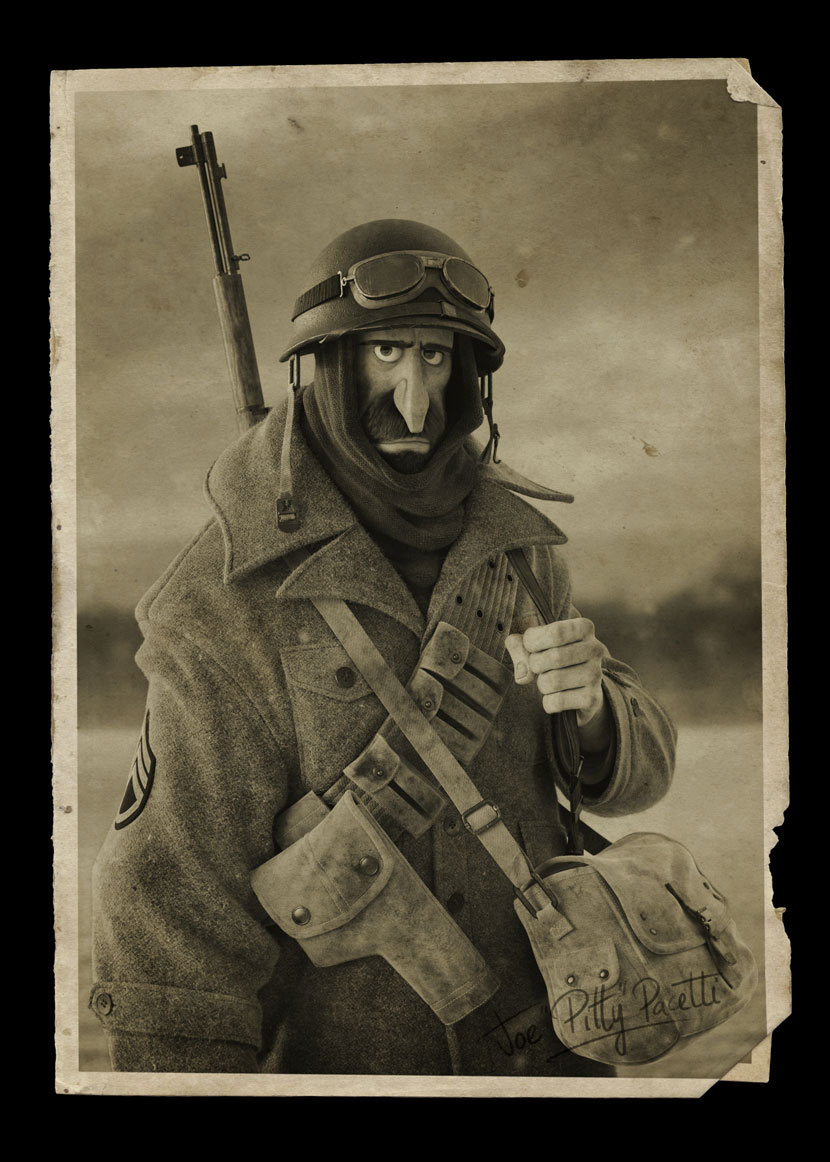 Javier made sure that all the equipment fit the time. This faded photograph further heightens that sense of immersion. Dismissed!
Have you used RebusFarm before? If so, please tell us about your overall experience. Is there anything you especially like about our service?
Yeah, I’ve used it on a couple of my previous projects. What I liked most was the ease of uploading the entire file thanks to the Mayascript and how quickly I could get a high-quality render.
In closing, is there anything else you want to say? Any present or upcoming projects you’d like to mention?
I want to thank you guys for giving me the opportunity to share my story and showcase my work! Now, I am focused on giving my best at my job and on learning essential aspects to be able to develop my next personal project. Thank you so much for your time to read this interview!
The pleasure is all ours! Javier, thank you so much for taking the time and all the best in the future!
Keep up with Javier Pedreño and his work here:
HOW TO JOIN OUR MONTHLY CONTEST
You want to be our next featured 3D Artist of the Month and win 250 RenderPoints? Just visit our 3D Artist of the Month competition page and submit your entry. We'll choose the best image and contact the winner.
>> Read more articles on our blog
