
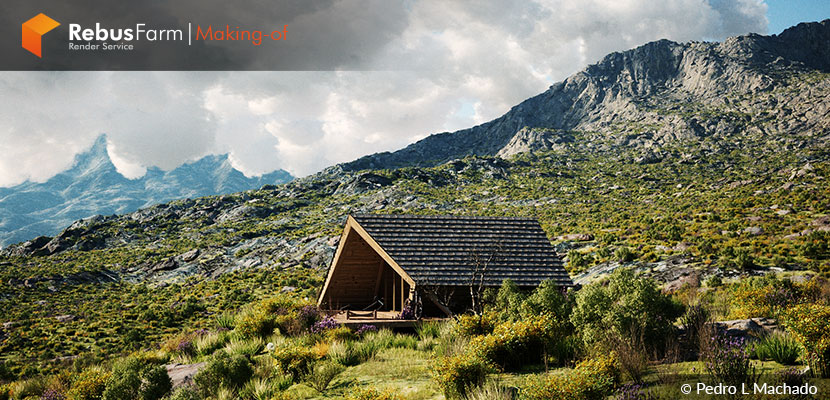
Unveiling the creation of his Cabin Study in Patagonia, a labor of love by Pedro Machado, we delve into the creative process behind this captivating project that wasn't born from a client's request but rather from a personal desire to explore. Pedro craved the opportunity to depict architecture nestled within the beauty of nature. This study allowed him to unleash his skills in crafting photorealistic and inspiring environments. Enjoy the article!
About me.
Hello,
My name is Pedro Machado. I'm from Brazil, and I've been working in the computer graphics area for a long time, focusing more on the archviz area. Today, I am also a partner at a large architecture company in Brazil, Davila Arquitetura.
Since childhood, with a lot of curiosity, I started learning the first version of 3ds Studio for DOS, the precursor to 3ds Max, in 1990; since then, I have never stopped in the area. Nowadays, I'm even better known on the internet for making some incredible homemade animations and very detailed landscapes in CGI.
I would like to thank VWArtclub and Rebus Render Farm for always supporting and featuring us and allowing us to share our workflow with this incredibly talented community.
About The Project.
The idea for this project was a study; it was not a client request, although I would love to receive this type of request, as in my commercial area, Archviz work is rarely in places with an exuberant nature where you have to value the that would be around the architecture of the project. Therefore, in our studies, we can show more of the artistic side, which involves trying to recreate nature in a photorealistic and impactful way.
Software Used.
The project was created in complete CGI with 3ds Max and Fstorm Renderer!
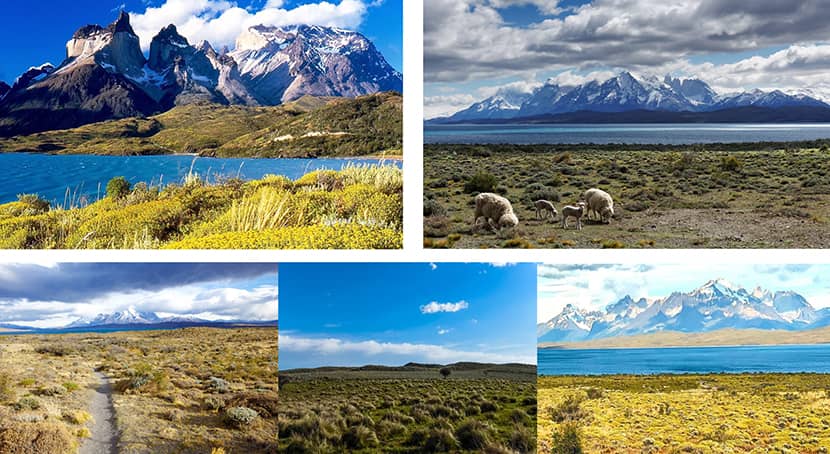
References.
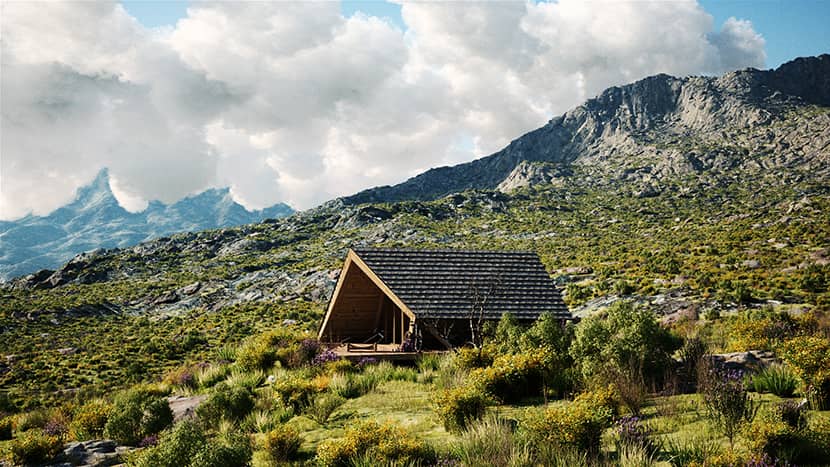
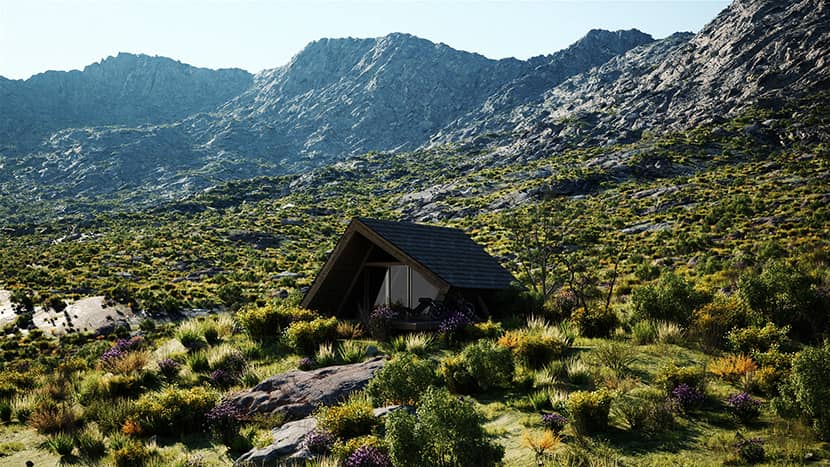
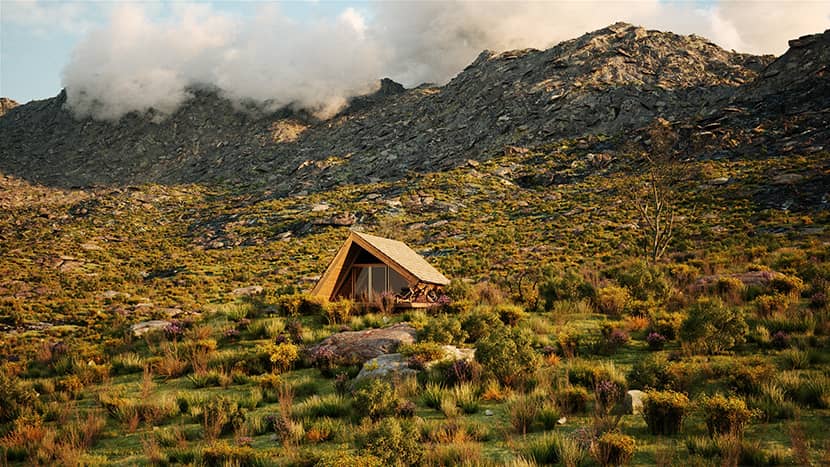
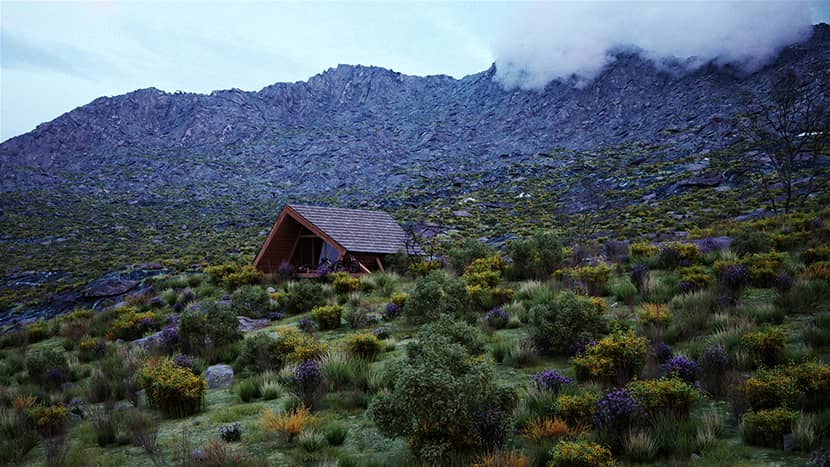
The great inspiration for these landscapes comes from the South American region known as Patagonia, a mountainous area with excessively flowery valleys of low vegetation, such as pampas grass and blue waters from melting ice and snow.
Modeling The Cabin & Terrain.
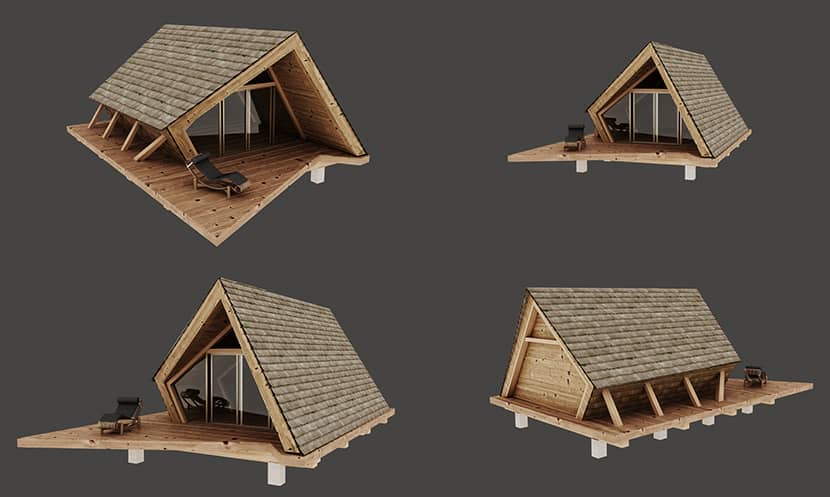
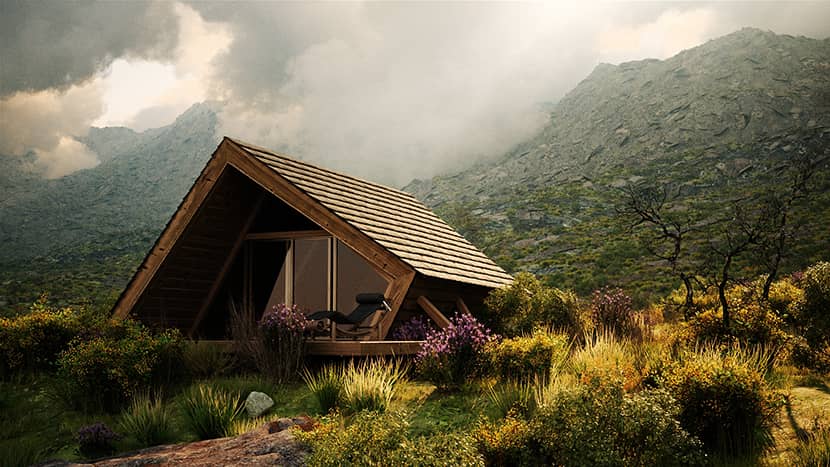
As an architectural element of the mountain cabin, I created an A-frame type, looking at some photo references. As the focus wasn't on the cabin, I didn't do any kind of layout or worry about seeing the interior because the views would only be external, not needing details that would not be seen. I modeled everything in 3ds Max, with materials for the Fstorm Renderer. I used simple materials with PBR textures from CG textures and some old wood textures from my library.
For the terrain, a typical digital elevation map of some region of the USA that I don't even remember was used. This file can also be easily generated using various software. The important thing is just to identify a mountain slope feature in a grayscale 2D image. The terrain was elevated using 3ds max own displace default modifier, containing a maximum of 600k polygons to generate a good mesh that shows the terrain elevated without low quality due to the low number of polygons. This primary 3d model of the terrain had a square size of approximately 4 x 4 kilometers.
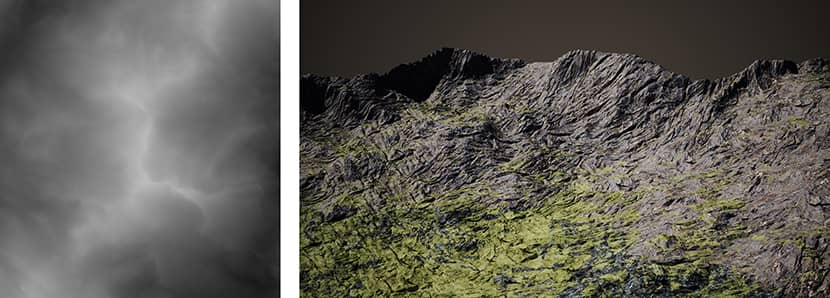
The terrain shader consisted of various rock textures in PBR, mostly from Quixel, along with vegetation textures to give the green underneath. Everything is well randomized and separated by mask maps, with the type of shader predominating according to altitude. Below you can see the terrain grayscale map and terrain shader visualization.
Another terrain disconnected from the main one was also used much further away to show another mountain on the horizon, with textures showing a mess of mixing rock colors, with green vegetation, and with much more exaggerated displacement values due to it being so far away, so that appears to be vegetation and rocks. Here, I did not use any additional objects as it would be too heavy and unnecessary to place vegetation and rocks on this mountain, which is so far away. This is how far the mountain looks from above and the primary terrain material.

3D Assets.
The entire scene was composed by distributing around 25 object assets, including some rocks and most vegetation, all placed only on the main terrain. I tried to find models as similar as possible to the Patagonian vegetation.
Among these models are several from Quixel, some from Globle Plants, and also some that I created that are typical of my region and served to represent this type of Patagonian vegetation. Everything was distributed in its proper proportions with the FstormRender scatter tool, which is highly robust, allowing you to do anything regarding distribution techniques. In total, almost 10 million objects were distributed on this central terrain. It is always important to find the correct density, scale, and spacing of vegetation to match the characteristics of a given biome. This ends up being achieved after several tests where we adjust each time closer to our reference photos until the desired result is achieved.
Here we see what the scatter graph of this scene looked like, as well as an overview of the assets used:
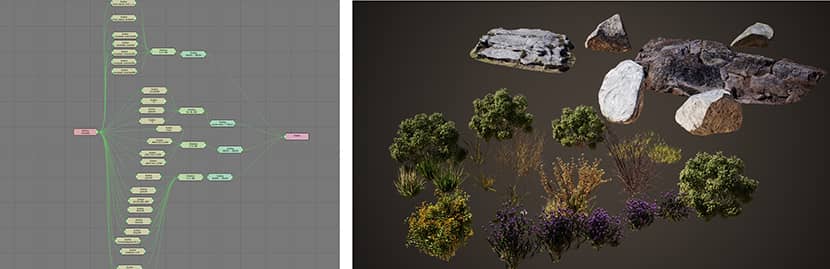
This is how the final scatter project turned out; with the correct proportions, I judged the scale, position, and quantity of vegetation and rocks to make it look like a Patagonian region.
Lighting & Atmosphere.
This is undoubtedly a critical point in showing the quality of any render. The renderer I used, Fstorm Render, is 100% path trace using only the GPU, and nowadays, with very fast GPUs and a lot of memory, we can create very heavy scenes without any problem and FstormRender has a lot of credit for being very well programmed within 3ds max, making it better capable than any GPU renderer on the market.
As I said, being 100% path trace, for people like me who understand very well the behavior of physics and why atmospheric phenomena are what they are, we can simulate practically the same thing that nature does, regarding the behavior of light in terms of volumes, absorption, and transmission, just by configuring parameters and values of absorption and transmission distances in materials and media with BRSSDF type shaders. (which, in the case of Fstorm, is very well programmed).
This must be correctly configured according to the scale of your scene. As we generally always work on a 1/1 scale, we can infer that the measurements that we see in reality, such as what is the maximum absorption distance of your atmosphere in meters, how much it would be compressed at certain heights, in addition to the relative power that its sun would have. In this scene, the main source of light, the sun, it's a sky light system and sun that every render has based on time and latitude.
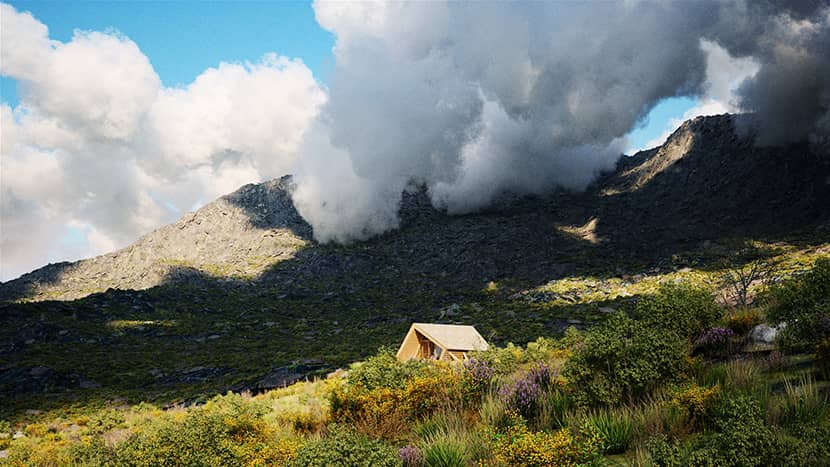
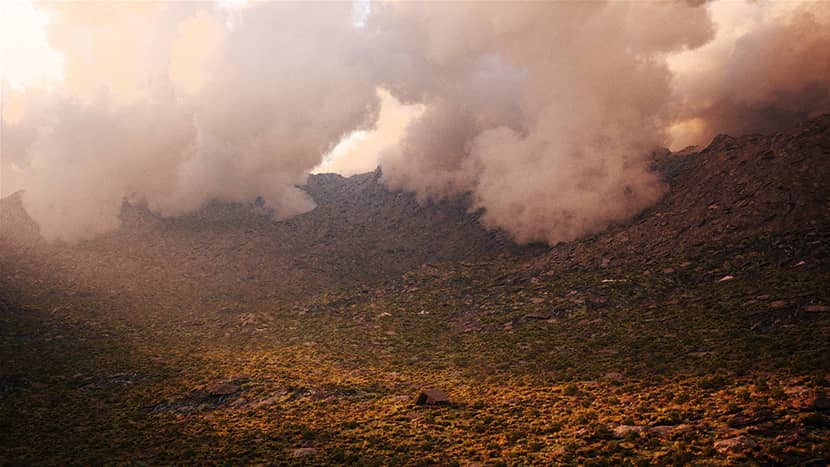
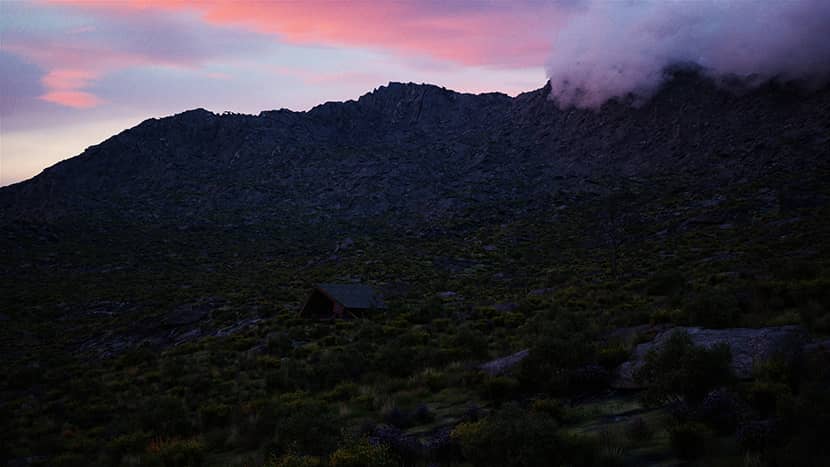
By adjusting these physical parameters, it is now possible to just play with changing the time of day or latitude, in addition to the absorption level of the atmosphere, and see what kind of reaction the light will illuminate your rendering and environment, giving us the freedom in interactive rendering (not real-time like a game engine) to find the ideal light. I only used the typical HDR lighting in the dusk sunset scene because scenes with low light and low angle of incidence in this physical mode that I explained would need a lot of raytrace depth to avoid the clouds being dark with some artifacts, which would increase the rendering time by up to 5 times. In this scene, I use a raytrace deep of 24 rays.
The clouds in this scene are an excellent volume shader that Fstorm has. They are not objects of the VBD volume objects type; they are a type of special shader that interprets the procedural noise maps as something 3d within traditional geometry objects; in this case, I used a mess of spheres and teapots from 3ds max as geometry. with deformations from the geometry noise modifier to create the general appearance of the areas of these clouds.
See respectively. clouds mesh with no shader, clouds with shader, and clouds with atmosphere.

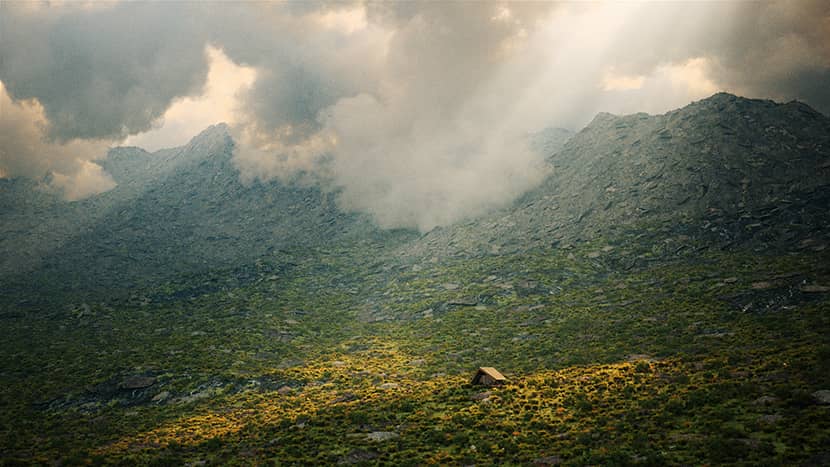
Like the atmosphere, the cloud shader must also be configured physically relative to its parameters for a realistic appearance consistent with what we see of clouds in reality. With all this correctly configured, we can physically see lighting situations arise where we see the famous "God rays."
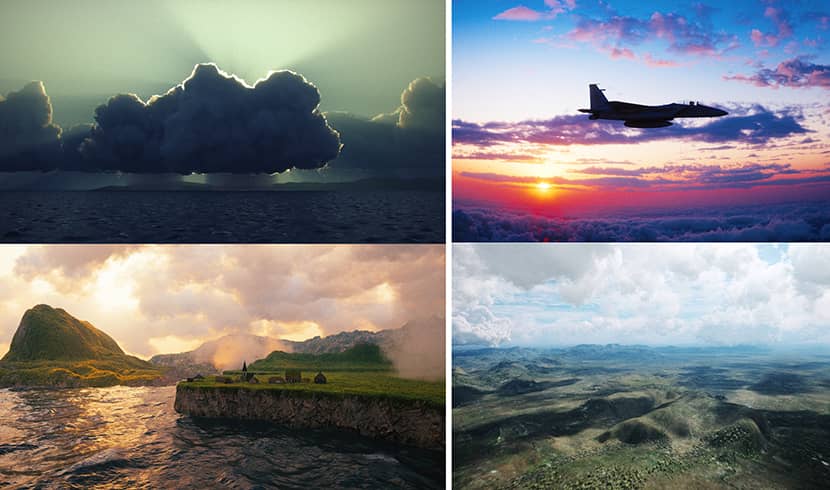
Some other examples of atmospheric effects that I made in other images with Fstorm Render.
The spectral atmosphere effect in this cabin project and environment. Now with these physical settings adjusted, the scene is almost done.
Final Considerations.
With everything configured, I added a few more elements, such as a dry tree near the cabin, an armchair, and a downhill mountain bike (my sport) available on CGmood.
Let's say we now have a drone and a photography camera at hand, looking for the best angles and testing the light at different times of the day and different atmosphere settings, just navigate through the scene and take your photos!
Also, as always, I almost choose not to do any post-production, as FstormRender has an excellent tone mapping system that works practically like a RAW file with "trillions" of colors and exposure levels in addition to accepting LUT filters directly in the render, which always give a more photographic characteristic to the images. If I want to add more elements to the scene, I prefer to place them directly in the render instead of making other compositions and generating more files, but each case is different; this is not always a rule.
Regarding the rendering itself, an RTX 4090 was used, which was my first scene on this new card to test the potential of a scene with many distributed elements. Everything runs smoothly, consuming only 5GB of the total 21GB available for rendering. The rendering time for each image in 1080P resolution was approximately 7 to 12 minutes.
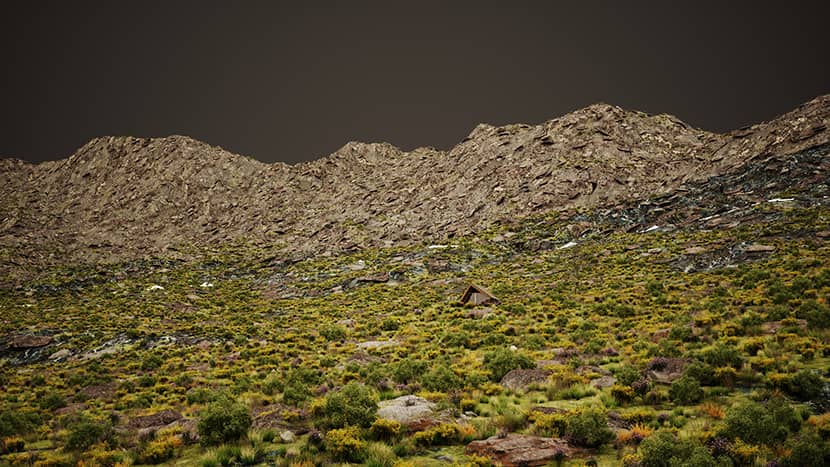
Final Images.
Conclusion.
In this project, I expected to have shown the objective of taking people into the feeling of what this region of exotic nature represents. I hope this brief description of the workflow and the explanation about " thinking based in physical world behavior" is valid and helps the creative abilities of those who want to work and create large natural terrains with photorealism.
Kind regards,
Pedro Machado.
About the artist
Pedro Machado, a Brazilian native, boasts a long and successful career in computer graphics, with a particular interest in architectural visualization. He currently holds a partnership at Davila Arquitetura, a prominent architecture firm in Brazil. Pedro's fascination with the field began in his youth, leading him to delve into the first version of 3ds Studio for DOS, the forerunner of today's 3ds Max, back in 1990. This sparked a lifelong passion that continues to this day. Machado has garnered a significant online following for his exceptional skills in crafting captivating homemade animations and meticulously detailed CGI landscapes.
![]()
![]()