
Many times, we have seen several ArchViz artists moving from architectural visualization to the automotive and VFX field. Following the same path, Matt from GPU Magic Studio based in Poland, in this informative article described to us his workflow and sources of inspiration & knowledge. Enjoy!
About me.
Hey everyone,
I'm Matt Ludwinek, a Senior 3d Generalist working in the 3D industry since 2009. I started my journey making simple architectural renderings but later I jumped into modeling hi-poly cars, time went on and I craved more. Not long after that, I got fascinated by VFX and animation. At the moment, I'm running a VFX and Animation Studio called "GPU Magic Studio" as well as a 3D printing company based in Poland.

Software Used.
I use the same software since the beginning of my journey. The main tool is Autodesk 3DS Max with Chaos V-Ray but in this project, I used Corona Renderer and the smoke was made using PhoenixFD.
Post-production with my favorite Adobe After Effects and the final shots compiled with a soundtrack in Adobe Premiere Pro.
Idea & Inspiration.
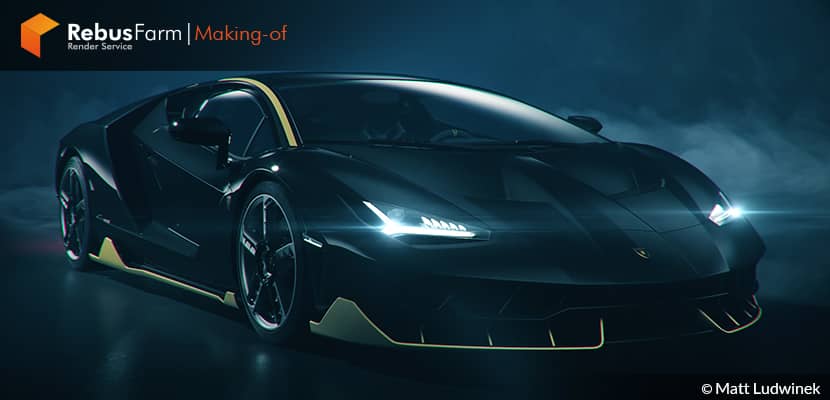
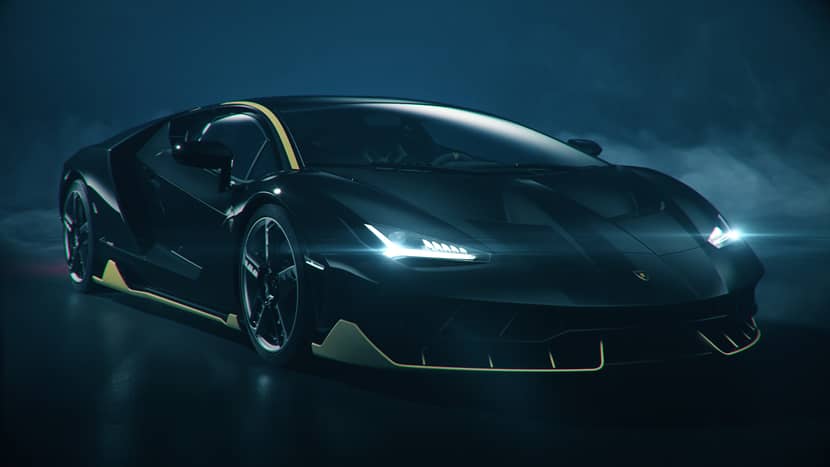
My first idea was to get back into Automotive rendering because I got a little rusty in this topic. I was thinking about modeling a car but due to a lack of spare time, I used one of the outstanding models from Jakub Przybolewski, the Lamborghini Centenario.
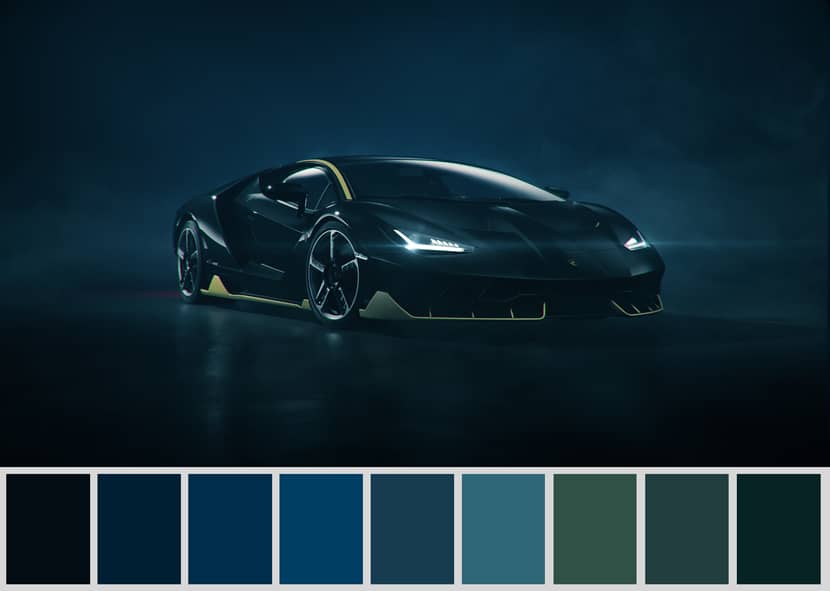
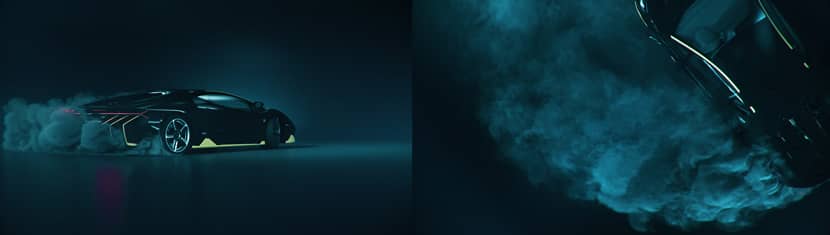
I went through some images and I saw Bernd Montag's crispy renders on Behance but I thought I need a bit different vibe. I found SuicieSquad and Bladerunner's 1982 color pallete with a smoky, misty, and noisy mood. This was it, I finally decided to go with a dark grainy setup and a lot of smoke.
Lately, I'm spending a lot of time making simulations thanks to Jesse Pitela from RedefineFX. You should all check his fluid and smoke courses, highly recommended.
Scene Setup & Animation.
It seems that the car animation isn’t easy but actually it’s a quite simple setup. First, I made a path for the drift from a spline that looks like a question mark to let the car change the drift direction.
The next step is to create some helpers. The whole car mesh is linked to the dummy located in the front so we can get that sliding motion then I've changed its Position controller to Path Constraint so it will follow a spline path.
Now the tricky part - the wheels need to rotate over their local X axis and also turn on the Z axis and follow the car body. I've animated X rotation then linked the whole Wheel to a dummy, animated this dummy over the Z axis, and then linked that dummy to the car dummy. No mess and full control to play with.
Lighting & Materials.
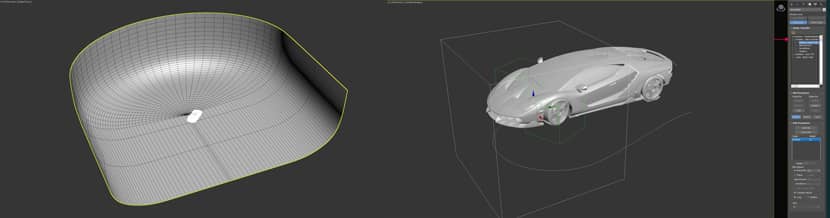
The model was ready-made with its fine materials but they needed some tweaking here and there. It’s very easy to get what you need in an interactive view so you can see the results instantly.
Lighting was a bit time-consuming because there are 18 lighting sources in the scene. I had also to tweak them a bit between the several shots of this project. Most of them are made to get the desired reflection on the car, while some other are with hdr linear and radial gradient. The rest of the lights are used for the environment around the car and a few directional lights to get a glow behind the car + taillights. You can find some great tutorials on AutomotiveCGI Youtube Channel.
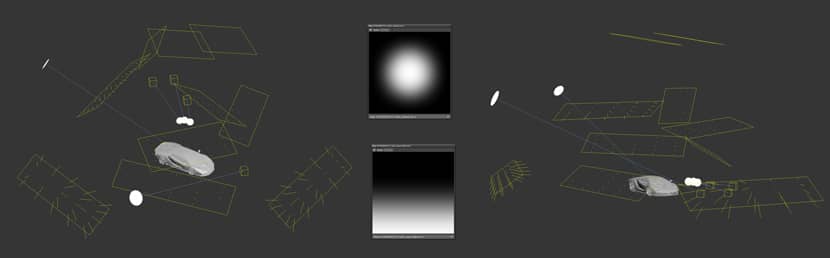
CLICK TO ENLARGE THE IMAGE.
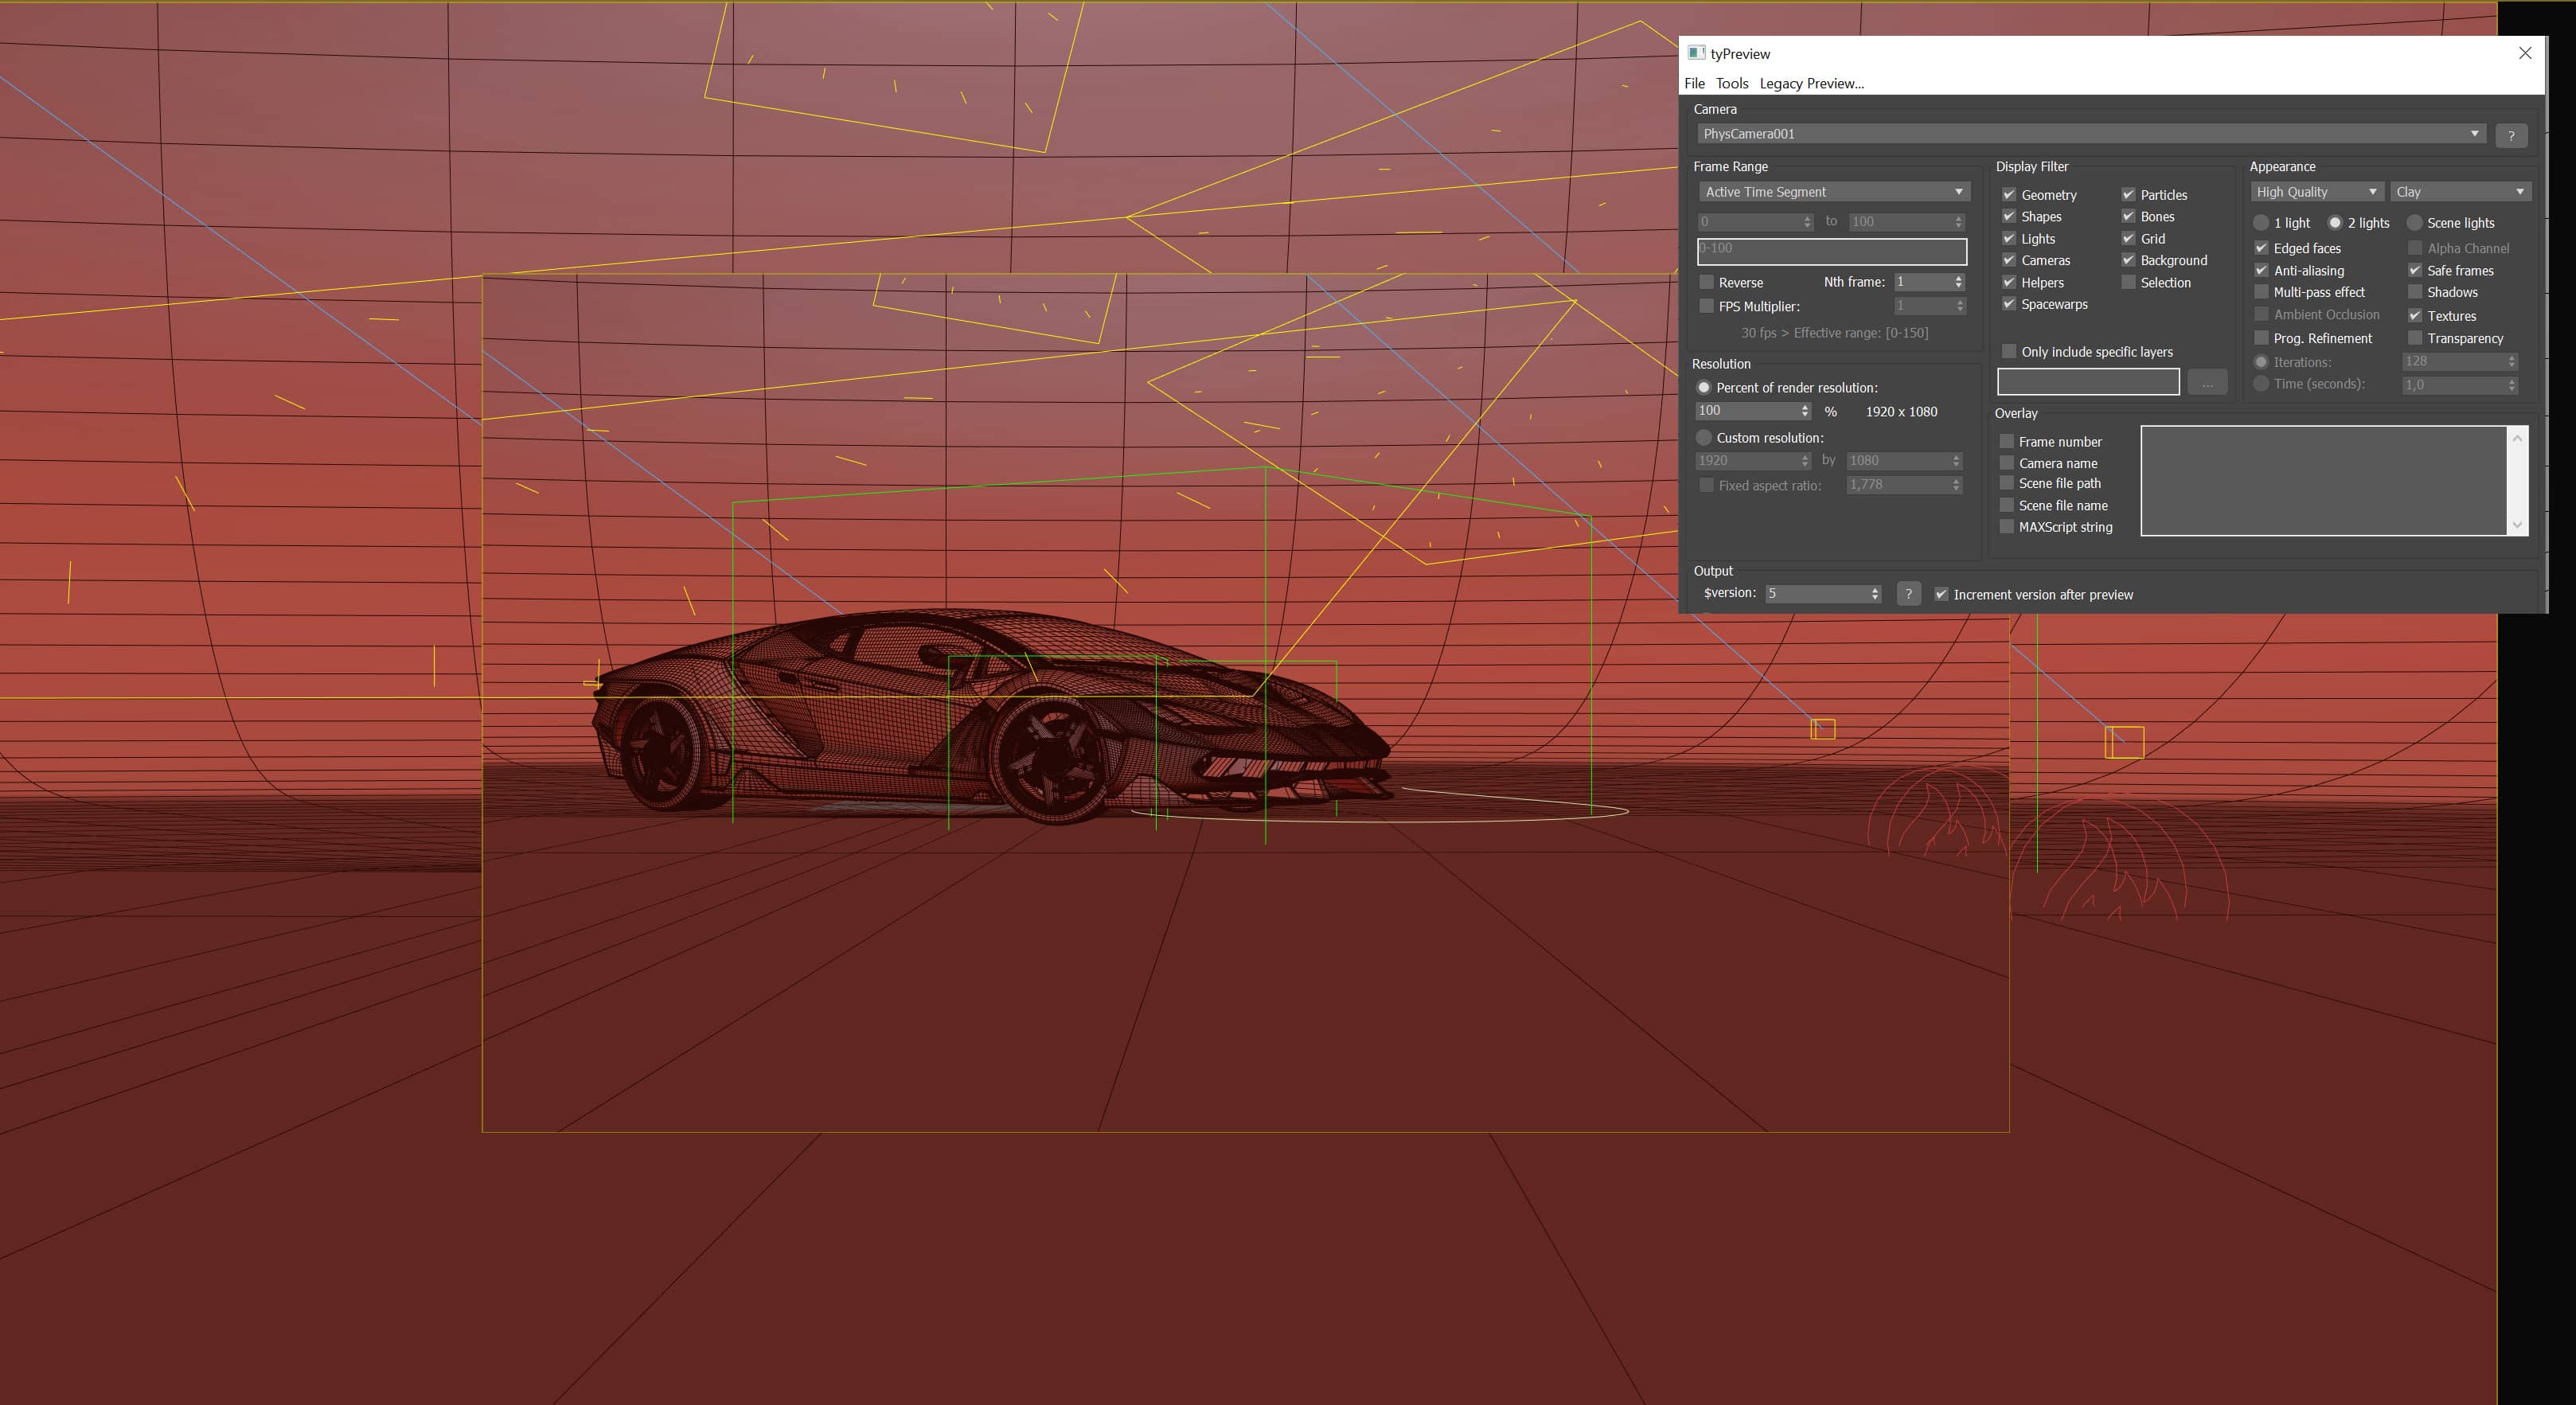
Cameras.
I've made many different shots to get some options and choose from when compiling the final animation. For this process is wise to use TyPreview using TyFlow which is extremely fast and you can see if the shot looks fine or if you need some tweaks.
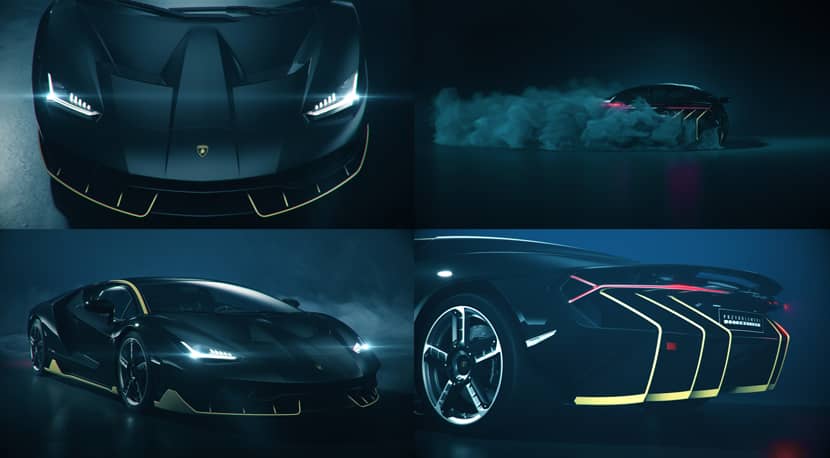
Smoke Simulation.
That was one of the inspirations I got from the RedefineFX Youtube channel. Burnout tutorial to play with the settings under PhoenixFD. You can check this useful video tutorial below:
CLICK TO ENLARGE THE IMAGE.
Rendering & Post-Production.
Rendering was easy but due to many lights and smoke simulations, it took from 2-7min per frame. The noise was set up to 3% with 0.5 denoiser. Remember to check the UHD Cache and set it to animation ;)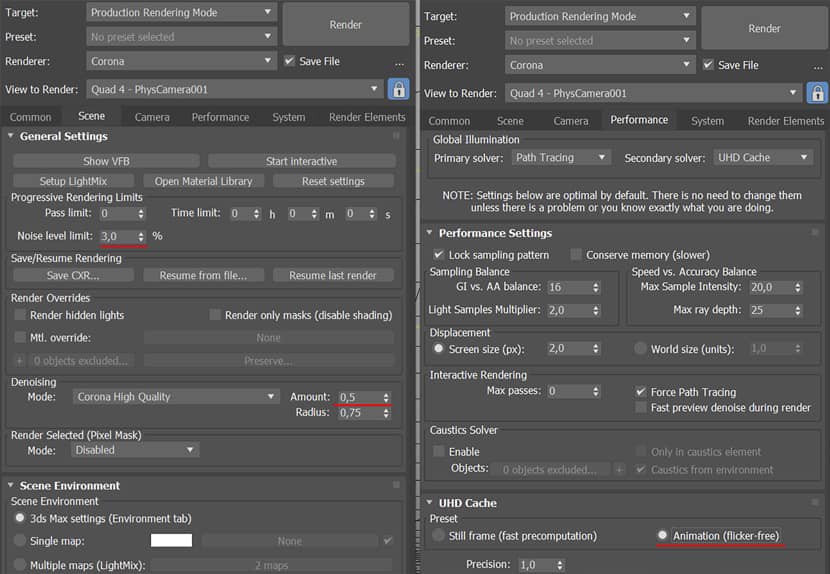
CLICK TO ENLARGE THE IMAGE.
The Post-production process covers:
1. Color grading
2. Background and front smoke were added with stock smoke footage.
3. Optical flares tracked to the front lights.
4. Overall tweaks – contrast, exposure, clarity, film noise, levels, motion blur, retiming shots.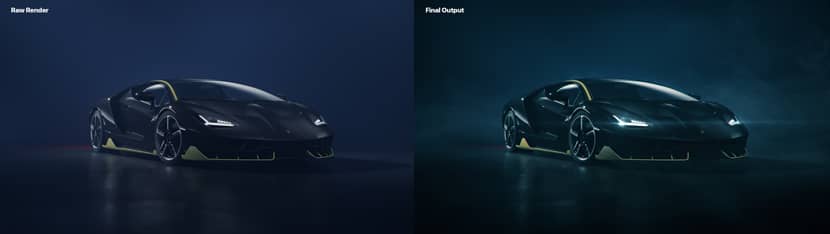
And finally, I cut all the shots so they go along with the soundtrack.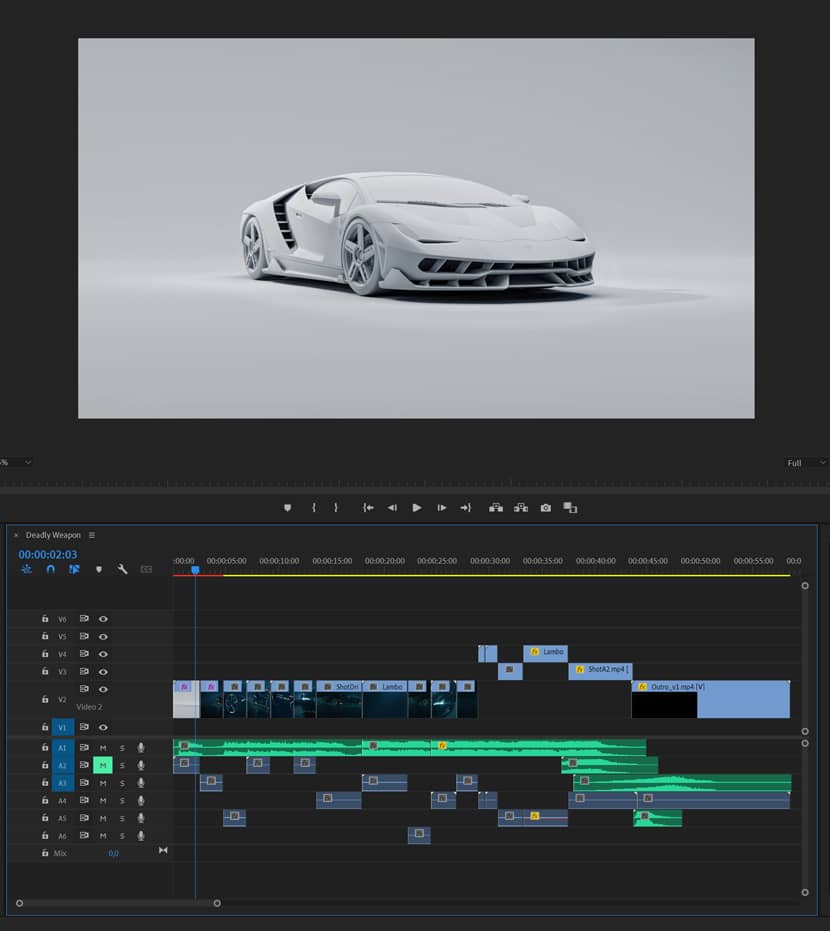
CLICK TO ENLARGE THE IMAGE.
Conclusion.
Thanks for the time you spent reading my article and I hope that you found it useful. Also a big thanks to Rebusfarm Team for inviting me to participate in their making-of section. Below you can watch my short animation that came out of this effort.
With kind regards,
Matt Ludwinek.
Check more of Matt's work on these channels:
Want to share your work with our community too?
Contact us at Diese E-Mail-Adresse ist vor Spambots geschützt! Zur Anzeige muss JavaScript eingeschaltet sein! and tell us about your favorite project.
Get started with your own renderings