
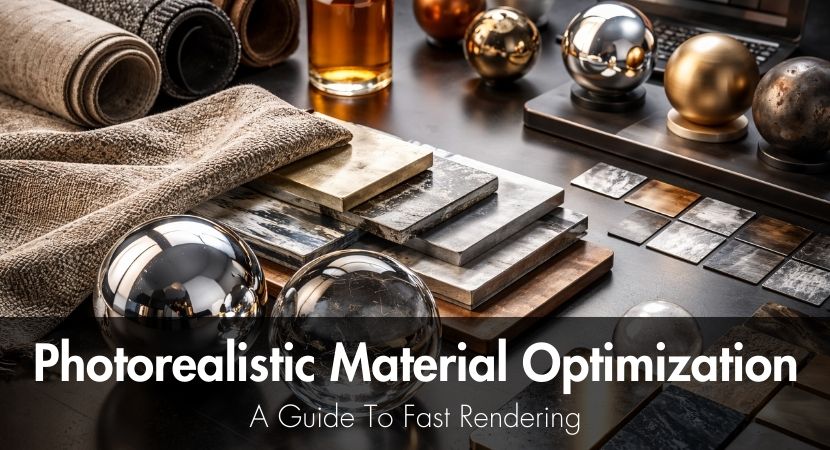
Understanding how to optimize materials without sacrificing photorealism is a valuable skill for 3D artists. Photorealistic rendering has always been an important goal, yet it often comes with long render times and high memory consumption, a fact that usually gives deadline pressure. Materials define realism, surface interaction with light, and visual credibility, but they are also one of the biggest contributors to slow renders. Let's explore how we can dramatically improve render speed while keeping visual quality in our images!
The methods covered here will help you reconsider how materials are constructed, assessed, and used throughout contemporary production pipelines, regardless of whether you work in architectural visualization, product rendering, or cinematic imaging. After reading this article, you will perceive material optimization as a creative and technological benefit that allows for quicker iterations, fewer expenses, and more dependable final outputs, especially when utilizing cloud rendering solutions like RebusFarm.
What Makes Photorealistic 3D Rendering Materials So Resource-Intensive?
Because they require complex light calculations, numerous ray interactions, and high-resolution images to simulate real-world surface behavior, photorealistic materials are resource-intensive. Before creating a final pixel, the renderer needs to evaluate the additional ray bounces introduced by each translucent layer, slight roughness variation, or reflective highlight.
Ray tracing lies at the heart of this complexity. Rays interacting with materials multiple times through reflection, refraction, scattering, and absorption are essential to modern photorealistic rendering. The more layers a material has, for example, a clear coat on car paint, the more calculations are required per pixel. This causes an exponential rise in render time, particularly in scenes where the visual composition is dominated by materials. If you're not familiar with the term of Ray Tracing and how it actually works, the following video by InspirationTuts provides a clear idea of how it operates and it also simplifies the fundamental concepts in an understandable manner.
Another important fact is memory consumption. Procedural nodes, displacement maps, multilayer shaders, and high-resolution textures all fight together GPU or system memory. Render engines slow down or resort to ineffective caching techniques when memory restrictions are reached. In Archviz rendering and product visualization, materials are frequently pushed to extremely high levels of detail in order to withstand close-up shots as well.
Render time and material quality are closely related. Although they increase realism, higher sampling rates, deeper reflection depth, and more precise light conveyance also increase processing costs. By layering superfluous shader elements that greatly affect performance but add nothing to the final image, many artists mistakenly create bottlenecks. The first step to more smarter material rendering is obviously identifying these obstacles.
Essential Techniques For Fast Photorealistic 3D Rendering.
Fast photorealistic 3D rendering can be achieved by making thoughtful decisions about how materials interact with light rather than increasing quality settings without a meaning. Understanding which elements of a material are really important and which could be made simpler without being noticed, is the first step towards optimization.
Quality and speed must coexist in a productive workflow. Final renders need to be accurate and stable, while preview renders need to be responsive. Creating materials with scalable complexity is one such tactic. The same material can be used for both look-development and final delivery stages by adjusting settings that regulate reflection depth, sampling quality, and texture resolution.
A good example of an artist’s know-how when it comes to combining quality with speed can be found in this video by CG Boost. It gives us some practical tips that demonstrate how thoughtful technical decisions can significantly improve our work without compromising quality. It is also important to note that, although different software may vary in interface and tools, the logic remains the same. Any artist can apply these principles by searching for similar tutorial series for their own software.
Different optimization approaches serve different goals. Simplified shaders with lesser texture resolution and ray depth enable quick iterations in the early stages of design and testing. Instead of increasing certain parameters globally, they are deliberately increased for final photos. This keeps realism where it counts most while avoiding needless performance loss.
Workflows are transformed when materials are set up with this dual purpose in mind. Artists use adaptive materials that react smartly to render parameters rather than rebuilding shaders for each stage. This method lowers the possibility of errors between preview and final outputs while also speeding up individual renders.
How To Optimize Subsurface Scattering For Skin Materials?
Limiting sampling depth and utilizing simplified diffusion models that maintain softness without requiring extensive ray calculations are the best ways to optimize subsurface scattering. Because skin materials mimic light penetration beneath the surface, where rays scatter before leaving, they are among the most difficult materials.
Sampling control is the first step in effective SSS. Overly high SSS samples frequently result in noticeably longer render times. Faster results without obvious artifacts are typically obtained when sample count and global illumination quality are carefully balanced. In many cases, reducing SSS depth while compensating with color and roughness adjustments maintains realism in a "budget-friendly" way.
Optimizing texture is similarly crucial. Skin shaders usually rely on multiple high-resolution maps for color variation, roughness, and scattering radius. The resolution and format of these maps should be optimized so that they don't exceed the final output size.
The secret to quick skin rendering is self-control. Physically flawless simulation is not always necessary for true realism. It calls for a compelling light response that complements the image's framing and story.
This video by All Is Play below provides a beginner-friendly introduction to subsurface scattering inside Unreal Engine, focusing specifically on skin and wax materials. It explains how light behaves when passing through translucent surfaces and demonstrates how Unreal Engine’s Subsurface shading model is designed to simulate this effect accurately. The tutorial helps artists understand not only how to set them up but also when and why to use them in real production scenarios.
What Are The Best Practices For Rendering Materials And Textures Together?
Instead of defaulting to maximum quality, rendering materials and textures effectively requires striking a balance between texture resolution and perceptual impact. Textures play a major role in memory usage, particularly in scenes with a lot of different materials.
MIP mapping and proper texture filtering allow render engines to load only the level of detail required for a given camera distance. They minimize texture lookup time during rendering and avoid needless memory usage when enabled and configured properly. This works especially well in expansive architectural scenes where a lot of elements are only visible in the backdrop. This video by Udacity explains how MIP maps work as a texture optimization technique, showing how lower-resolution versions of textures are automatically used at greater distances to improve performance and reduce aliasing.
In scenes with many textures, memory management becomes necessary. Performance is maintained by combining texture sets, reusing shared maps, and minimizing needless variants. Large bitmap files can frequently be replaced by procedural textures, which give more flexibility and less memory consumption. For anyone who want to explore this topic in more depth, we recommend revisiting our previous article: "Procedural Textures: Cut File Size by 90% & Speed Up 3D Workflow".
Rendering Different Materials: Optimization By Type.
Different materials stress render engines in different ways. Instead of using generic solutions, artists can maximize creatively by being aware of these differences.
How To Speed Up Glass And Transparent Material Rendering?
When internal ray bounces and refraction depth are carefully controlled, glass and transparent materials render faster. Because light must pass through, reflect within, and exit transparent surfaces, ray ray paths are multiplied.
Values for the index of refraction should not be overdone but should still be physically plausible. Extreme IOR levels don't improve realism; instead, they make ray bending more complex. Particularly in architectural scenarios with numerous glass surfaces, refraction depth should only be set as high as required to support visible layers.
In order to assist artists in understanding why reasonable IOR values are crucial for creating realistic glass while controlling render times, this video by The Science Classroom provides a straightforward explanation of the IOR and how it affects light behavior in transparent materials.
Another significant drain on performance is caustics. Although physically realistic caustics can improve realism, most architectural and product rendering images don't require them. Similar visual effects can be achieved by simulating caustics using textures or light projections. Nevertheless, in case you are not familiar with caustics and you would like to have a taste of how they can be used properly, here is a simple and common tutorial by UVA Graphics.
Metal Materials: Achieving Realism Without Long Render Times.
Reflection depth and sampling are important performance parameters since metal materials rely mainly on reflections. In controlled lighting settings, an excessively high reflection depth rarely enhances realism but can significantly increase render times.
Brushed metals often show anisotropic reflections, which should be used selectively. High-quality HDRI lighting and subtle anisotropy often create convincing images without the need for complex shader setups.
The HDRIs themselves are quite important. Metal materials can converge more quickly thanks to clean, well-exposed HDRIs that lower noise and sampling needs. This demonstrates how lighting optimization and material optimization are connected.
This tutorial by Jonas Noell explains how to create realistic brushed metal and anisotropic shaders efficiently, comparing traditional bump or normal map techniques with V-Ray’s optimized anisotropic BRDF parameters. It clearly shows how using the correct shading model not only improves visual realism but also leads to cleaner, more optimized results.
Fabric And Cloth: Balancing Detail With Performance.
When fiber-level detail is directly recreated, fabric materials become expensive. In most situations, bump and normal maps offer enough visual complexity rather than depending on true geometry or micro-displacement.
Applying sheen and microfibre effects requires care. Excessive sheen sampling can greatly slow renderings, even though it adds realism. Increasing quality settings is frequently not as effective as adjusting sheen sensitivity to lighting conditions.
For fabrics, procedural textures work really well. They minimize memory use, provide uniform variation without obvious tiling, and scale smoothly across resolutions. Here is a perfect example by Ryan King Art, who creates a procedural woven fabric material in Blender:
Advanced Material Optimization For 3D Product Rendering.
Photorealistic 3D product rendering places unique demands on materials because products are often viewed in close-up scenarios under a controlled studio lighting setup. Optimization here definitely focuses on precision.
Studio lighting setups that minimize unnecessary reflections and indirect bounces help materials converge faster. Without sacrificing clarity, clean light placement lowers noise and permits lower sampling values. Here is an informative tutorial by Arch Viz Artist channel:
Material presets offer speed and uniformity for typical product categories, including glass, metal, and plastics. Pre-optimized shaders guarantee consistent performance across projects and save on setup time.
Marketing images, animations, and configurators require different levels of precision. Optimizing materials per deliverable prevents over-rendering and wasted resources. If you're a newcomer artist in the field and you would like to explore what exactly 3D product rendering is, we found this small gem by XO3D:
How Do Different Render Engines Handle Material Rendering?
The different render engines in our market handle material rendering differently because each uses unique sampling strategies, shading models, and hardware acceleration methods. CPU-based engines often excel in stability and memory handling, while GPU renderers prioritize speed and parallelism.
While some engines manage layered materials effectively, others gain from reduced shader graphs. Instead of depending on generic settings, you can customize shaders for that environment by knowing how your preferred engine assesses materials.
Additional factors like memory constraints and texture compression are introduced by GPU rendering. Reducing texture size and simplifying node networks are common ways to optimize materials for GPU workloads and avoid bottlenecks.
Creating Efficient Photorealistic 3D Renderings In Production.
Material optimization becomes very powerful when it is integrated into production pipelines rather than applied as a last-minute solution.
When Should You Use Material LODs (Levels Of Detail)?
When objects exist in a scene at different distances or levels of relevance, material LODs should be employed. Hero-level detail isn't always necessary for every surface.
Distance-based material switching makes sure that front assets are given full attention while background parts use simplified shaders. This method works particularly well for urban and architectural visualizations.
Using asset managers or scripts to automate LOD generation guarantees consistency and saves time for large projects. This tutorial by Art of Pilgrim presents a practical LOD-based optimization workflow, demonstrating how baking materials and textures across different asset levels can reduce draw calls a lot and improve performance at the same time, keeping visual consistency through efficient texture atlasing and map rebaking techniques.
How To Set Up Material Libraries For Fast Rendering?
Not a lot to mention here, but I wanted to refer to pre-optimized material libraries, which are based on performance-tested shaders and specified parameters that obviously offer us fast rendering times. Reusable templates also minimize setup problems and do away with guesswork.
On the other hand, version control is crucial. Tracking material changes prevents performance regressions and ensures consistency across teams. Libraries that are kept up to date become strategic assets that grow with your freelancing or studio workflow.
Debugging Slow Rendering Materials And Textures.
Identifying slow materials requires systematic testing. The shaders that use the most memory and time are shown via profiling tools and render statistics.
Excessive reflection depth, superfluous texture resolution, and redundant shader layers are some common errors we usually do due to lack of time. Isolating our materials and testing them individually before final rendering is a go-to solution.
Testing optimized materials locally before sending them to cloud rendering platforms, for example, ensures predictable performance and cost control.
Cloud Rendering And Material Optimization.
Because optimized materials lower upload times, memory use, and total render costs, they are particularly useful in cloud rendering systems. Artists may rapidly test various quality levels without going over budget thanks to efficient materials.
RebusFarm's scalable resources that adjust to efficient processes make it an excellent choice for handling scenes with a lot of materials. Cloud rendering is no longer a last option but rather a powerful extension of local production when materials are constructed effectively.
Future of Photorealistic Material Rendering.
Real-time ray tracing, procedural advancements, and AI-driven optimization will influence material rendering in the future. Smarter material evaluation that dynamically adjusts to scene context is promised by neural rendering techniques.
The fundamentals of optimization do not change as render engines do. Relying only on faster hardware can never be as effective as understanding how materials work. You can watch the following video by Stefan 3D AI Lab for a clear real-world example. It shows how the YVO3D tool can use artificial intelligence to create incredibly detailed 4K textures, demonstrating both the creative potential and the efficiency gains that AI-driven texture generation can bring to modern material workflows.
Key Takeaways for Faster Photorealistic 3D Rendering.
Some of the conclusions we can draw from this research are that faster photorealistic rendering can finally be achieved through thoughtful material creation and not by sacrificing quality. Artists can fulfill deadlines, cut expenses, and retain creative freedom through optimization, which strikes a balance between efficiency and realism.
At first it may seem like wasted time that at that given moment was not possible to spend, but in reality it is a lot of time gained that we will realize with pleasure in the future. Finally, optimized materials greatly assist render farms, increasing the predictability and accessibility of cloud rendering. Professional development is still based on constant exploration and improvement.
Frequently Asked Questions About PBR Materials.
Why do photorealistic materials take so long to render?
Just because they require complex light interactions, high sampling rates, and detailed textures that increase computation per pixel.
Can you achieve photorealistic 3D rendering without complex shaders?
Obviously yes! Convincing realism often comes from smart lighting and texture use rather than overly complex shaders. Also, don't forget the post-production process and AI-Upscalers which can improve the final outcome so much!
What's the difference between PBR and photorealistic materials?
PBR provides a physically consistent foundation, while photorealistic materials refine that foundation for visual believability. Again, here is another article in which you can learn more about PBR materials and "How To Build A Universal PBR Material Library For All Your 3D Software"
What optimization gives the biggest render time improvement?
Reducing unnecessary ray depth and texture resolution usually delivers the most immediate profits.
Which material types benefit most from optimization?
Glass, metals, skin, and fabrics typically show the largest performance improvements.
Should I optimize materials before sending to a rendering farm?
Yes, it's good. Optimized materials reduce render time, costs, and potential errors in cloud rendering workflows.
We appreciate you reading this guide. I hope it helped you see material optimization as a strategic attitude for attaining quicker, more dependable photorealistic rendering across many projects and production pipelines rather than just a technical tweak. We are all motivated by the same enthusiasm for 3D art, regardless of the tools, render engines, or workflows we select: finding smarter ways to work, meeting demanding deadlines with confidence, and continually elevating the quality of our work.
Kind regards & Keep rendering! 🧡

About the author
Vasilis Koutlis, the founder of VWArtclub, was born in Athens in 1979. After studying furniture design and decoration, he started dedicating himself to 3D art in 2002. In 2012, the idea of VWArtclub was born: an active 3D community that has grown over the last 12 years into one of the largest online 3D communities worldwide, with over 160 thousand members. He acquired partners worldwide, and various collaborators trusted him with their ideas as he rewarded them with his consistent state-of-the-art services. Not a moment goes by without him thinking of a beautiful image; thus, he is never concerned with time but only with the design's quality.
![]()
![]()
![]()
![]()
![]()
