
Open Spaces with clean lines consist of the view of Mid-Century Modern Architecture. Sometimes seen as cold and unattractive, mid-century modern designs were a byproduct of post-war optimism and reflected the USA's commitment to building a new future with modern materials such as reinforced concrete, glass, and steel for simple forms and unadorned facades. In this making-of article, Phil Buerer from Guachinarte, based in Switzerland, explains how he started creating images of mid-century modern architecture with a special focus on Palm Springs, California, after his client's request.
About Me.
Hi,
My name is Phil and I've been doing visualizations of architecture for quite some time now. I'm originally an architectural draftsman and have worked in various fields such as graphics, programming, and photography. Nowadays, I mainly create images for marketing real estate, architectural competitions, and product design.
Software Used.
Cinema 4D was used for modeling the project, V-Ray for rendering, and Photoshop for post-production.
About The Project.
In 2020, I got a request from Lumas asking if I would be interested in creating images of mid-century modern architecture with a special focus on Palm Springs, California. They would sell them as limited high-quality prints in their galleries all over the world. What a request! As you can probably imagine, they didn't have to ask me twice. If you want to learn more about this architectural style, you can watch the following documentary film by Arkansas PBS YouTube Chanel:
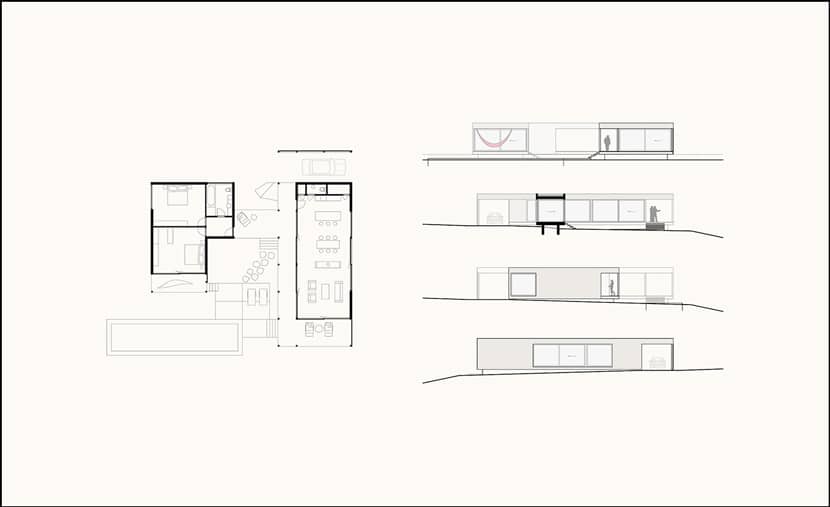
The idea was to create images of non-existing houses reminiscent of that style. Of course, my designs are highly inspired by the works of Neutra, Koenig, Lautner, Wexler, Frey, and so on. The focus was to design it so it could actually be built, with functional floor plans and perfect adaptation to the environment.
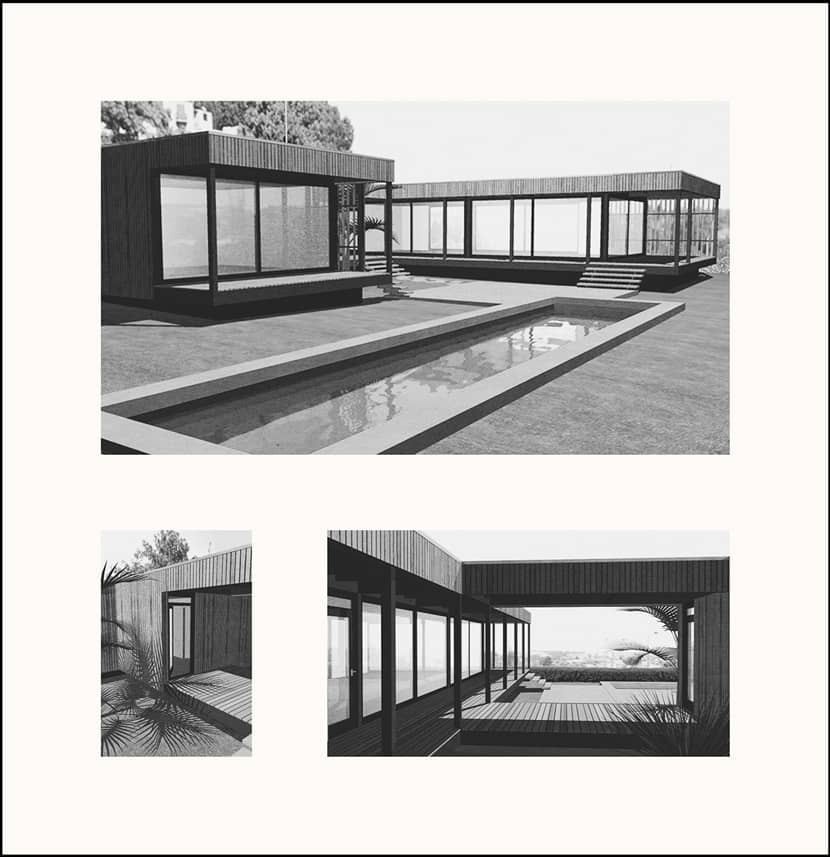
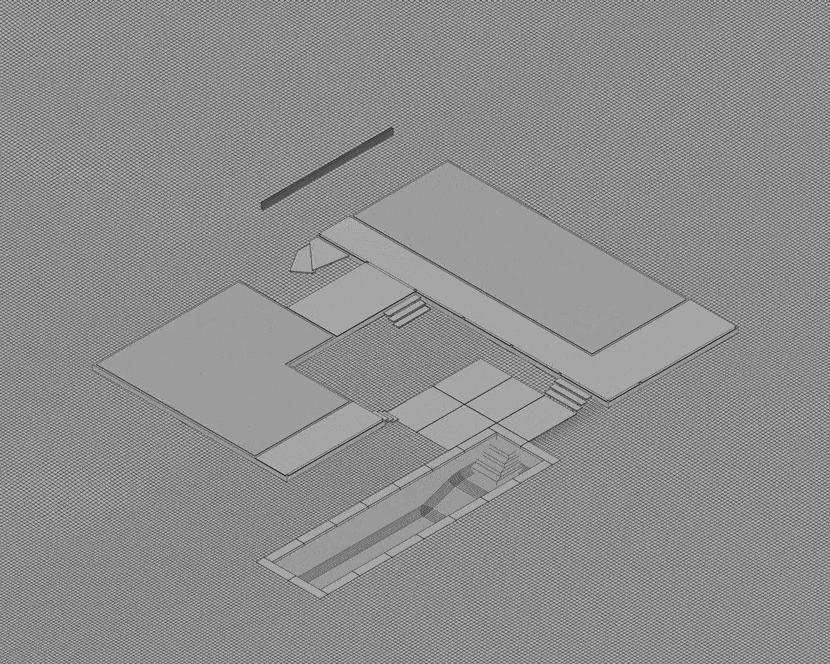
One of those projects, Mohave Valley, was especially inspired by Marmol Radziner's prefab homes. I had already designed this house back in 2008 for the purpose of my diploma work at the multimedia academy. It served as a 3d interactive walk-through experience, which was quite a new thing back then. This is how it looked like in 2008:
Modeling.
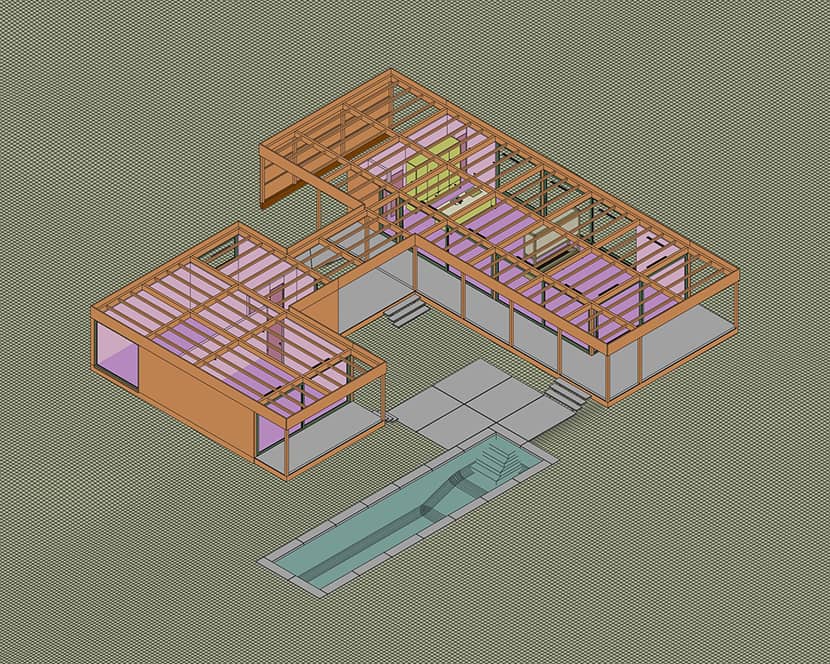
The 3d model I did 12 years ago wasn't detailed enough. Also, I knew that I wanted to change the project to some extent. It would be best to remodel the whole thing. It turned out to be pretty straightforward. Here's an overview of the house model.
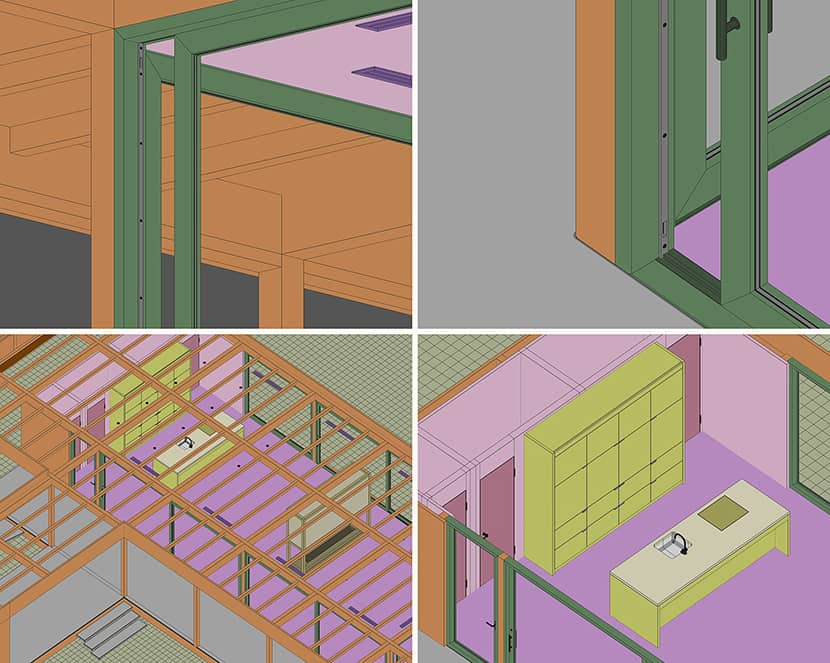
While modeling, I usually add some placeholder materials with random colors, which makes it easier to work with. Most edges are not beveled through modeling. For low bevels and objects in the distance, I usually just use the round edges option from the material. Window panes are hidden, but there are two panes in each window, modeled from simple cubes 2mm thick, with 7mm space in between.
Lighting.
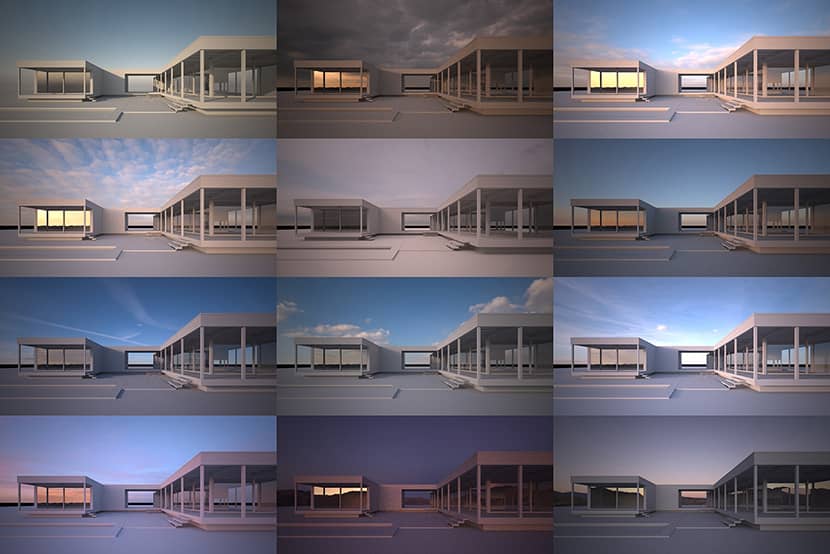
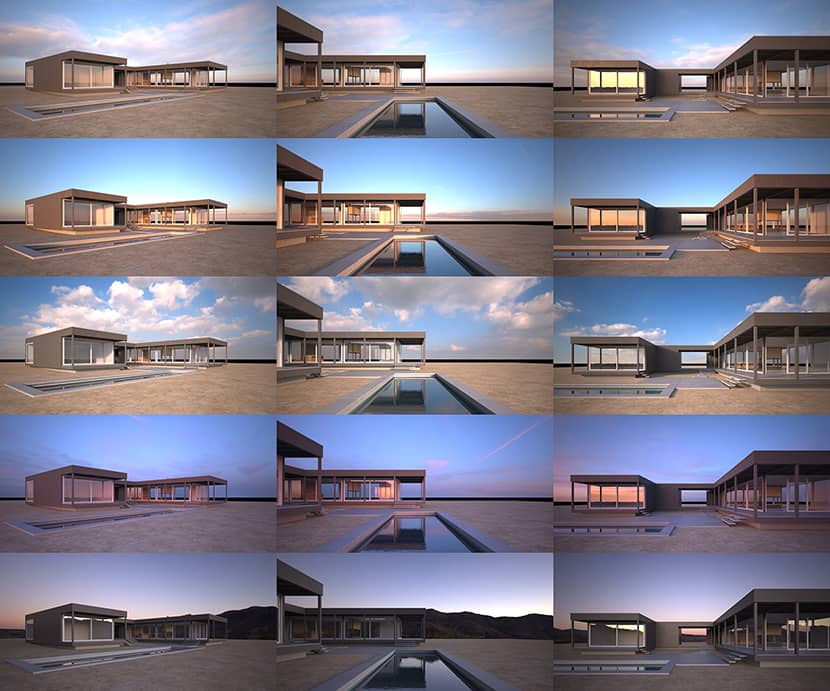
Before adding materials, I usually start testing some light scenarios. Although it was clear that it would be a late evening scene, I tested other options to make sure I didn't miss any potentially great shots.
To do this, I usually use a neutral grey override material but exclude the glass material from the windows to keep the reflections. I mostly start with a Vray sun + sky (upper left) to find the best sun angle and direction. Then I tested some HDRIs (PG Skies, Vizpark, HDRMAPS, and HDRI Haven).
I ended up with 12 options which all could have worked fine. I left them for the moment and would decide while making the composition. (Side note: never send 12 lighting options to a client!)
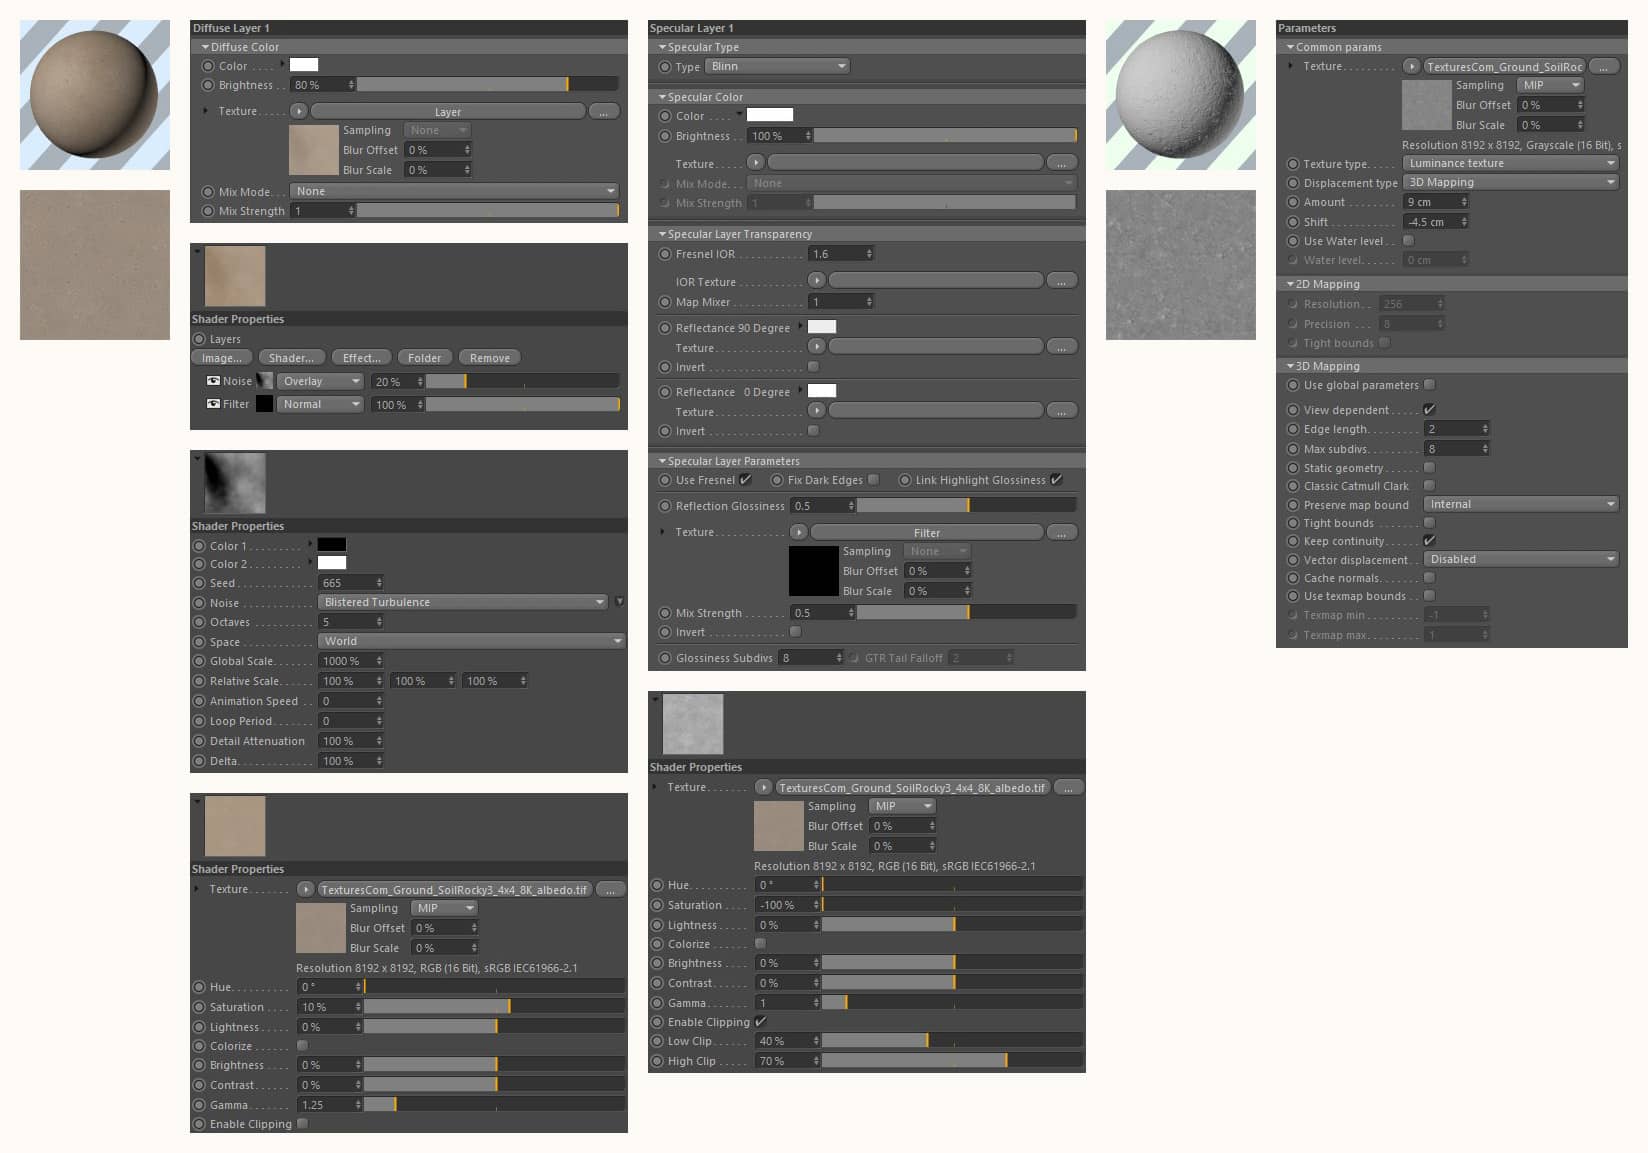
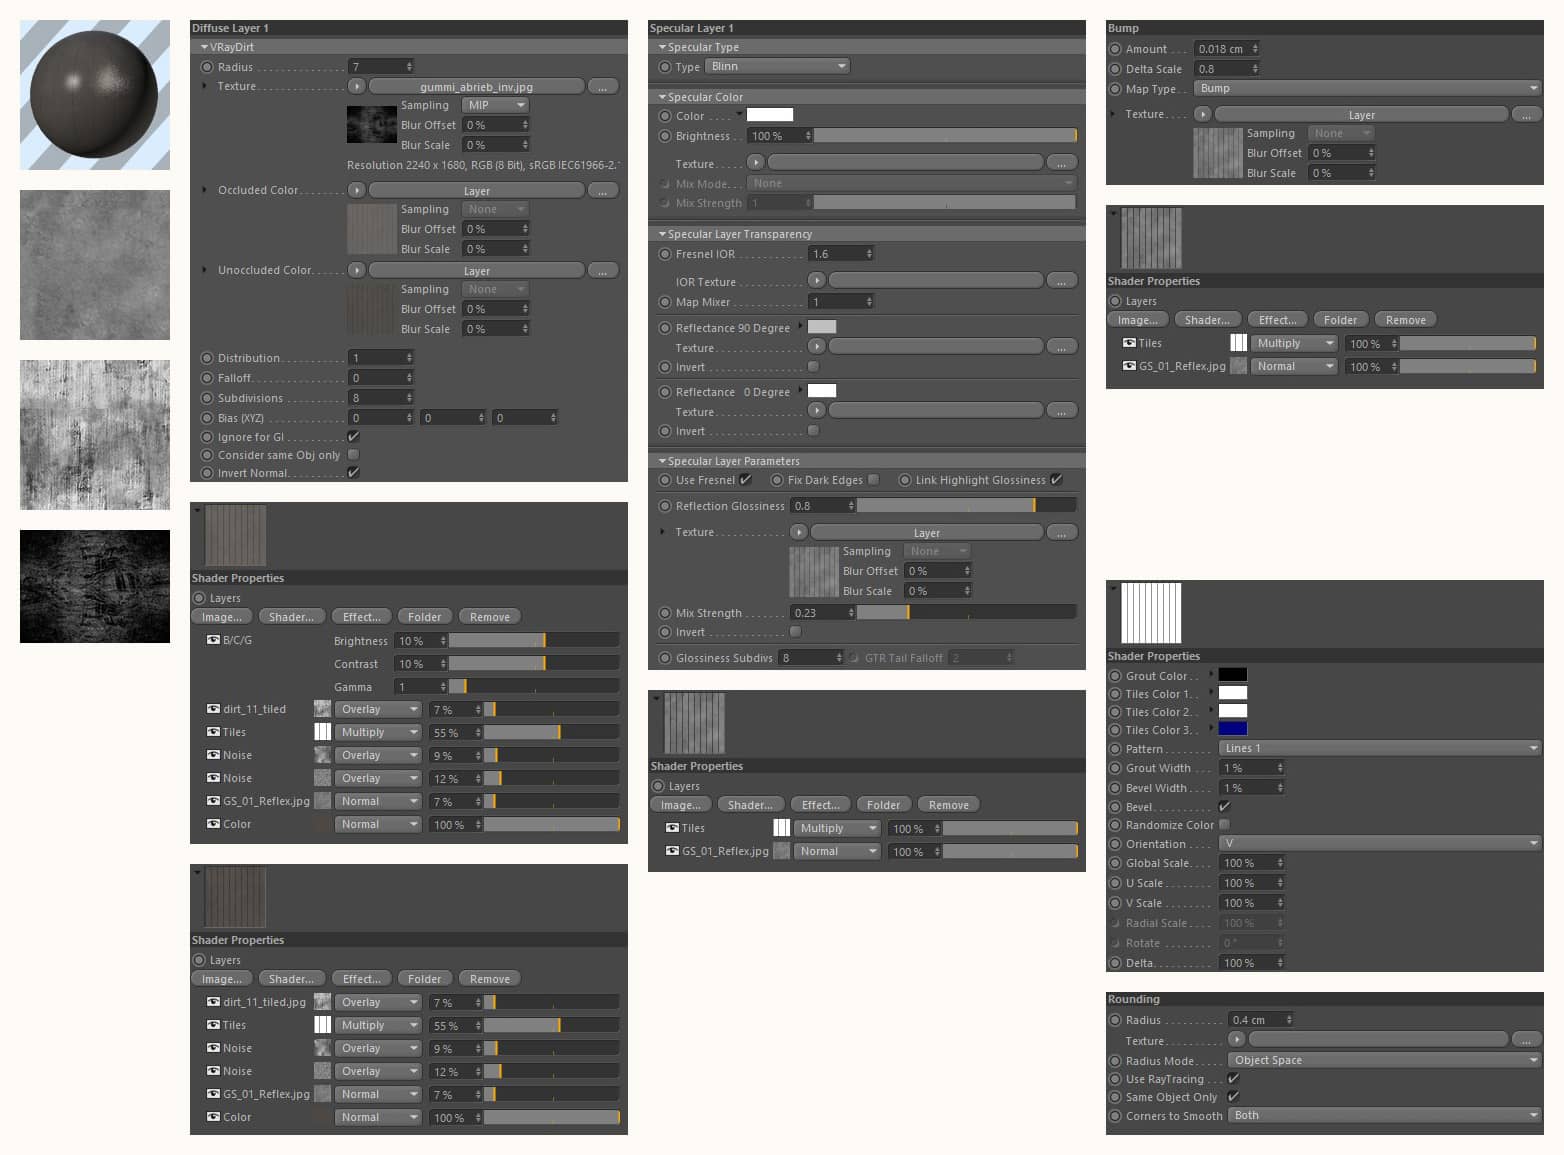
Materials.
There is nothing too fancy about the materials. The most important component in the majority of materials is the texture. In order to get realistic results, using high-res textures is a must. Here are three materials that I think are the most interesting.
Soil: this one is pretty simple to set up. I used an 8k ground texture from textures.com, which does most of the job. I mixed it with a noise shader to get a more uneven look. And finally, use the according height map for displacement. The thousands of little stones and grasses distributed by MoGraph sell it even better.
Concrete: I used a VrayDirt material to get brighter edges where the concrete gets worn out. To get broken edges, I used a bevel deformer and displacement. Every block was rotated and moved slightly to get a more natural look. A massive 10k texture from Extreme Textures was used.
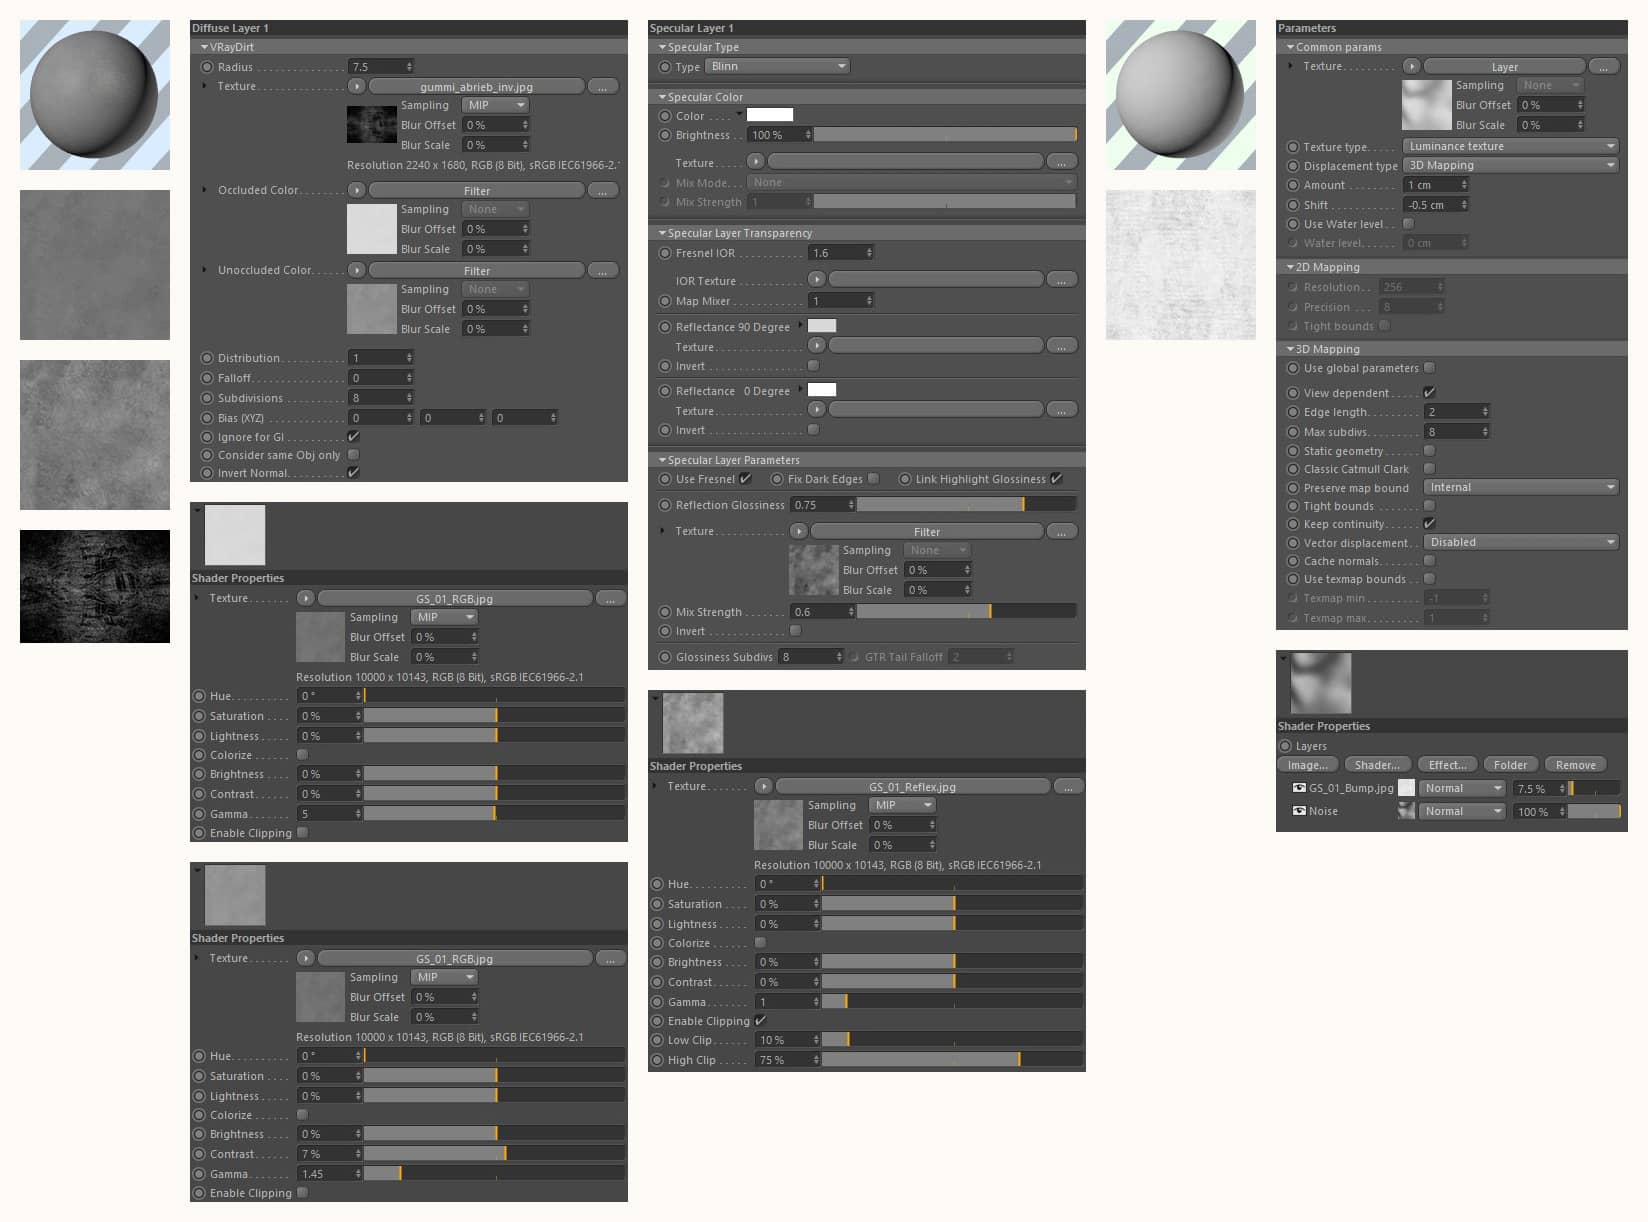
Facade: I've also used a VrayDirt material to get the patina look. Textures and noise shaders stacked on each other created a unique seamless steel material. Everything else was pretty basic.
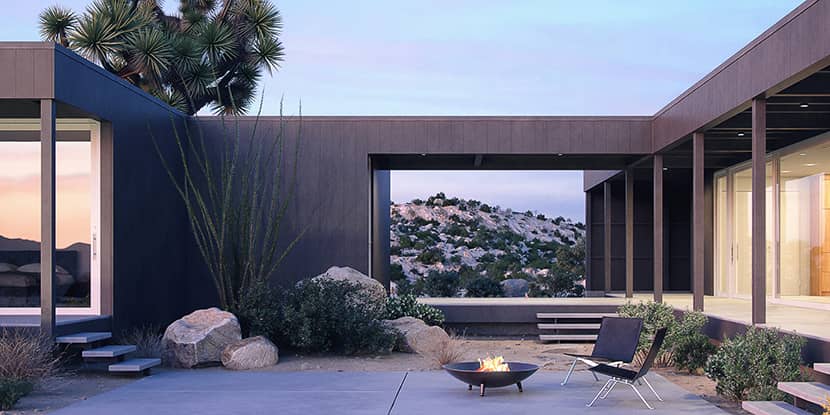
Composition.
Composition and lighting are the most important parts of an image; it's what makes or breaks it - almost more important than the subject itself (you can make good images from ugly houses, too). That's why I recommend never to shortcut this step.
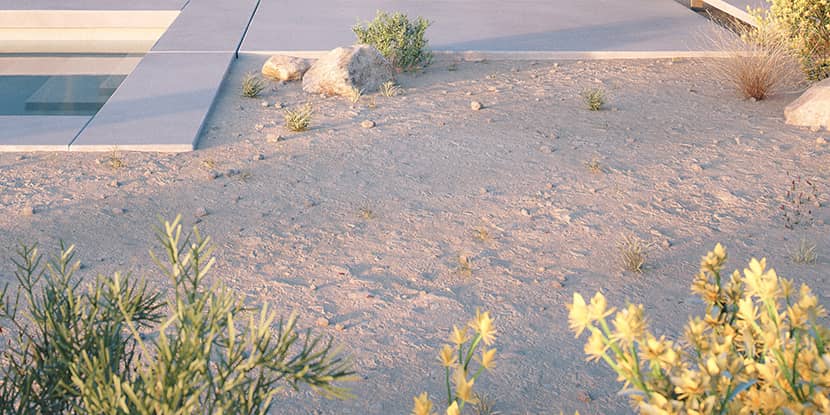
I didn't have many options because I was only looking for hero shots. The problem here is that it depends on the surroundings, which are, unfortunately, not built yet. You have to imagine it.
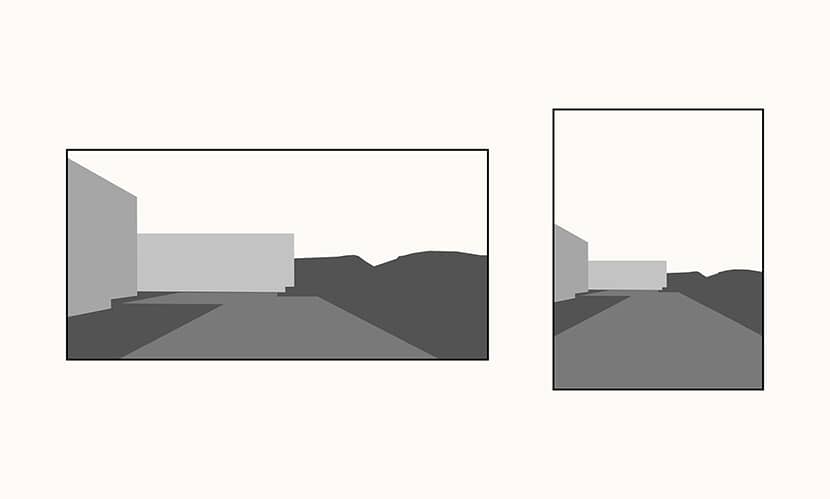
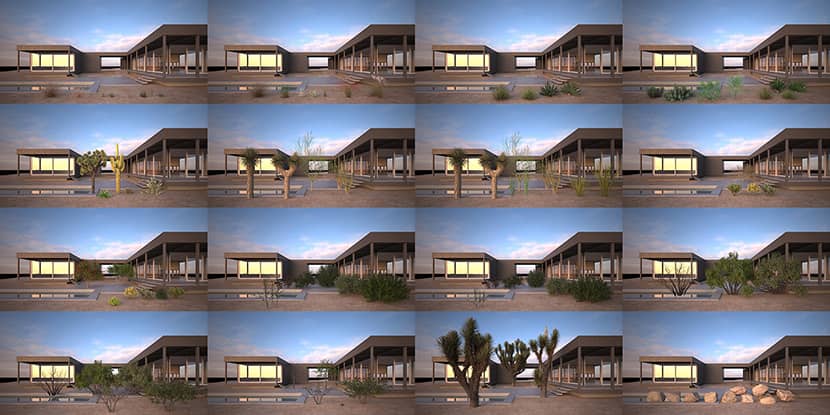
Which format you choose is also to be considered. Landscape, portrait, or square, each one has its own impact. Generally speaking, if you want to emphasize the height of a building, then you should use a vertical format. On the other hand, a horizontal format emphasizes the overall site. This project is a one-story building in an almost flat, endless desert environment, which I want to highlight. So, landscape format was the obvious choice here. The portrait format would focus too much on the pool and the sky. While, with a square format you wouldn't have any advantage.
I came up with three options; one 2-point perspective and two 1-point perspective. The 1-point perspectives are usually the most pleasing ones. The lines parallel to the frame bring order and calm the composition, which is usually what you're looking for in architectural photography.
The camera is placed lower than the average eye level, about 1 meter above the ground, which again emphasizes horizontal perception. But then shifted upwards to get a bit more sky. The focal lenght is 22mm and 16mm. ISO 100, f/5.8, 1/380s for the blue skies. ISO 700, f/3, 1/50 for the pink skies.
I would test the three camera options in a further selected set of lighting scenarios and then pick the ones that work best in each situation.
The color pallet, the object arrangement, and other additions will be part of the composition. Therefore, the final composition will then be nailed.
One of my favorite YouTube channels, Steven Brooke Architectural Photography, used to say, “Everything is compositional; if it doesn't help the composition, it hurts the composition”. (highly recommended).
Vegetation.
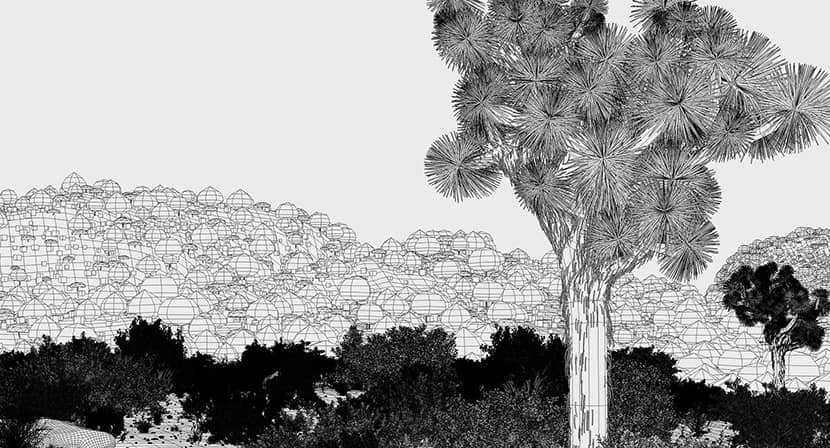
After the model, light, materials, and composition are ready, it is time to bring the scene to life with some vegetation. This is usually the most time-consuming part. A large proportion goes into finding the right 3d models. I used plants from HQ Plants, Vizpark, and Evermotion. To pick the right ones, I usually place them in front of the camera and do test renders.
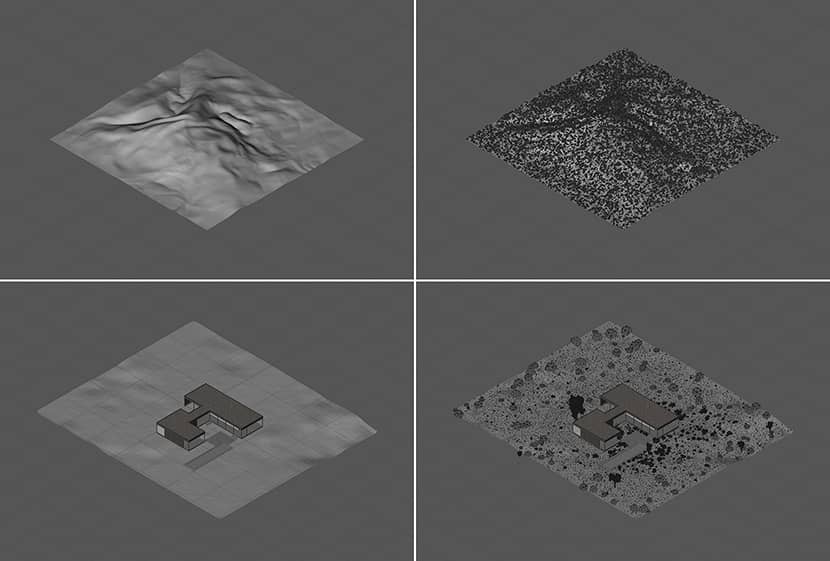
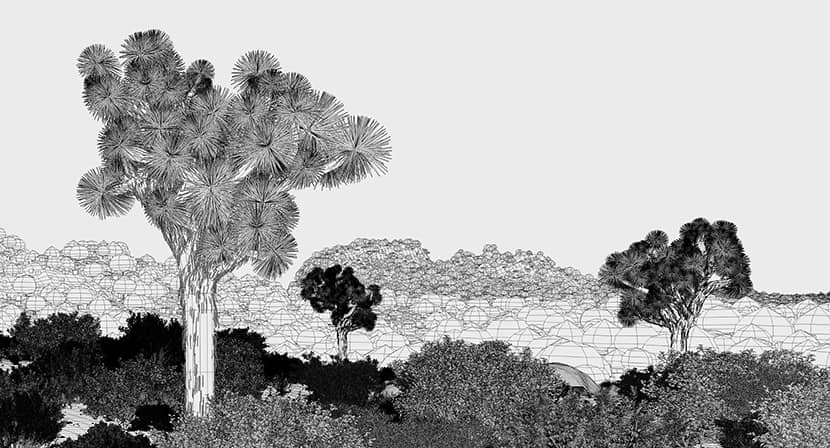
The terrain and the background hills consist of simple planes. Twenty-six parametric square planes, sized from 400 to 1600 meters, were elevated through noise shaders. And one highly subdivided plane for the foreground, sized 60x70 meters, was modeled manually.
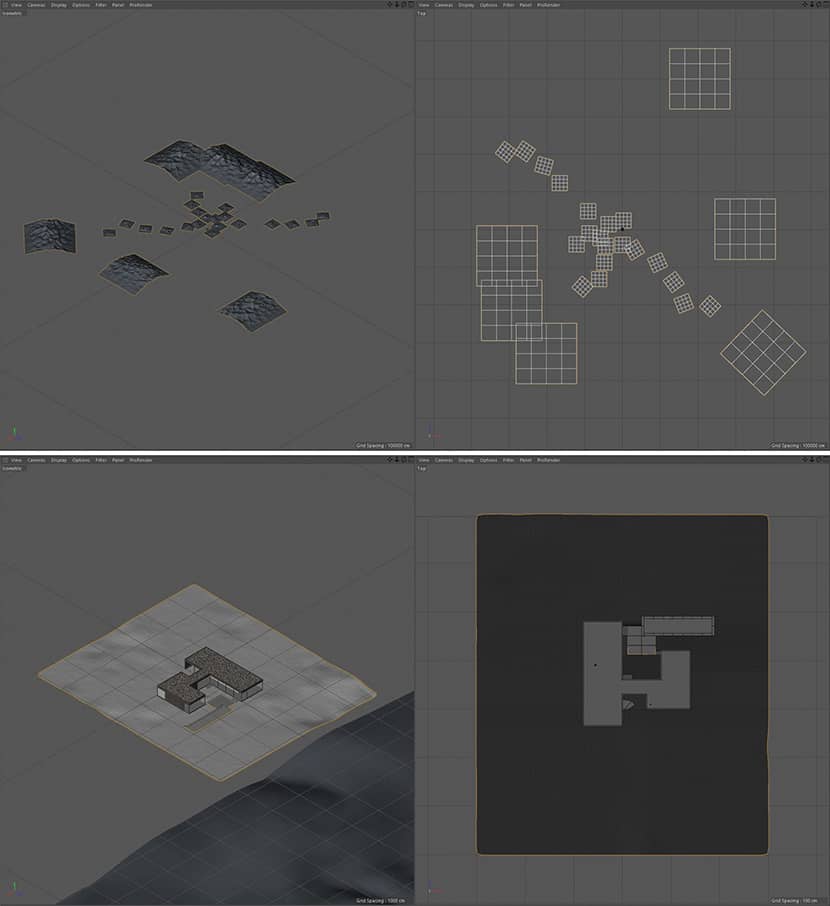
The distribution is mainly done with MoGraph. I placed the bigger objects and the objects closer to the camera manually. Below are the views of one of the background planes with and without distributed objects (about 30k objects per plane), and the foreground terrain with and without objects (2093 plants and countless little rocks and grasses).
If you'd like to have more in-depth information about the distribution with MoGraph, the elevation with noise shaders, and rocks with displacement, then check my Making-Of "Desert Hills".
Also, I went through the complete distribution process with MoGraph on similar projects in the following making-of articles.
Here are some crops of the vegetation:

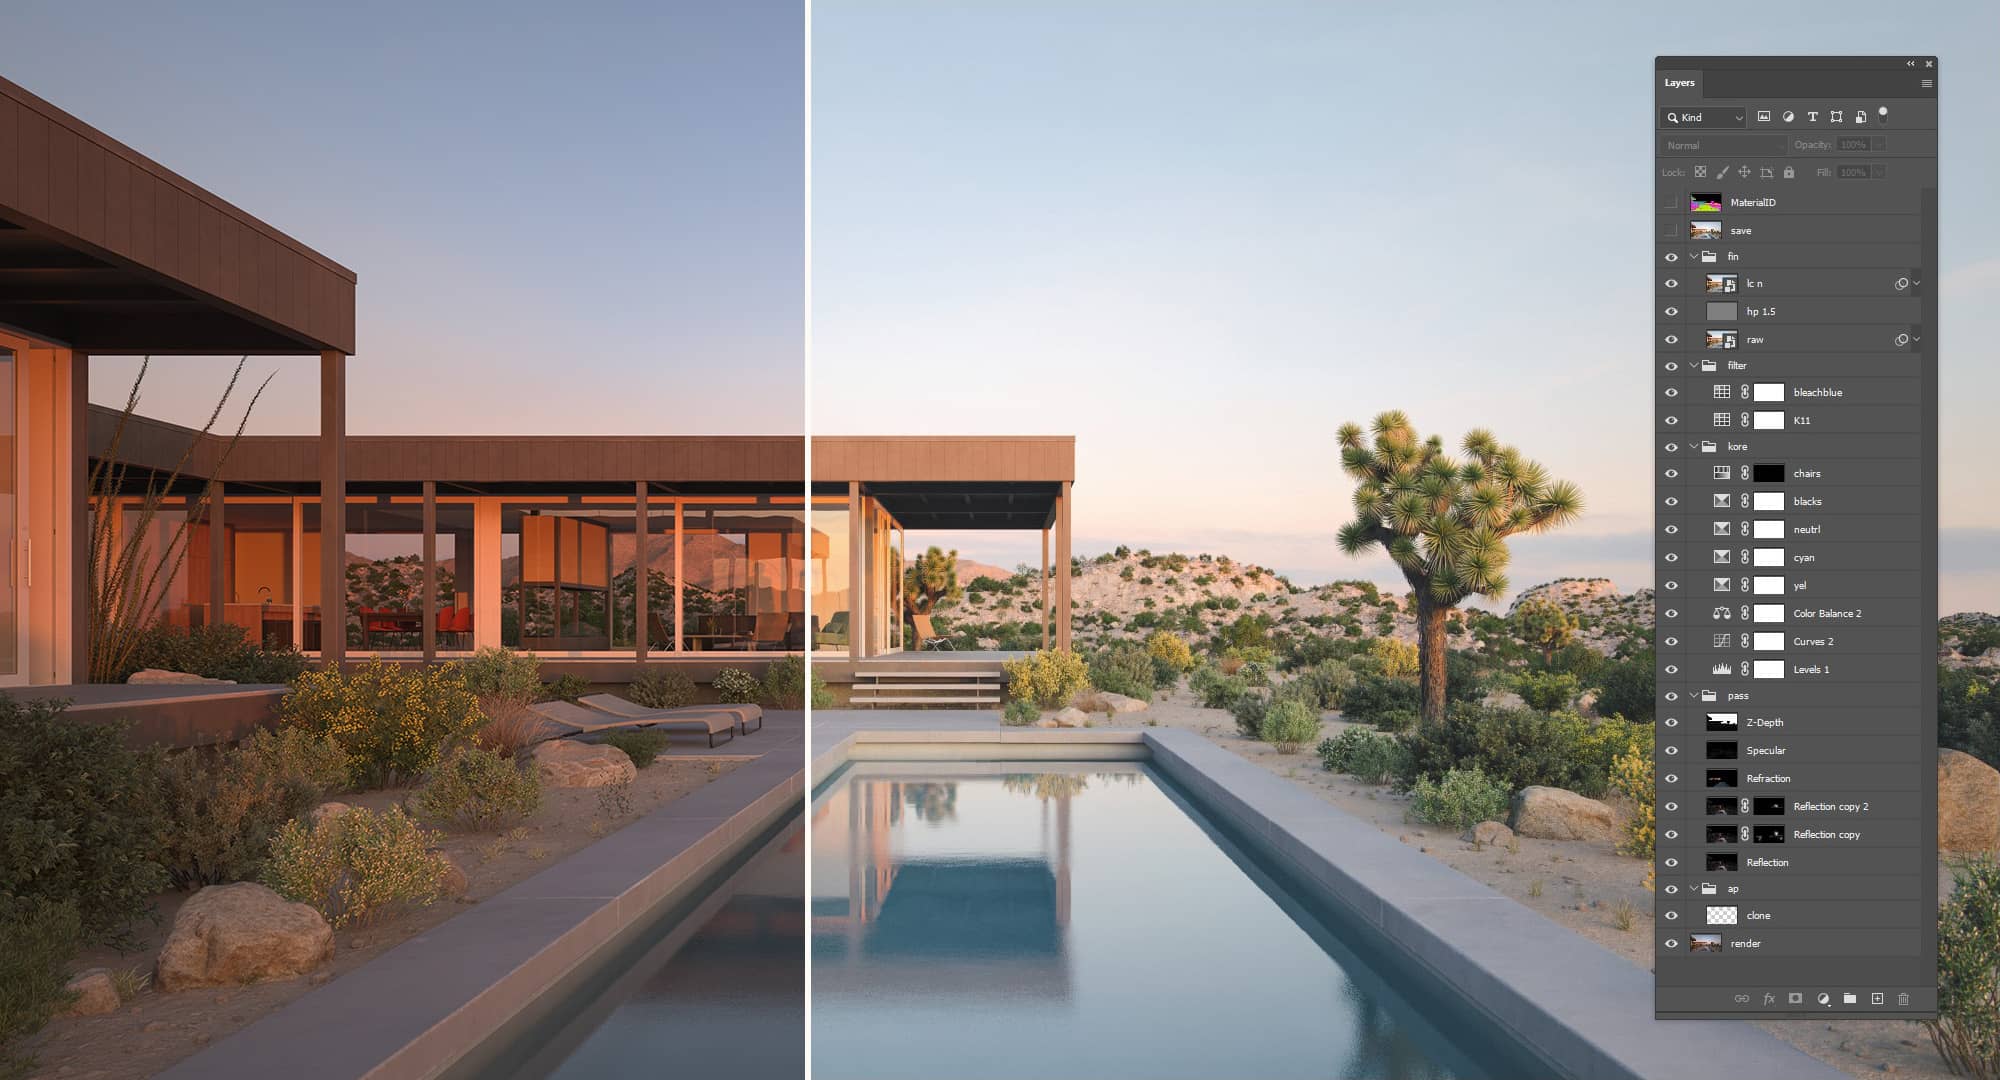
Post-Production.
There is nothing extraordinary about post-processing. But as with every previous step, you should not shortcut it. I usually spend a lot of time fine-tuning the image in Photoshop, even though sometimes the difference between the raw render and the final image seems minimal, but they are crucial.
The final raw render is 8k at 16bit, normally enough for bigger high-resolution prints and basic post-production. There is not much of an advantage if you go bigger.
The main steps I usually go through are:
- Correcting minor textures or other mistakes, if there are any.
- Render passes like reflection, specular, and z-depth.
- Controlling major contrast and colors.
- Filters (luts).
- Camera raw filter, sharpening, lens correction, and adding noise to finalize the image.
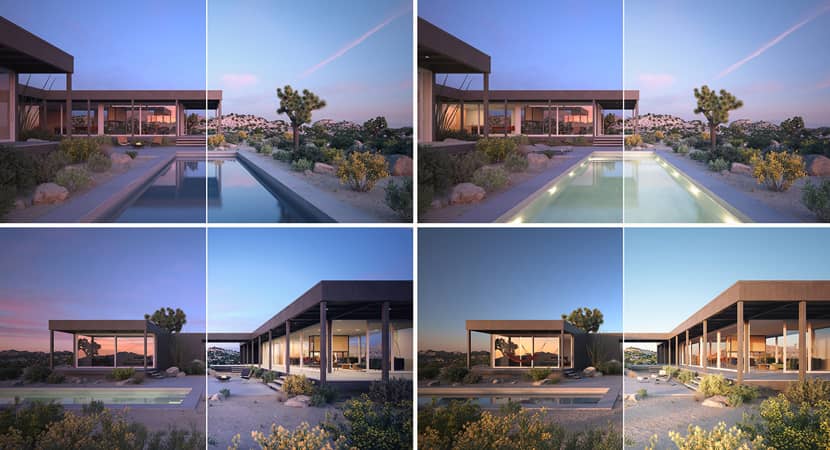
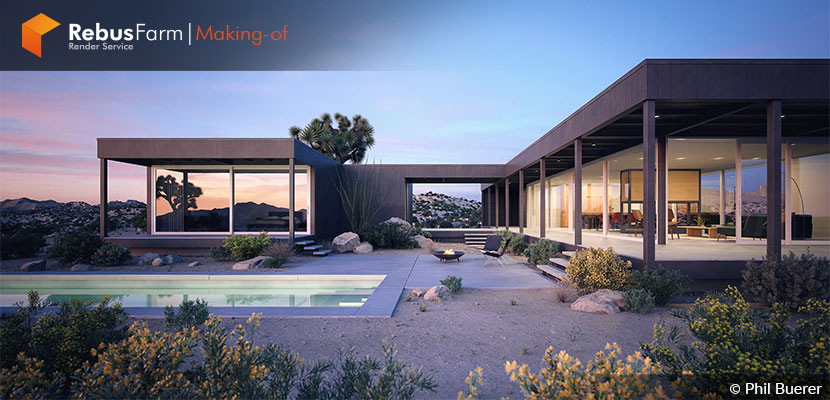
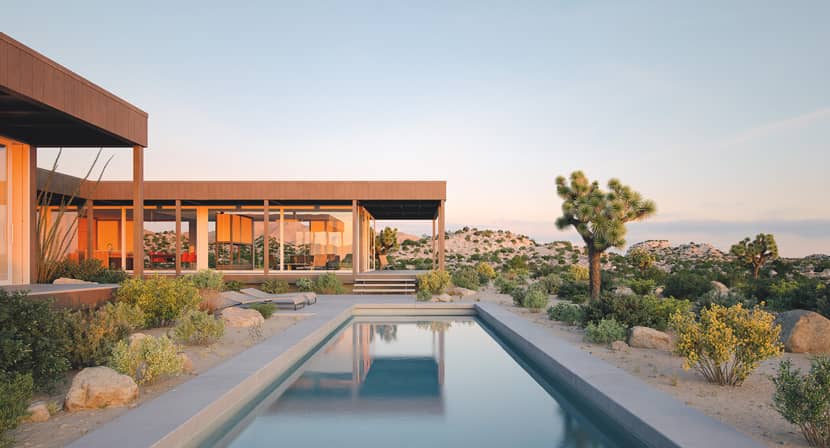
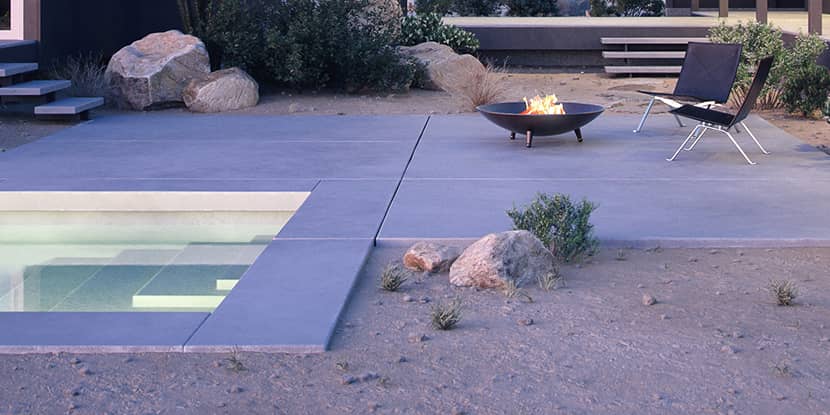
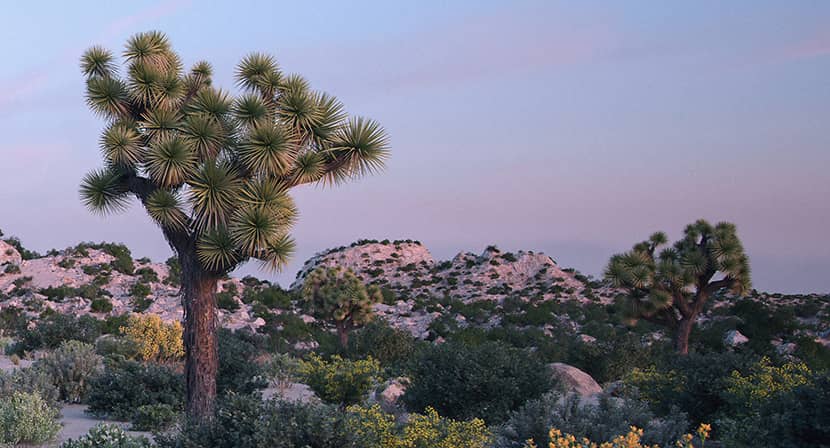
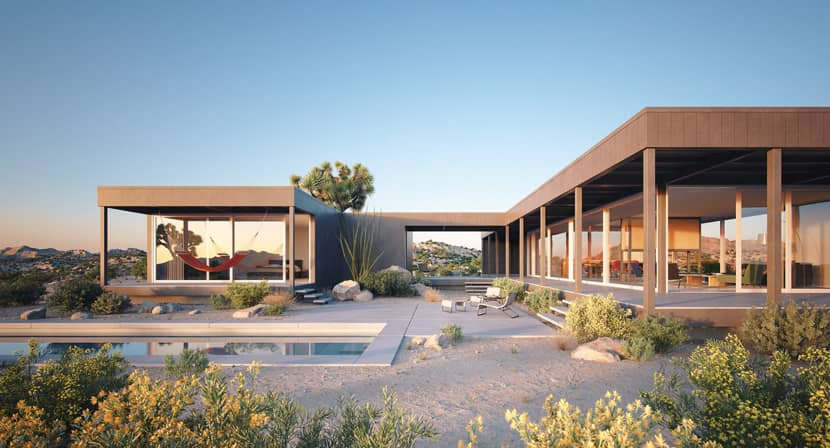
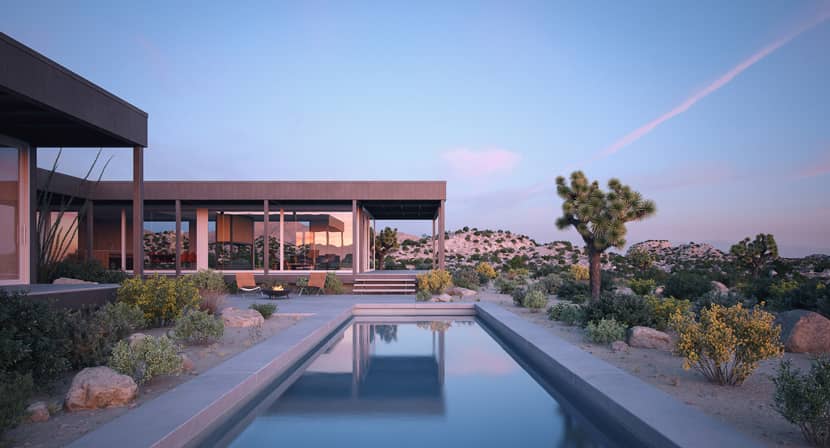
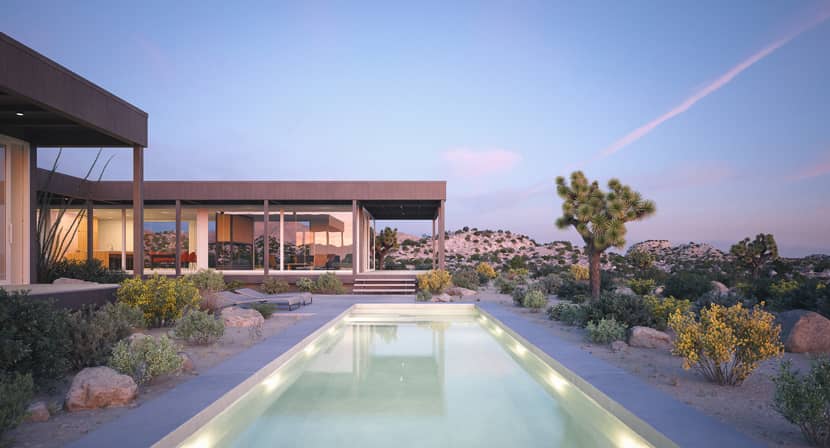
Final Images.
Here are the final renderings:

That was it! I hope you can follow my process. Let me know. If you have any questions, feel free to ask in the comment section below.
Kind regards,
Phil Buerer.
About the artist
Phil Buerer is an architectural draftsman and has worked in various fields, such as graphics, programming, and photography. Nowadays, I mainly create images for marketing real estate, architectural competitions, and product design.
![]()
![]()
![]()