How to render with Rhino
Download RebusFarm 3.0
If you are new to our service, you first need to download and install the RebusFarm 3.0 Software:
Login with your account details
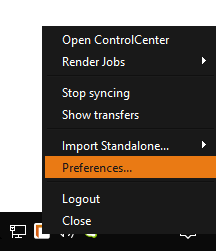
After installing RebusFarm 3.0 you need to login to the RebusDrop plugin with your RebusFarm User Account account details. You can find the icon of the RebusDrop plugin in the taskbar on your desktop.
![]()
Setup plugins
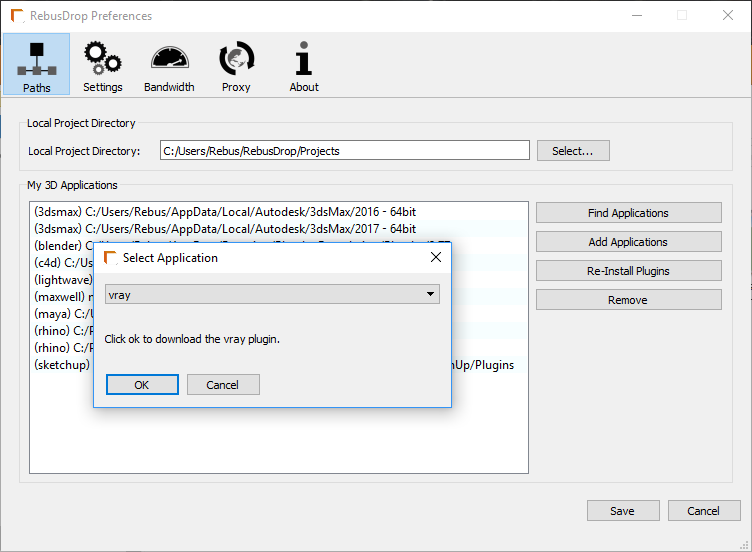
For rendering a Rhino scene on our farm, the RebusFarm plugins for Rhino and V-Ray need to be installed. In order to do so, go to 'RebusDrop Preferences', by clicking 'Add Application'. Choose 'Rhino' from the drop-down list and navigate to the installation folder in the following pop-up window.
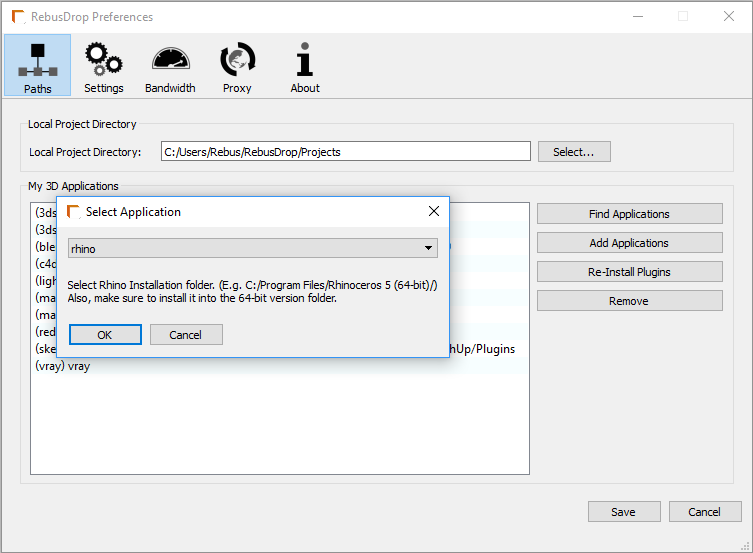
Repeat the process for V-Ray by selecting 'V-Ray' from the drop-down list and hitting 'OK'. You don't have to give an installation directory this time. When you are done click 'Save' to keep your preferences.
Now you are ready to render!
Submit a render job
Before submitting a render job, you set up your scene like you do for a local rendering. When you are ready to render you open the Rebus Farminizer plugin by typing 'Rebus' in the command line and click 'Smartcheck'.
Check submission info
Our plugin will check if there is anything in your scene that needs to be adjusted or fixed before sending it to our farm. It can show 'Info', 'Warning' and 'Error' messages.
'Infos' and 'Warnings' remind you of settings you might want to check or improve. They will not prevent you from submitting your job. If the Farminizer plugin is showing an 'Error', you will have to check and fix it. Errors keep you from submitting jobs to the farm because those will crash on rendering.
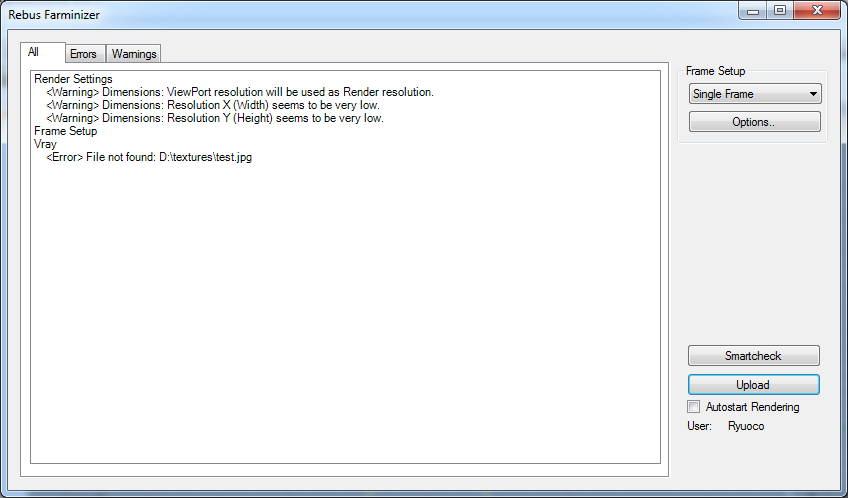
The screenshot above shows an example of a missing texture error. Check if the texture is linked correctly and accessible.
Upload a render job
Once you have fixed all errors, you can click 'Upload' to start submitting your project. Our Farminizer will automatically gather all linked assets (like textures, caches etc.) and start the upload. If you already uploaded the assets with a previous job, our software will skip the already uploaded files. Please note that this only works if the files have not been edited. If you edit a file that has already been uploaded, please rename and relink it, otherwise, our Farminizer will show an error that the file is already in use by another project. You can monitor the upload process in your ControlCenter as shown in the image below.

Autostart render
If 'Autostart render' was checked in the Farminizer plugin, the render job will be queued for rendering as soon as it is uploaded. If not, you click the play button in your ControlCenter after the upload completed.

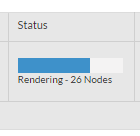
'Status' displays information about the progress state of a render job. Progress is measured by nodes completing their assigned task, this can be 1 to 5 frames per node.
Examples:
1. If 1 frame completes on a 10 frame job, the progress bar will move from 0% to 10%.
2. If 1 frame completes on a 1 frame job, the progress bar will directly move from 0% to 100%.
Once frames are completed, RebusDrop will begin downloading your output in the background and the ControlCenter will update the information for said frames. There will also be a preview of your frames.

If you click on the orange frame number you can open a log file for some renderers to monitor the progress.
You have additional controls for your jobs in RebusDrop like changing the download destination or deleting a job you no longer need. (Please be careful, deleting a job will immediately remove your output from our server!)


